Crimp Barrel Visual Inspection: A Step-by-Step Guide

"Manual inspection of crimp barrels struggles with subtle defects like under-crimps, nicked strands, and poor wire insertion—issues that are hard to see consistently across shifts and volumes. Overview.ai standardizes appearance checks, learns defect signatures from your line, and enforces pass/fail logic at production speed."
The Problem: Manufacturing Challenges
Crimped terminals must meet strict appearance standards to ensure electrical continuity and mechanical strength. Small deviations in strip length, crimp height, or insulation support quickly degrade reliability.
- Strands Outside Barrel: Conductors escaping the wire barrel due to improper strip length or wire placement.
- Under/Over Crimp (Crimp Height Out of Spec): Too tall or too flat crimps leading to high resistance or conductor damage.
- Insulation Support Mis-crimp: Insulation barrel not formed around insulation, or compression on bare conductor.
- Nicked/Cut Strands from Bad Strip: Damaged conductors reducing tensile strength and current-carrying capability.
Human vision fatigues over long runs, making subtle appearance differences and repeatable judgement difficult.
The Solution: Automated Visual Inspection
Machine vision enforces the crimp appearance standards defined for terminal type, wire class, and tooling. It checks wire and insulation barrel formation, strip length, bellmouth presence, conductor position, and overall crimp geometry consistently.
Deep Learning models learn real examples of good vs. bad crimps, including variations from different wire lots, terminal base metals, and minor rotation. This reduces false calls while capturing true defects that manual inspection misses.
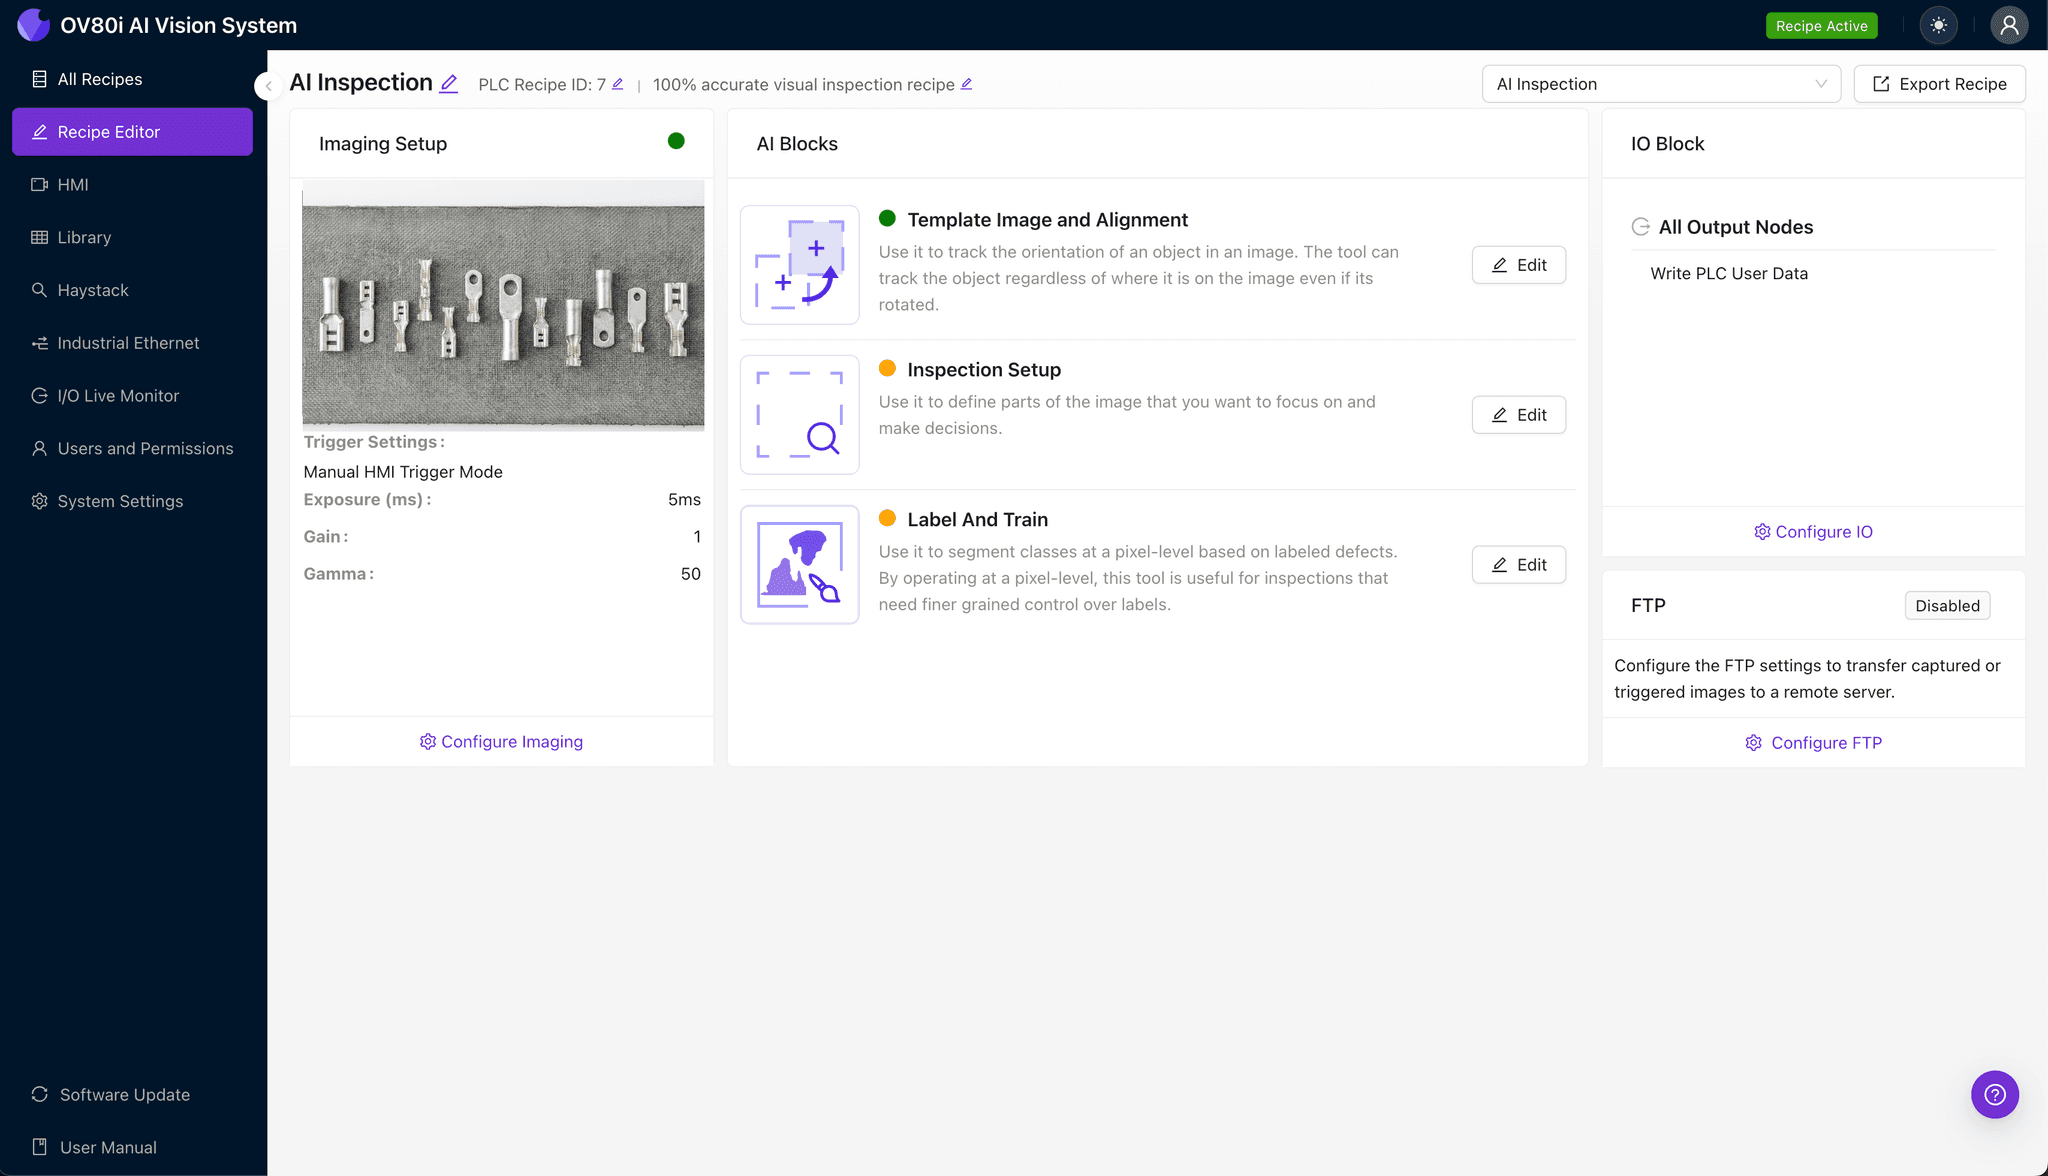
Step 1: Imaging Setup
Click "Configure Imaging". Place the crimped terminal in view. Adjust "Camera Settings" such as exposure and gain to ensure a clear, well-lit image of the barrel and strands. Click "Save".
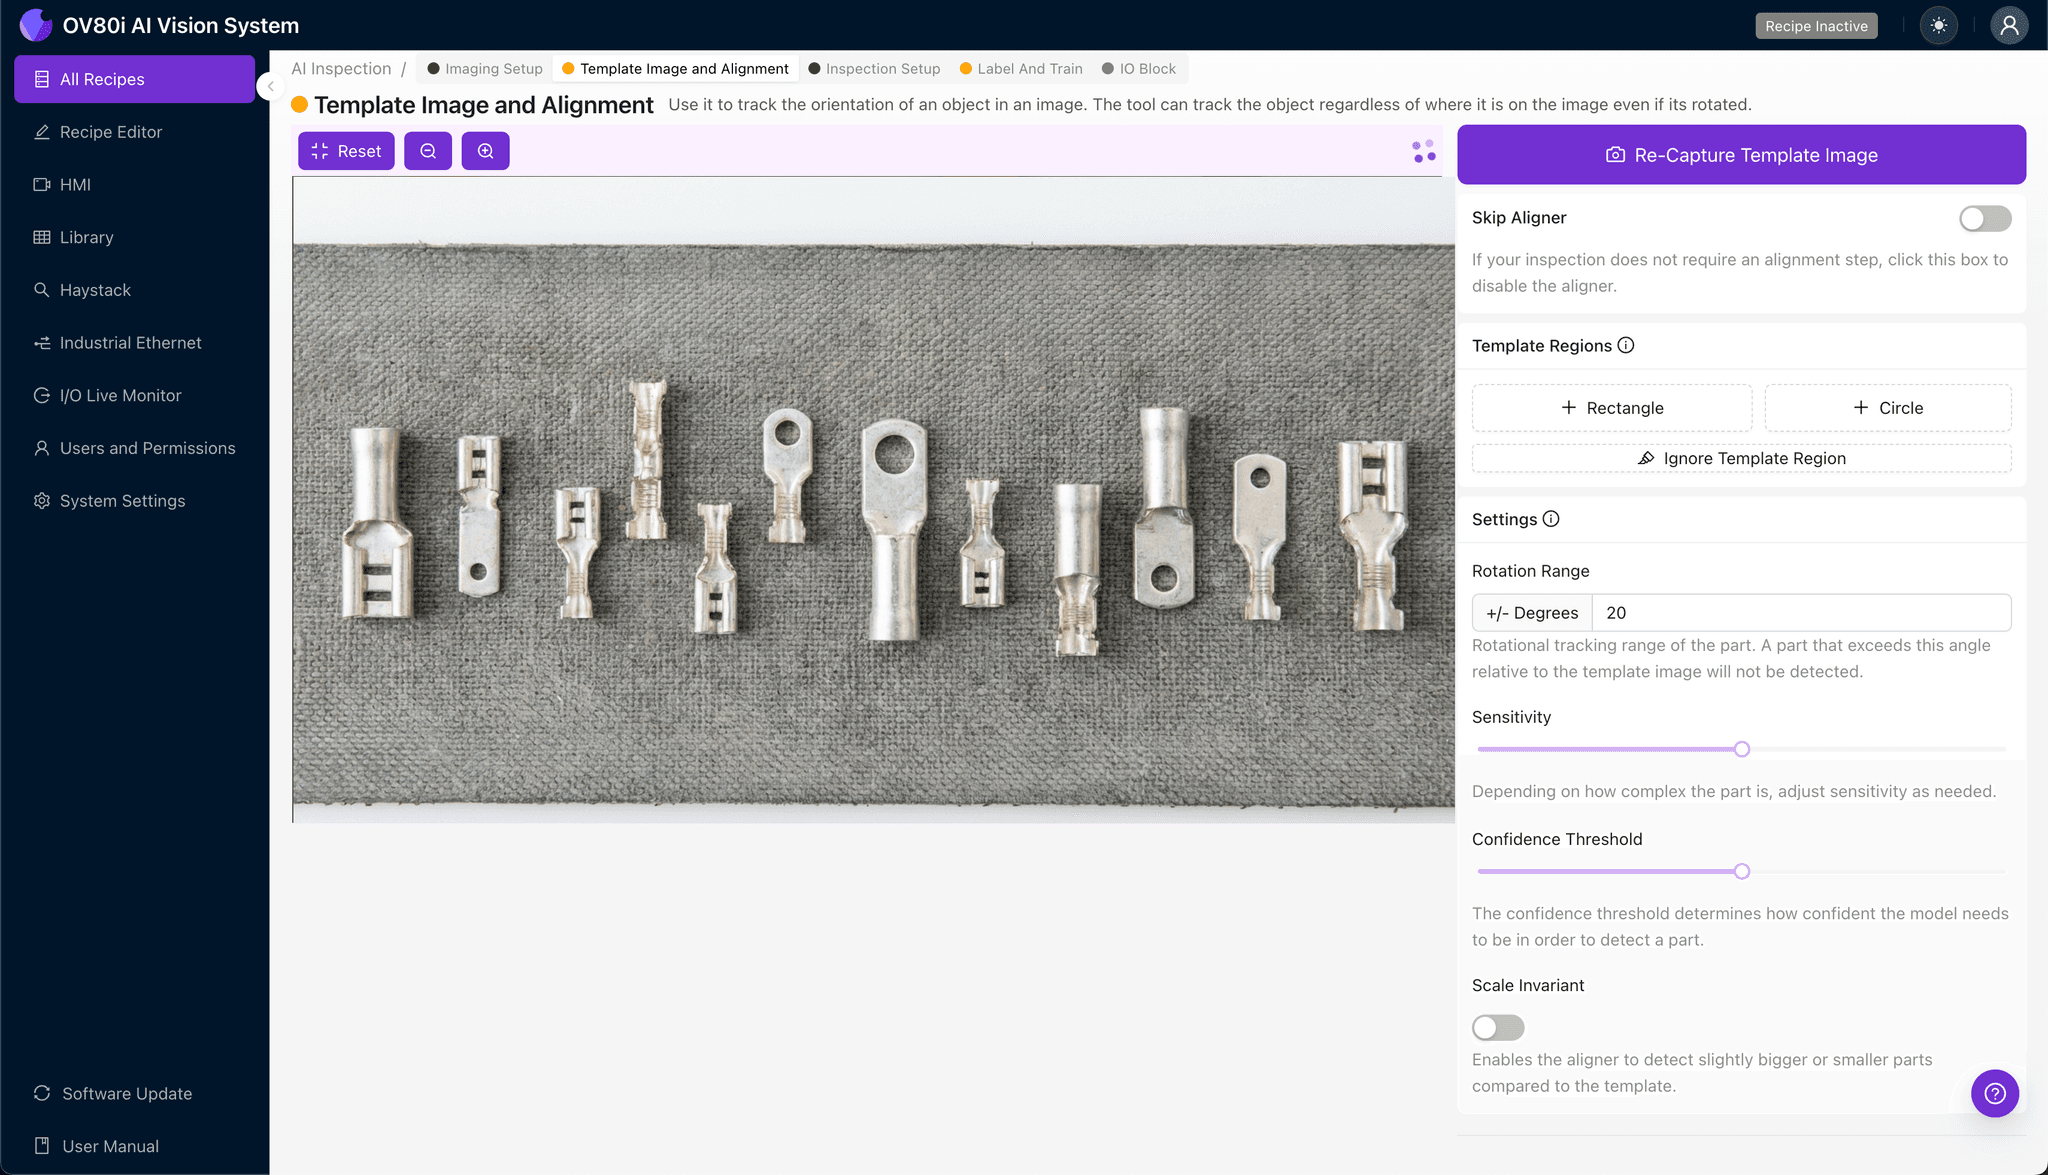
Step 2: Image Alignment
Navigate to "Template Image". Capture a clear Template of a master part. Add a "+ Rectangle" region around the main body of the terminal to anchor the inspection. Set the "Rotation Range" to 20 degrees to account for slight part movements on the line.
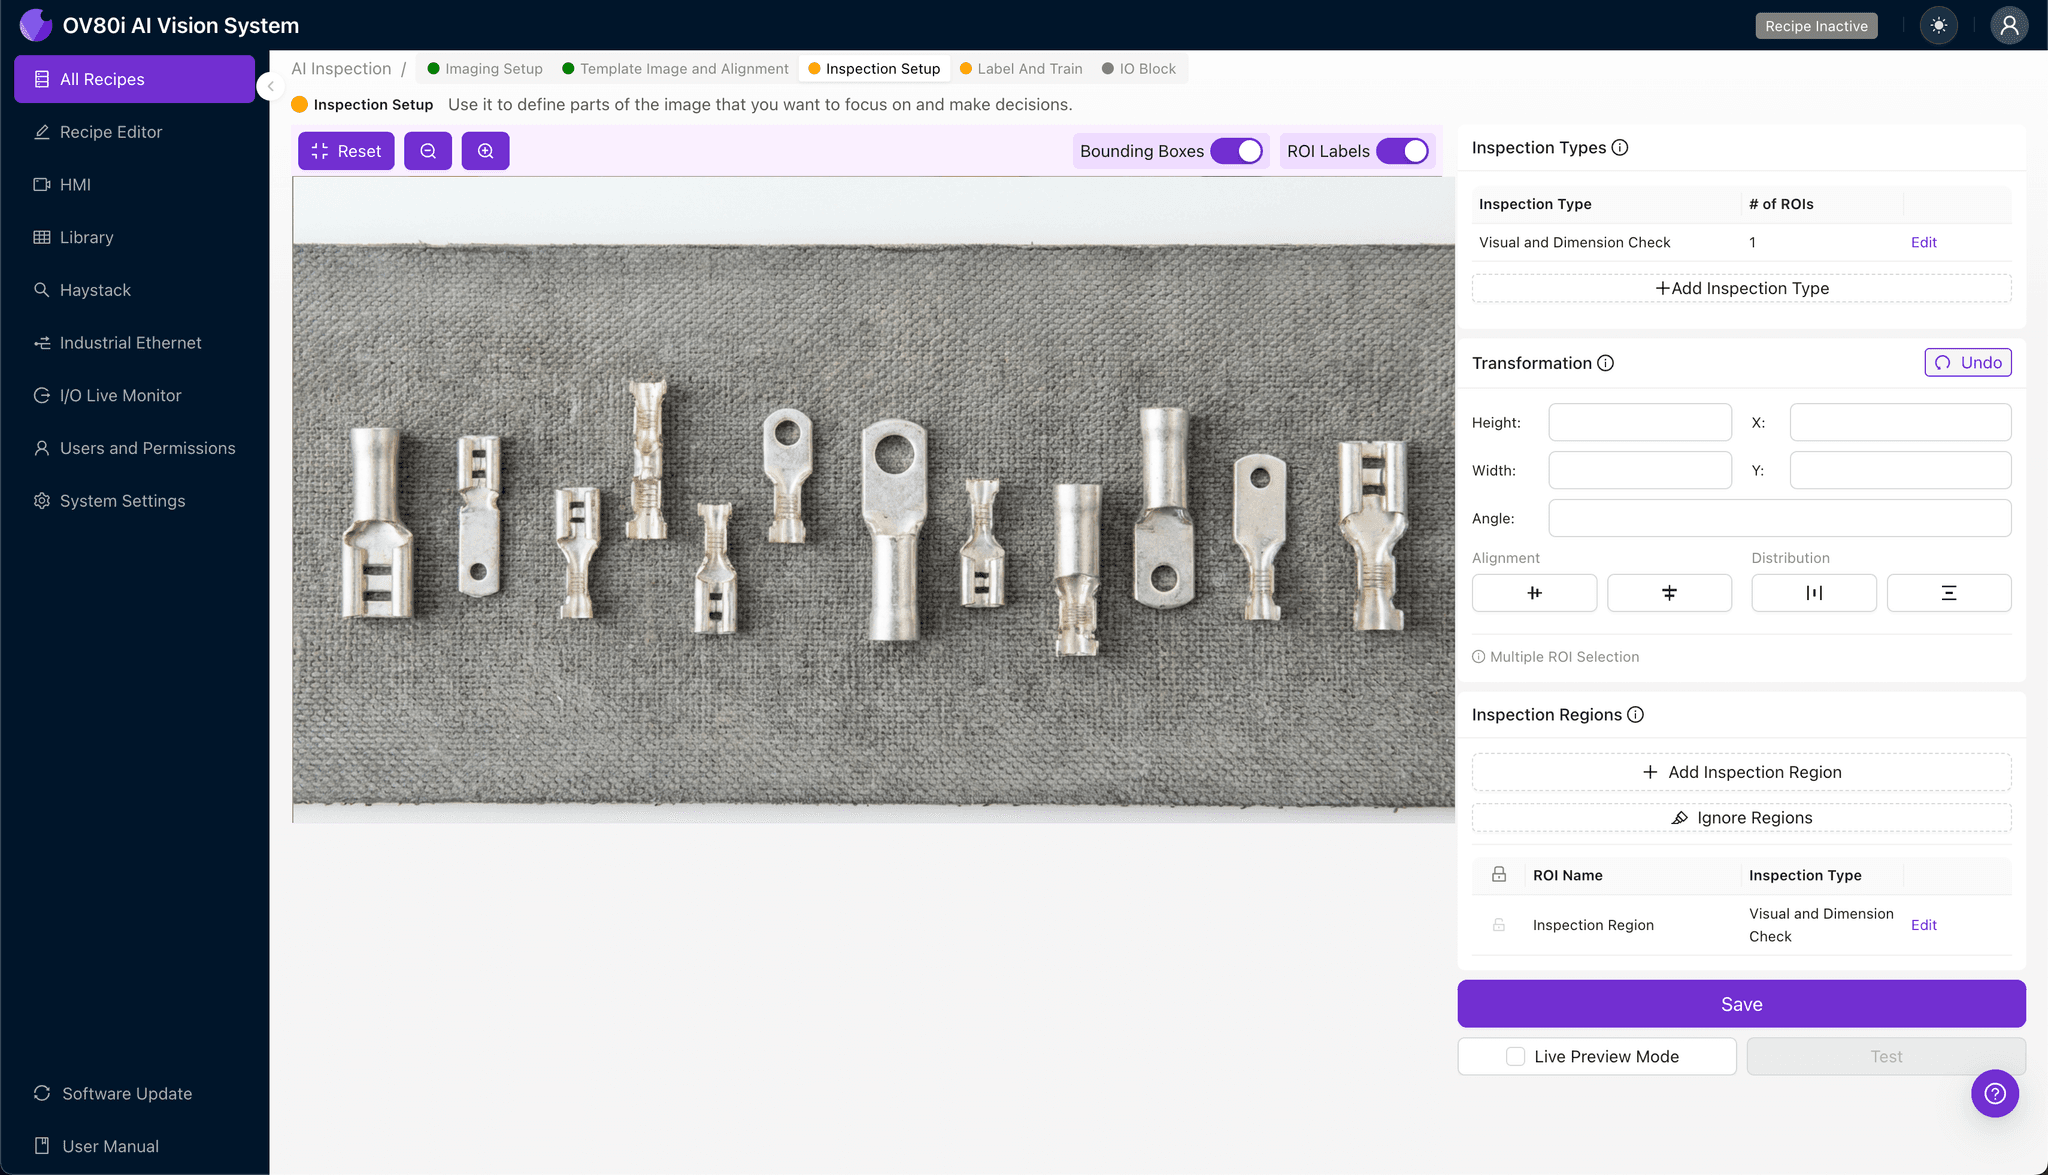
Step 3: Inspection Region Selection
Navigate to "Inspection Setup". Rename your "Inspection Types". Click "+ Add Inspection Region". careful resize the yellow box over the specific defect area (e.g., the wire barrel or insulation support). Click "Save".
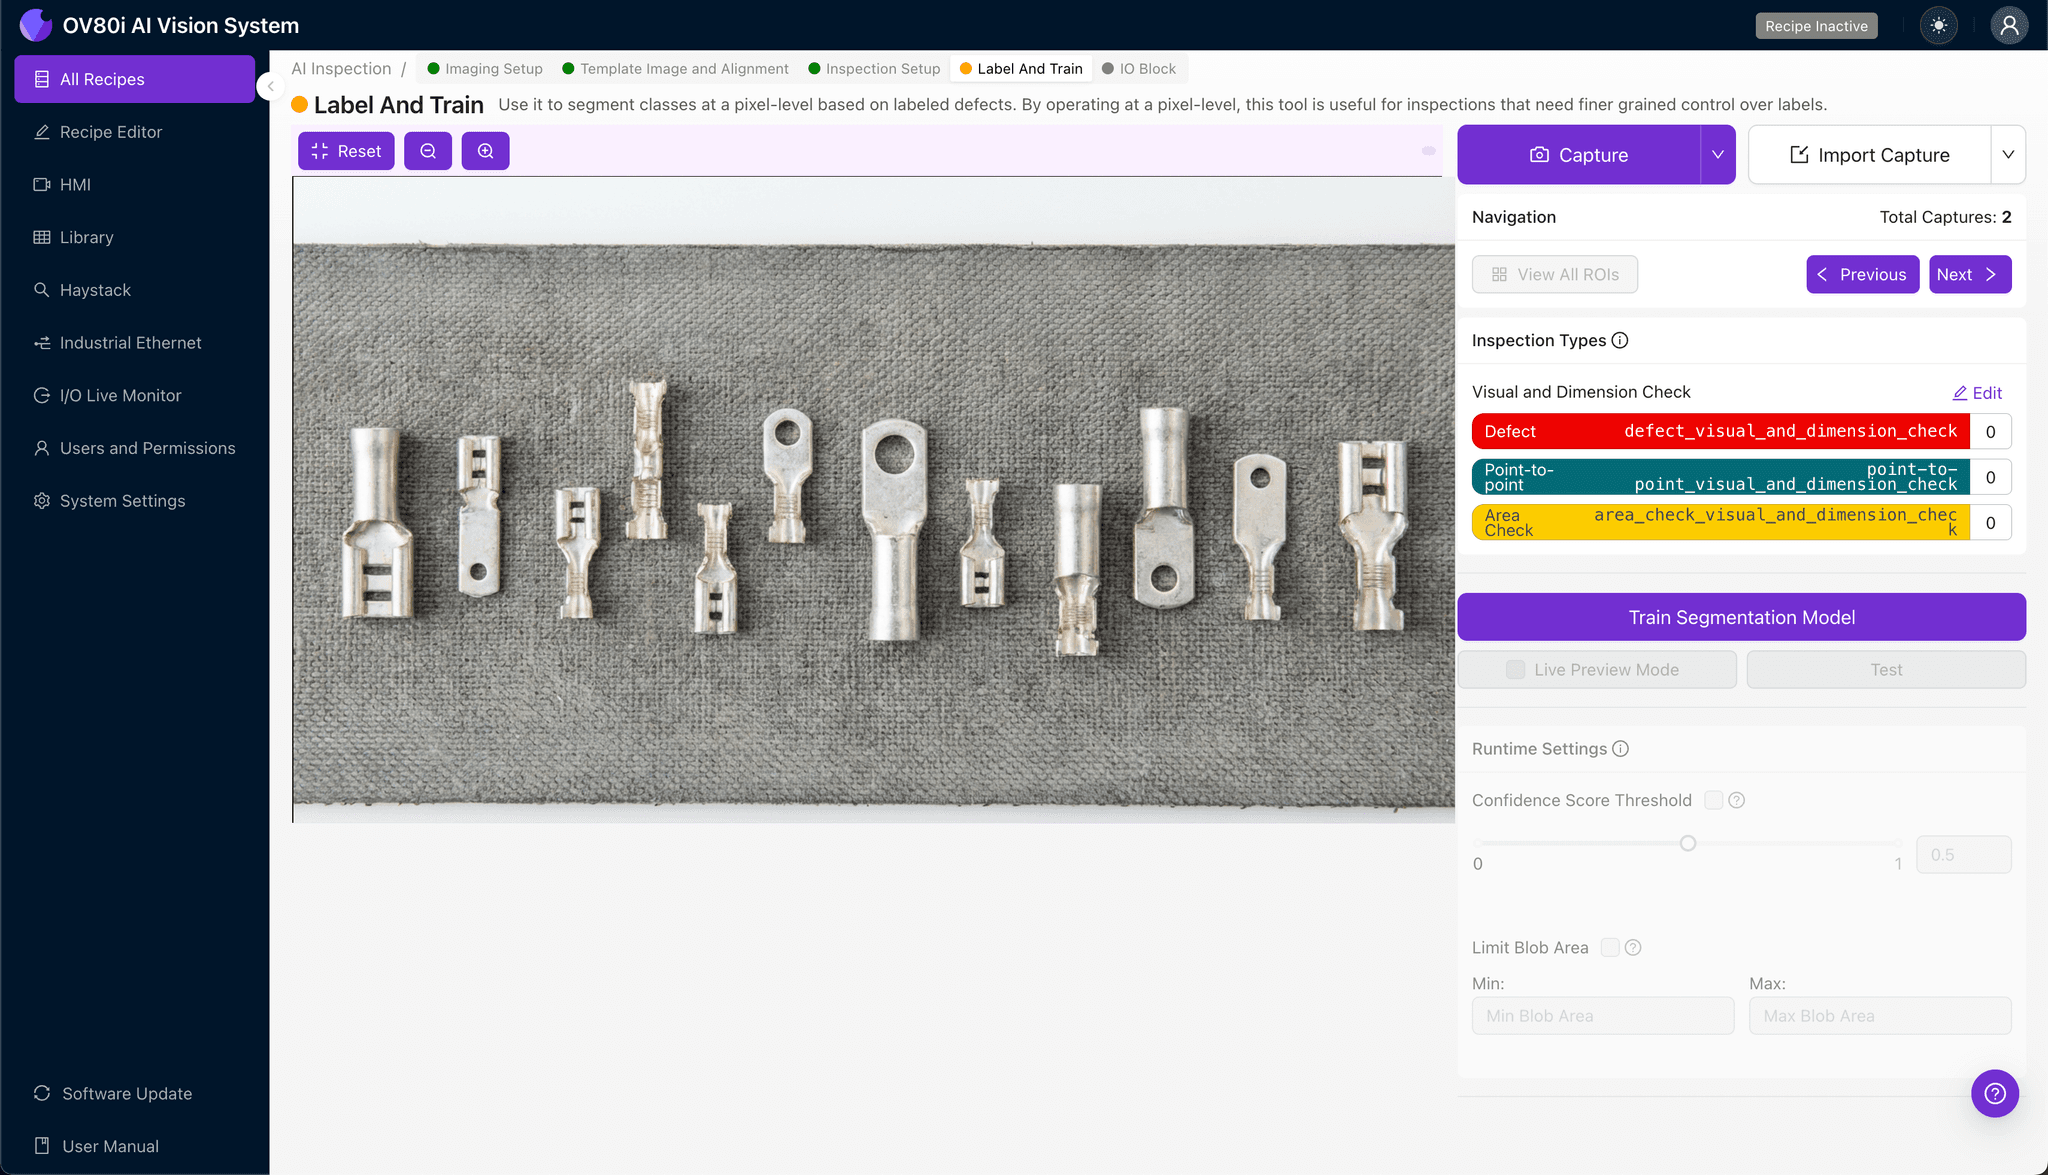
Step 4: Labeling Data
Label images as Good or Bad to train the recipe. Ensure you look for representative samples covering normal variation (different batches) and known failure modes (nicked strands, low compression).
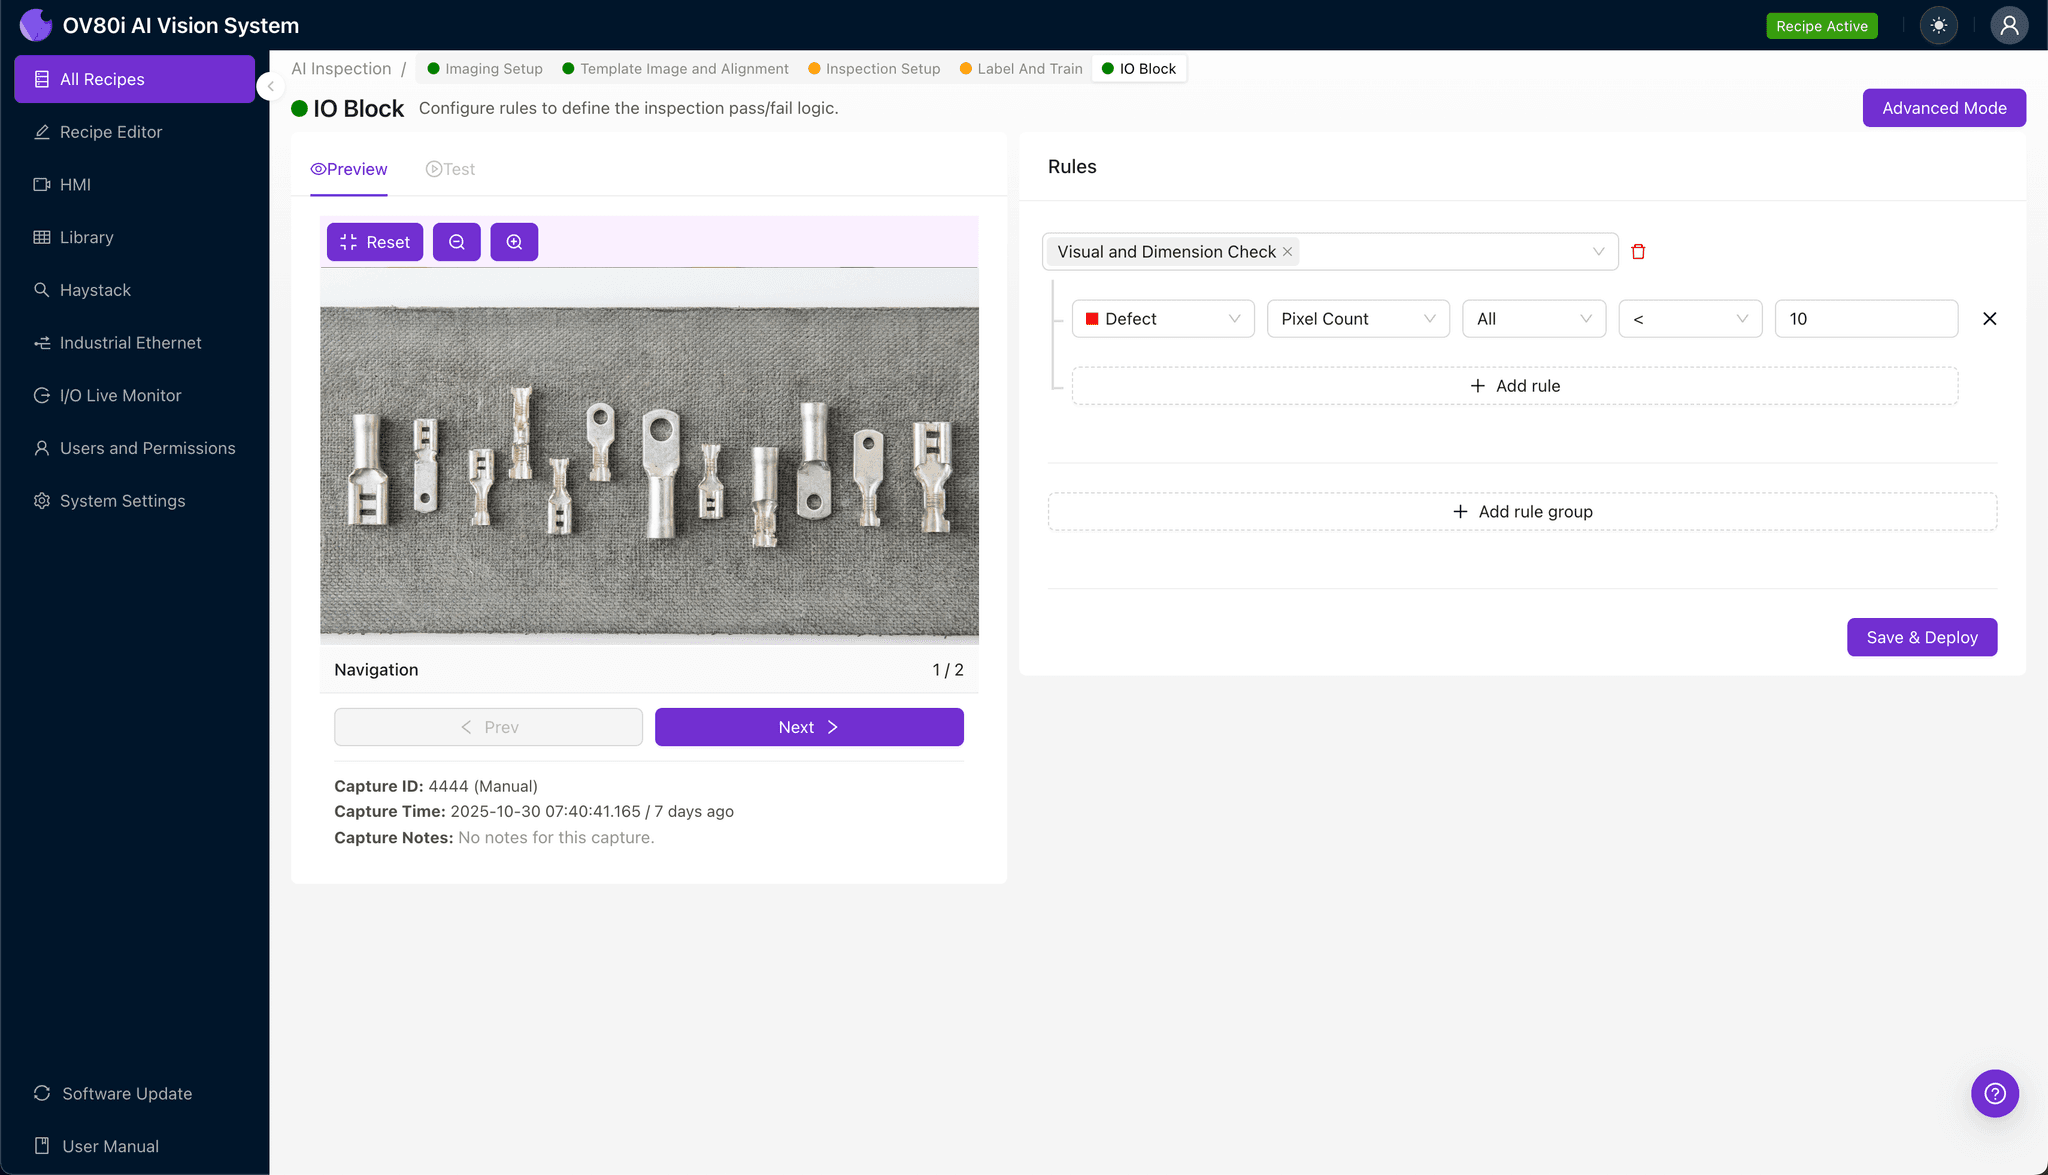
Step 5: Creating Rules
Set pass/fail logic based on your Inspection Types. Use these rules to gate automated acceptance on the line, ensuring only crimps meeting your visual standards proceed to final assembly.
Key Outcomes & ROI
- Reduced Scrap: Early, consistent detection of under/over-crimps and bad strips prevents rework and downstream failures.
- Higher Throughput: Automated checks run at line speed, eliminating slow, subjective manual inspection.
- Compliance and Traceability: Enforced appearance standards aligned to application specs, with image-backed records for audits.
Eliminate Crimp Defects Today
Stop relying on fatigued human inspection. Deploy Overview.ai to catch subtle defects instantly.