Grommets Visual Inspection: A Step-by-Step Guide

Quick Answer
Manual grommet checks are slow, subjective, and miss subtle defects as operators fatigue across shifts. Overview.ai uses machine vision and deep learning to detect shape, surface, and alignment issues consistently, delivering reliable pass/fail decisions at production speed.
The Problem: Manufacturing Challenges
Grommets protect edges, distribute load, and prevent abrasion across textiles, wiring harnesses, signage, and automotive assemblies. Their small size and material variety (metal, rubber, plastic) make consistent inspection difficult on fast-moving lines.
- Deformed flange: Rolled or crushed flanges from improper setting that cut fabric or wire insulation.
- Misalignment: Off-center or tilted eyelet/collar relative to the hole causing uneven load and tear-out.
- Burrs/sharp edges: Unremoved burrs or flashing on metal/plastic grommets that abrade mating materials.
- Corrosion/coating loss: Rust, pitting, or missing plating that compromises durability and appearance.
Even experts miss defects as human vision fatigues, lighting varies, and tolerances tighten across SKUs.
The Solution: Automated Visual Inspection
Machine vision with deep learning evaluates each grommet's geometry and surface in milliseconds. It catches subtle flange roll inconsistencies, ovality, burrs, and discoloration that are hard to see manually, and it does so uniformly for metal, rubber, and plastic grommets.
Overview.ai learns your visual standards from examples and applies them in-line or at inspection stations. The result is automated, objective decisions that scale across shifts, parts, and lighting conditions.
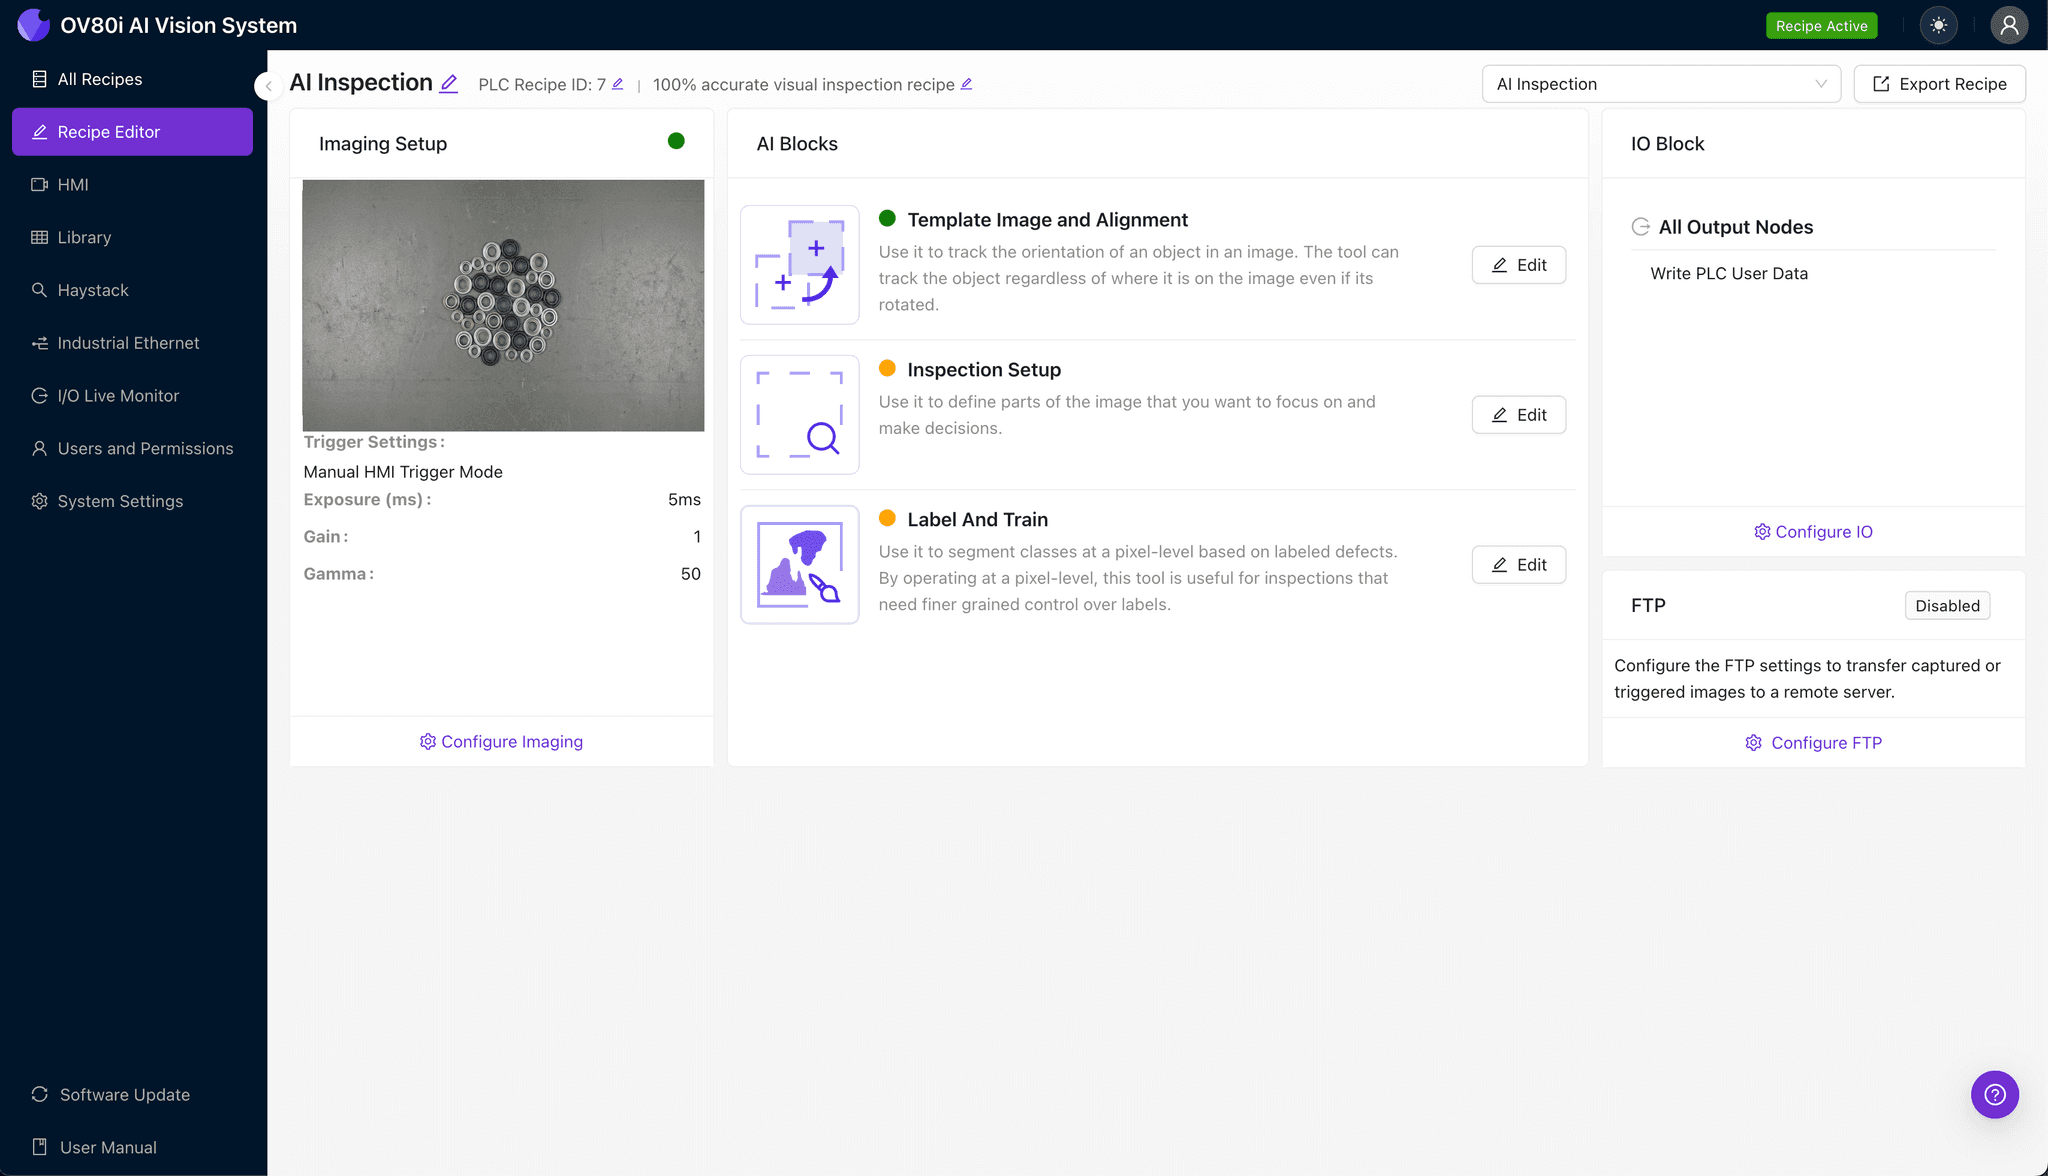
Step 1: Imaging Setup
Click 'Configure Imaging'. Place the grommet in view. Adjust 'Camera Settings' to ensure the flange and bore are clearly visible. Click 'Save'.
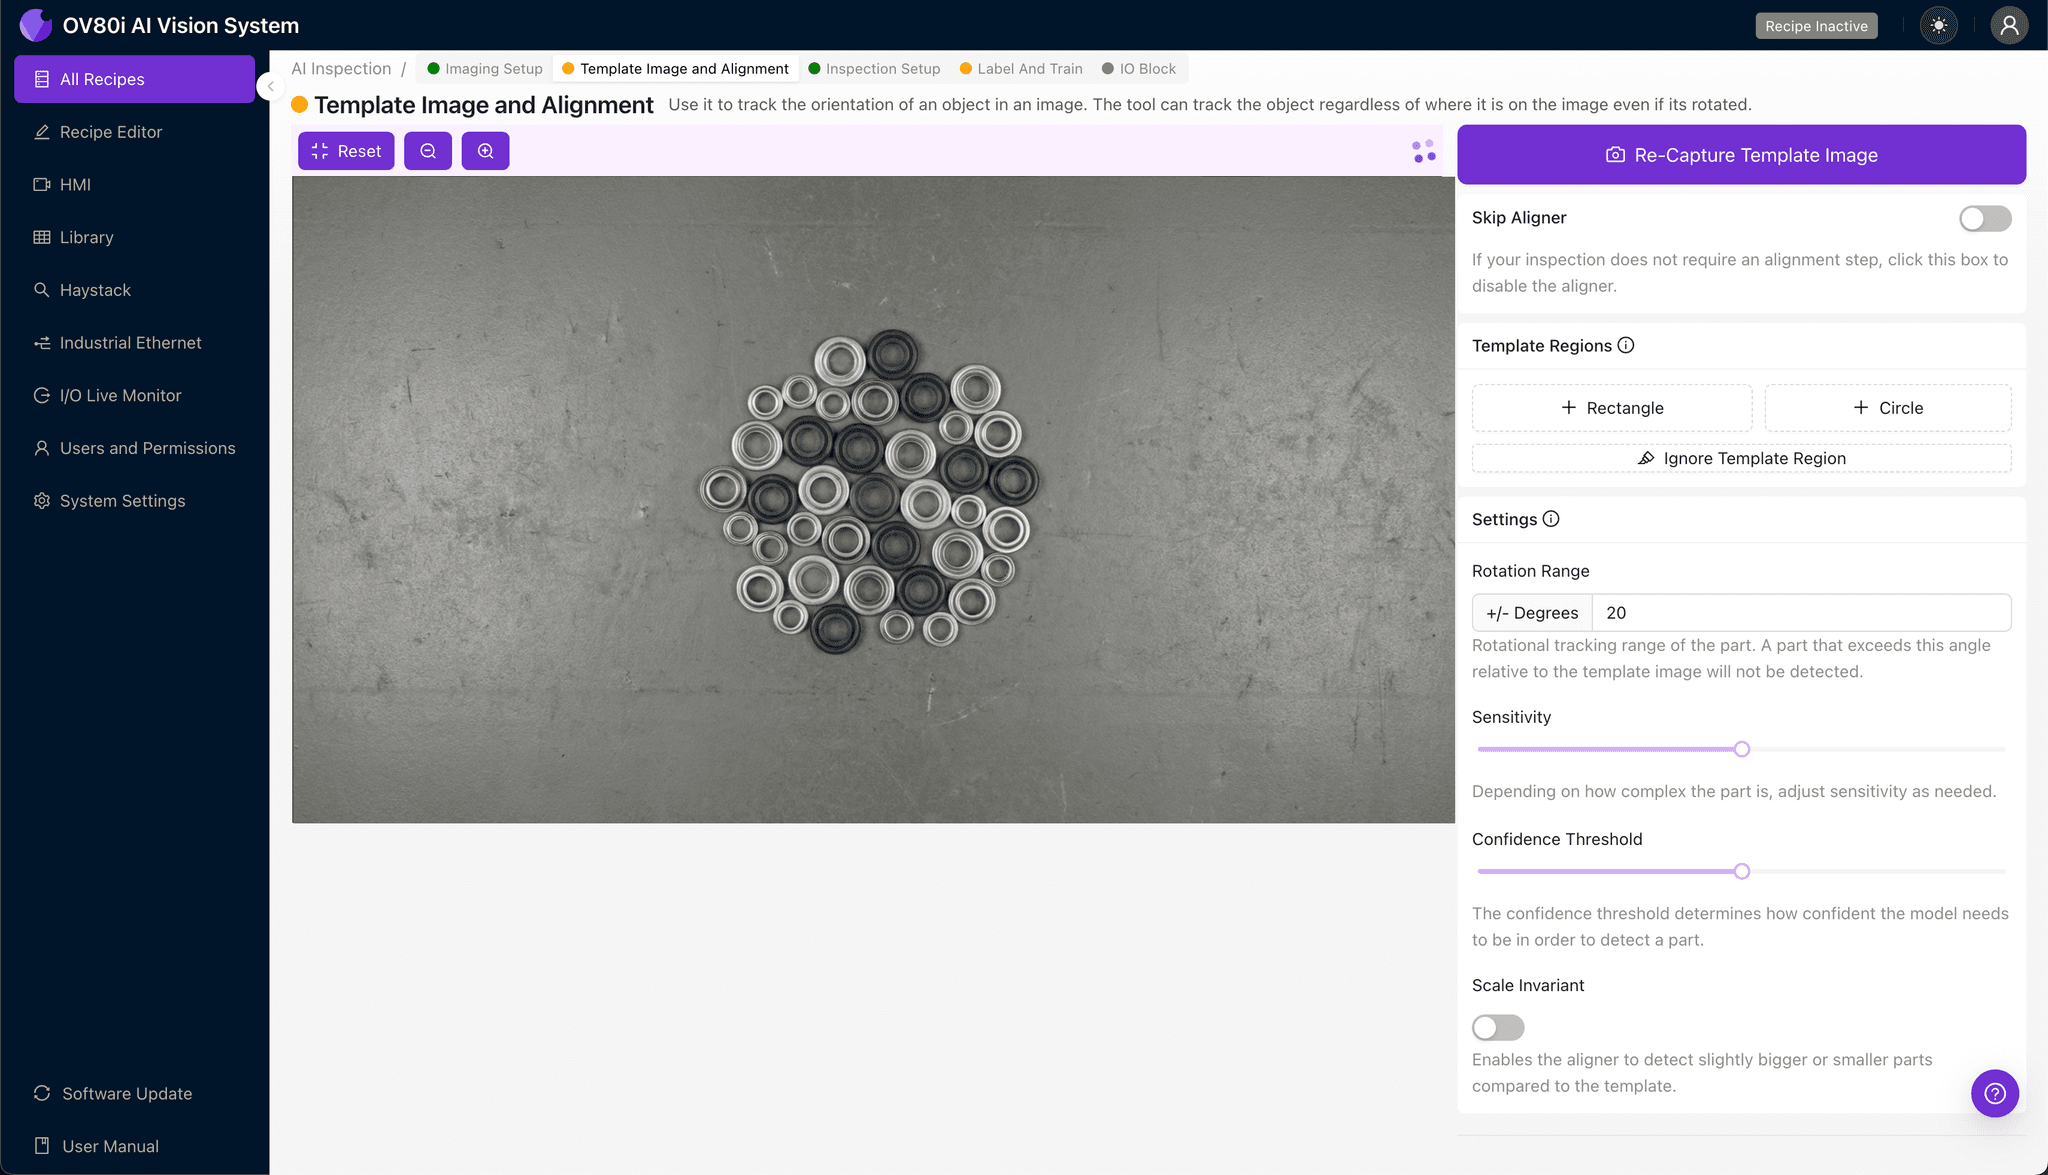
Step 2: Image Alignment
Navigate to 'Template Image'. Capture a Template of a good part. Add a '+ Rectangle' region to anchor the inspection. Set 'Rotation Range' to 20 degrees to account for minor part movement on the line.
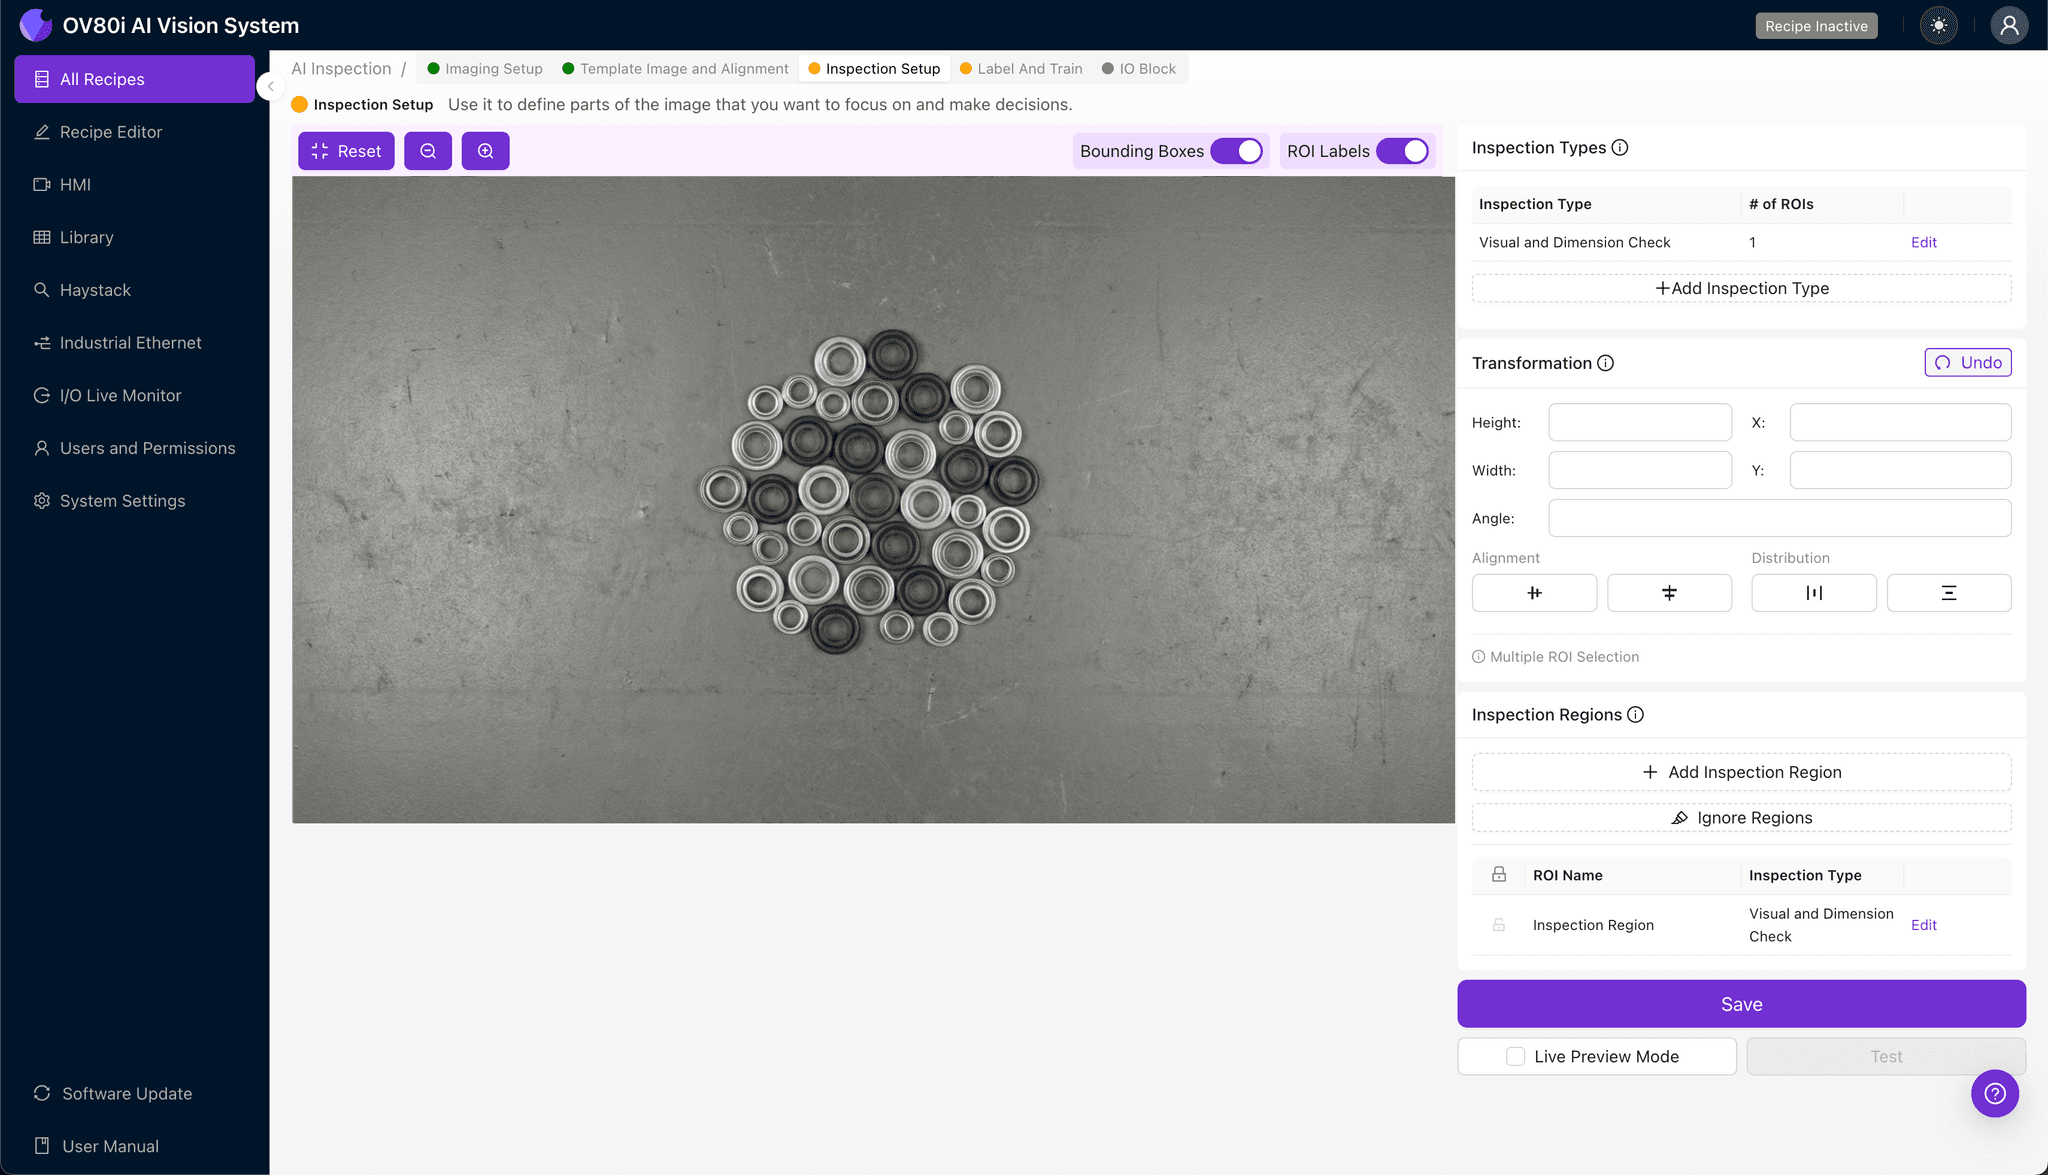
Step 3: Inspection Region Selection
Navigate to 'Inspection Setup'. Rename 'Inspection Types' (e.g., Flange Check). Click '+ Add Inspection Region'. Resize the yellow box over the defect area, ensuring it covers the entire grommet surface. Click 'Save'.
Step 4: Labeling Data
Label captured images as Good or Bad to train the recipe. Provide examples of common defects like deformations or burrs versus clean parts.

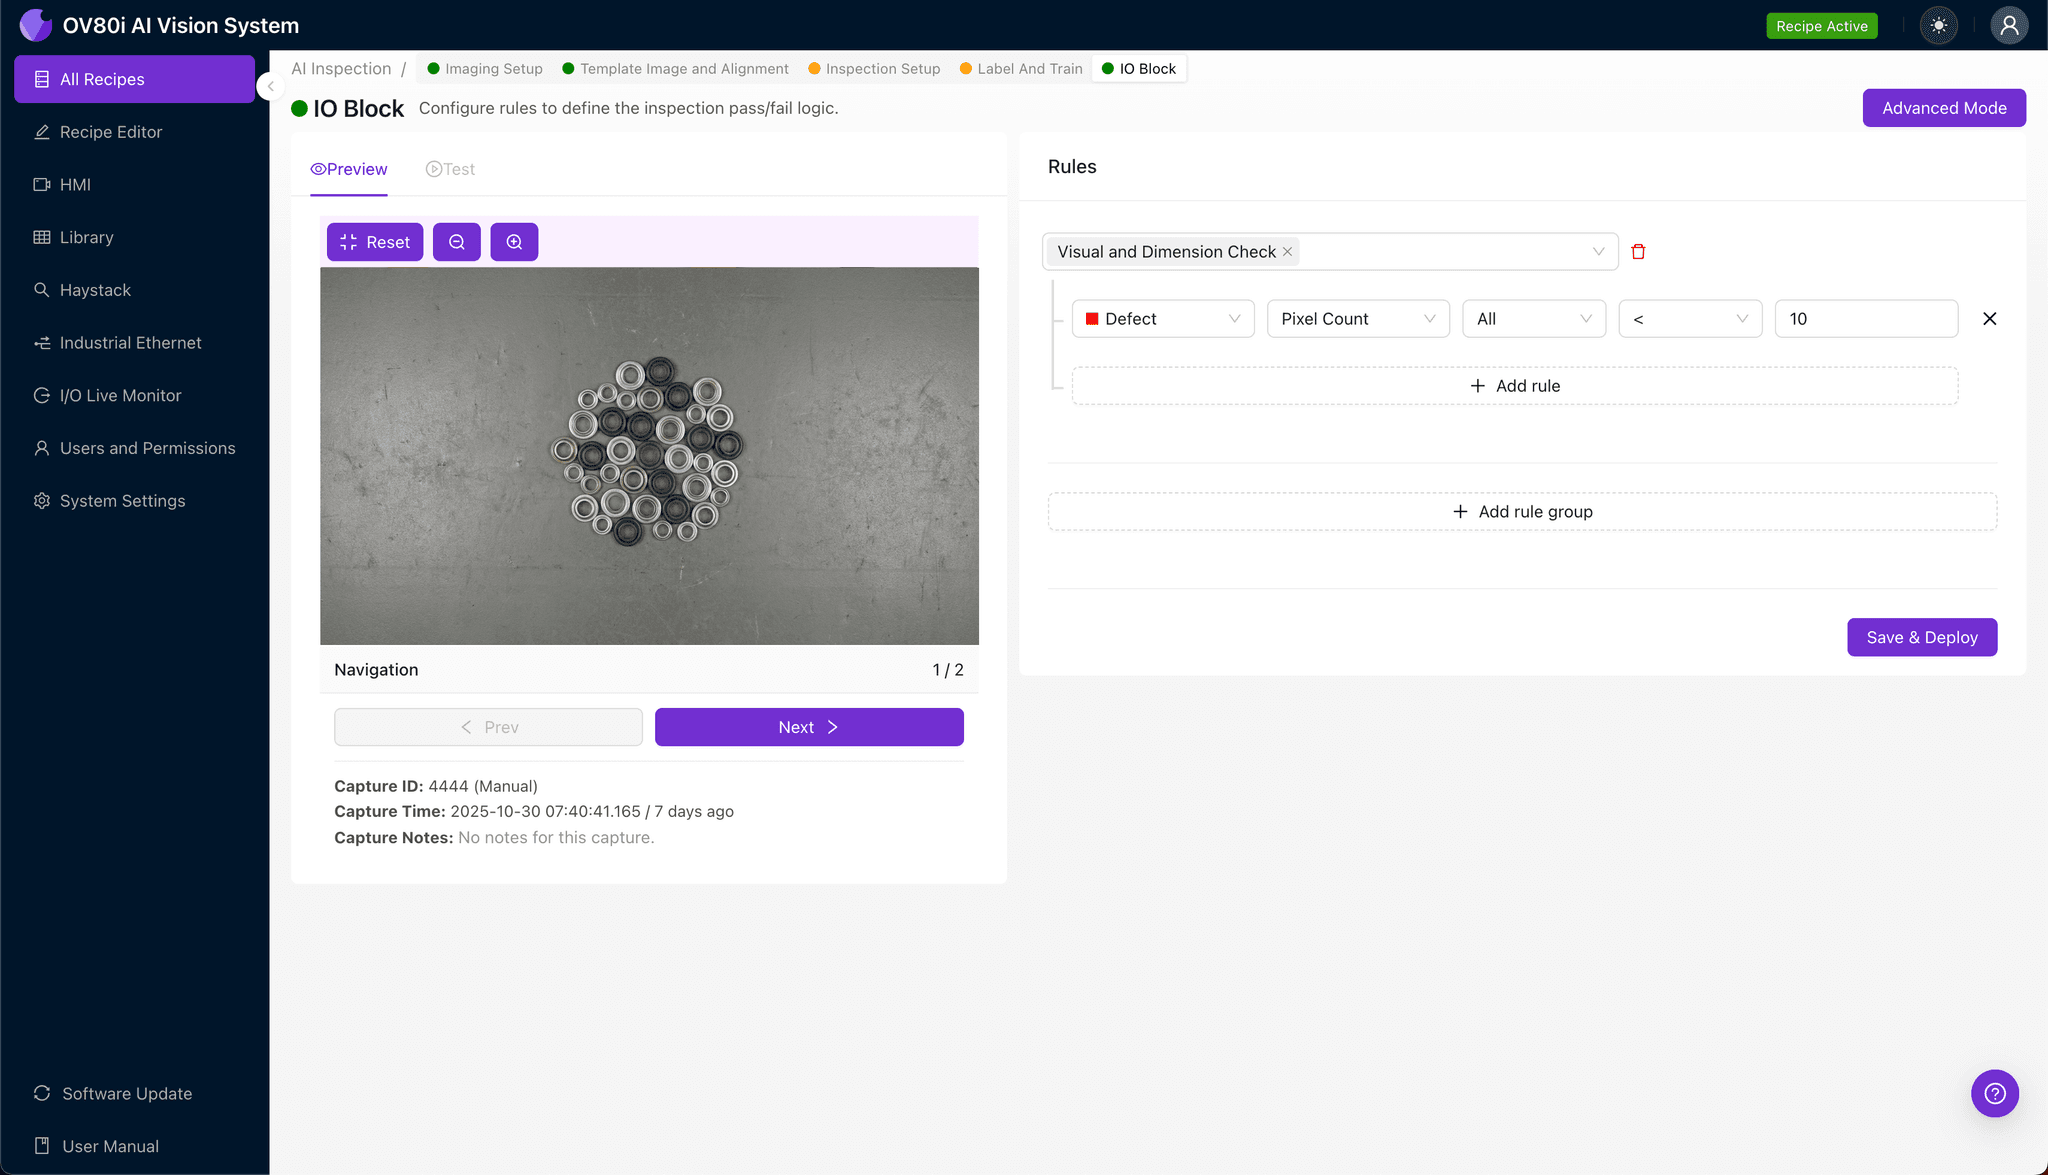
Step 5: Creating Rules
Set pass/fail logic based on Inspection Types. Configure thresholds to determine when a grommet should be rejected based on the AI's confidence score.
Key Outcomes & ROI
Reduced Scrap
Earlier detection of mis-set or damaged grommets prevents downstream rework and waste.
Higher Throughput
Automated checks keep pace with presses and harness/banner lines without slowing operators.
Consistent Quality
Standardized, auditable decisions that align with visual inspection standards across materials.
Ready to automate your grommet inspection?
Stop relying on manual checks. Deploy Overview.ai to catch 99.9% of defects with a system that learns from your existing process.