
How to Inspect a Keying Feature with a Sheared Corner Using AI Vision
"Sheared corner defects on keying features cause assembly failures and field returns. AI-powered vision inspection catches incomplete shears, burrs, and micro-cracks that human inspectors miss—delivering 100% inspection at full line speed."
The Problem: Why Sheared Corner Defects Slip Through Manual Inspection
Keying features with sheared corners are critical alignment components found in connectors, housings, and precision assemblies. When these corners are malformed, downstream assembly failures and field returns become inevitable.
Common defects found in keying features with sheared corners include:
- Incomplete shear — corner material not fully removed, causing interference during mating
- Shear angle deviation — corner cut at incorrect angle, compromising alignment function
- Burr formation — raised metal edges along the shear line creating insertion resistance
- Micro-cracking — stress fractures propagating from the shear point
- Dimensional drift — sheared corner depth or width outside tolerance specifications
- Surface delamination — material peeling or flaking near the sheared edge
Human inspectors struggle with these defects because the sheared corner geometry creates complex shadows and reflections. Inspector fatigue sets in quickly when evaluating hundreds of nearly identical parts per hour, and subtle variations in shear quality fall below the threshold of consistent human perception.
The Solution: Machine Vision + Deep Learning
Traditional rule-based vision systems fail on sheared corners because the "acceptable" geometry varies slightly from part to part. Deep learning models, however, learn the full range of acceptable variation while flagging true defects with high precision.
Overview.ai's approach delivers consistent, objective inspection at line speed—eliminating the subjectivity that plagues manual QC. The system inspects every single part without fatigue, catching defects that would escape even your most experienced inspectors.
Step 1: Imaging Setup
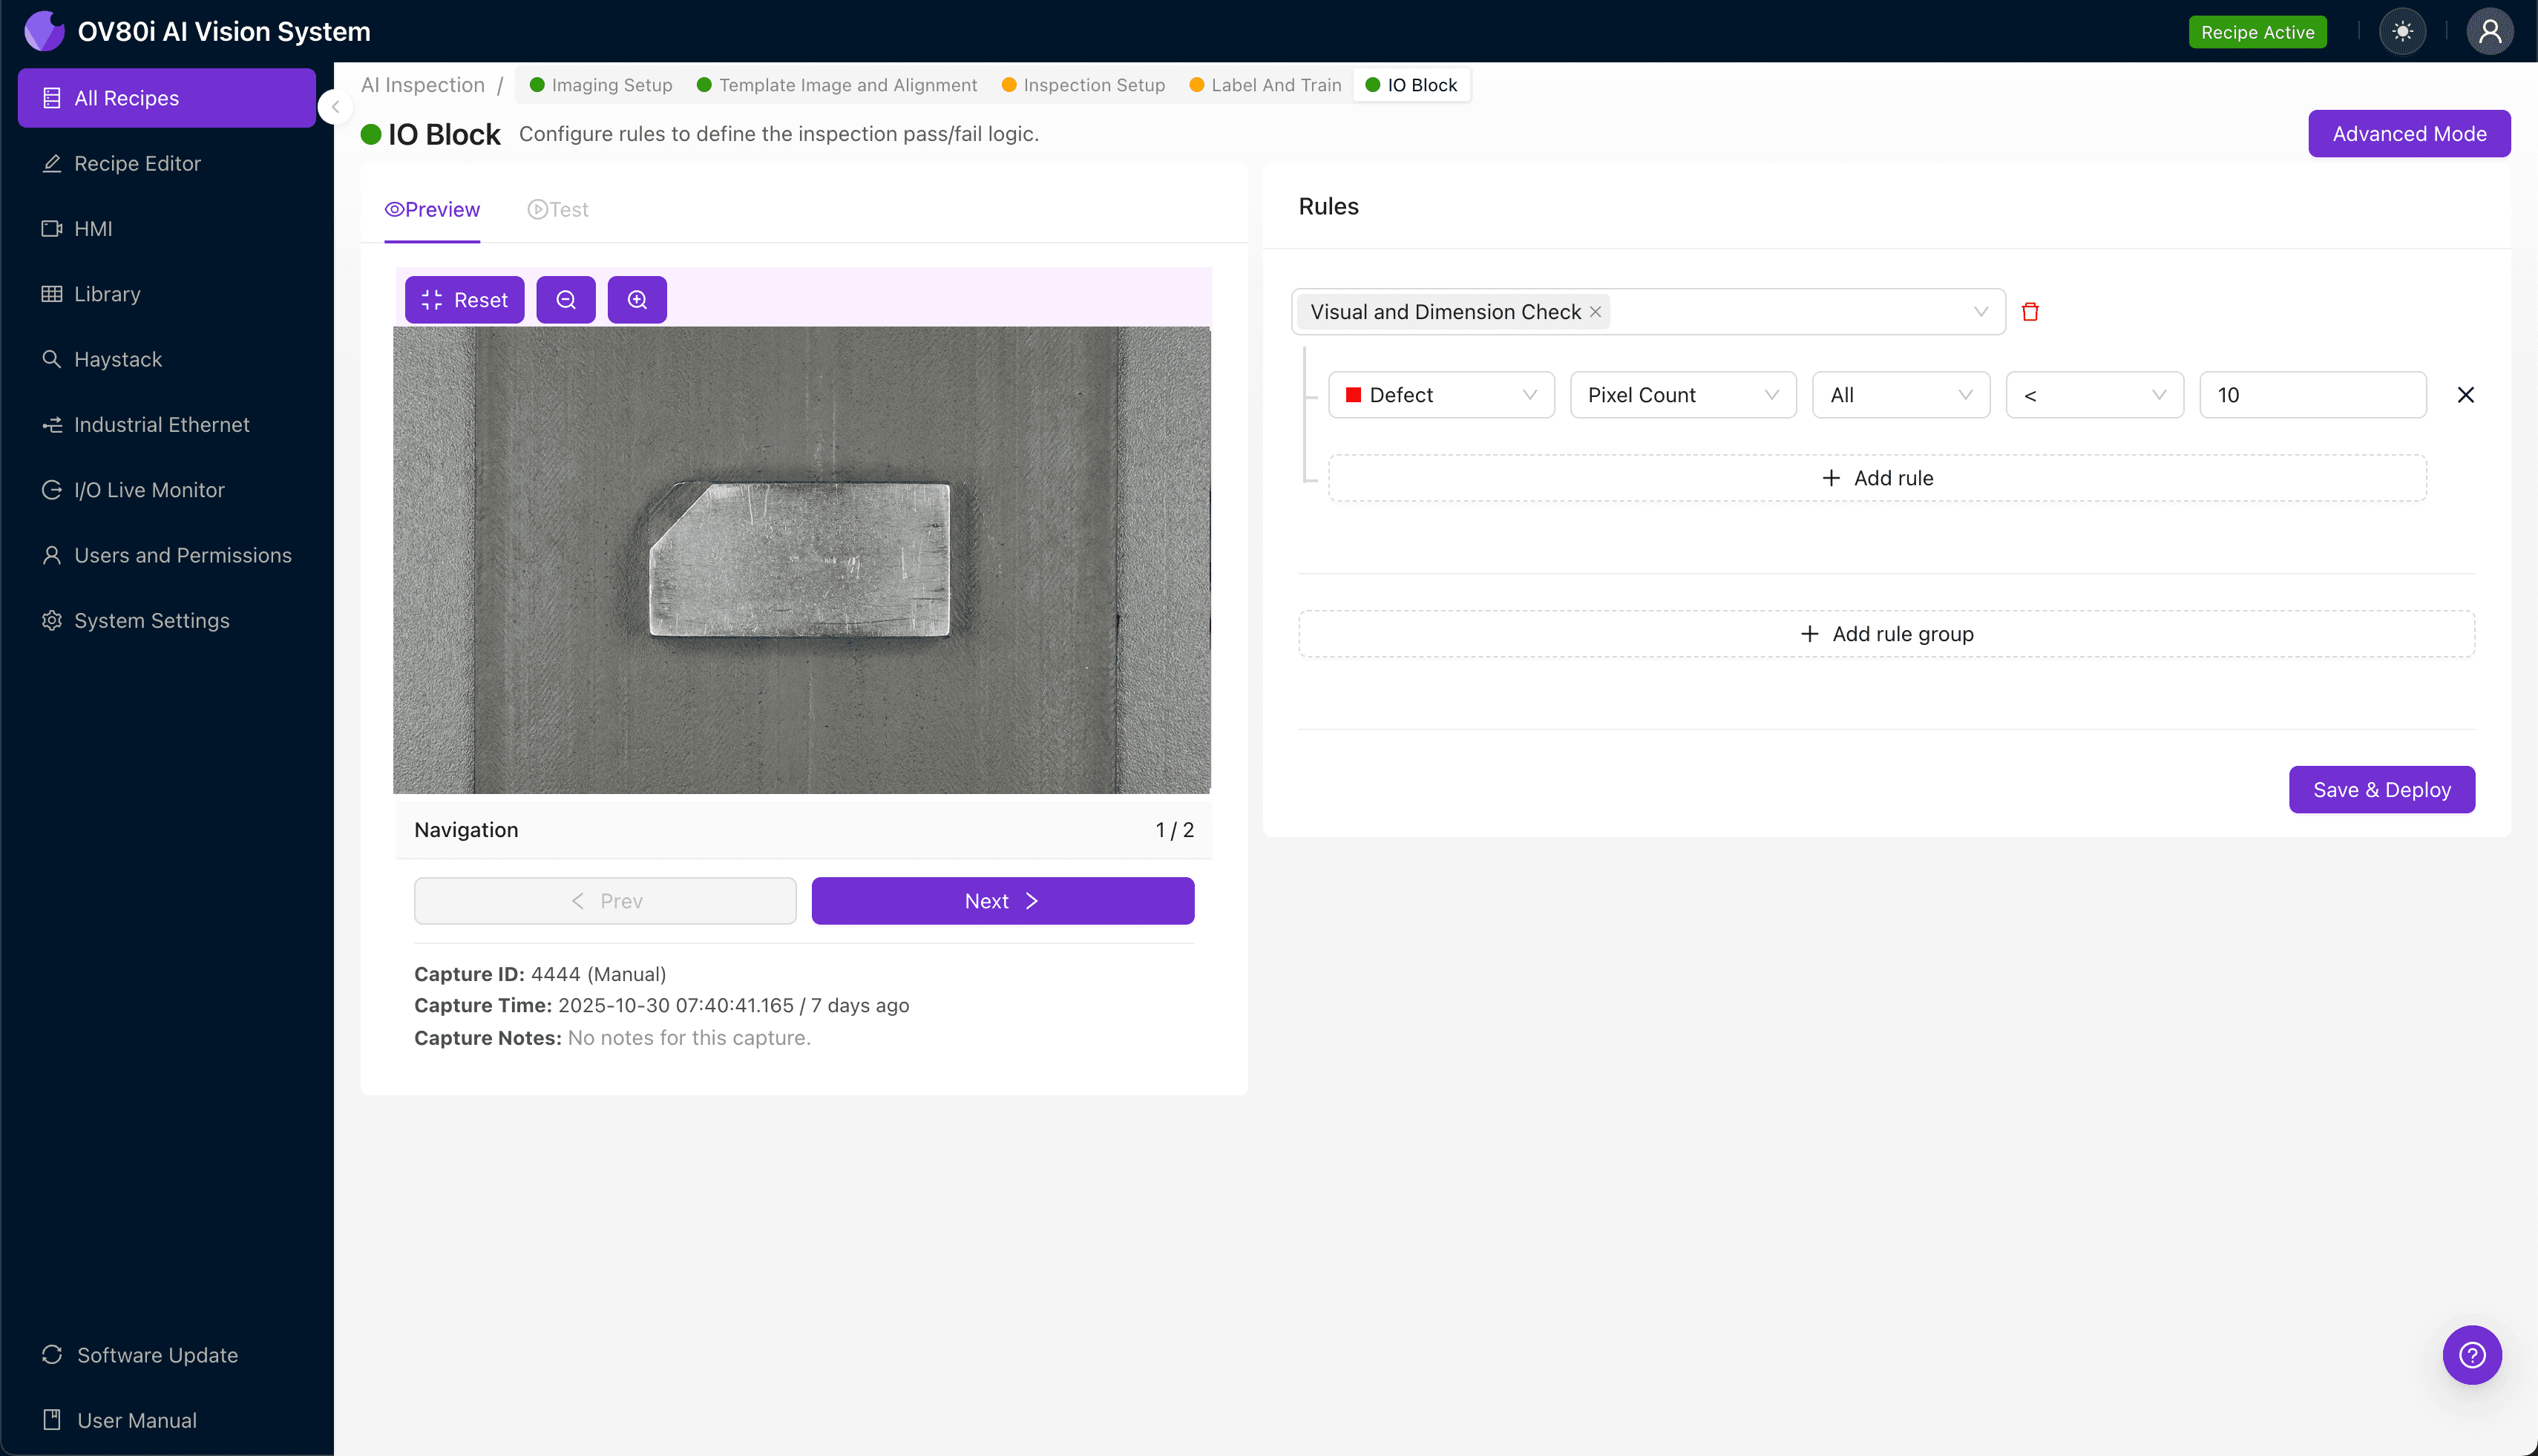
Place the keying feature with sheared corner under the OV80i camera, positioning the sheared edge prominently within the field of view. Proper orientation ensures the critical corner geometry is fully visible without obstruction.
Click "Configure Imaging" in the Overview interface. Adjust Camera Settings including exposure and gain until the sheared corner shows clear contrast—you want to see both the cut face and any potential burrs or cracks.
Click "Save" to lock in your imaging configuration.
Step 2: Image Alignment
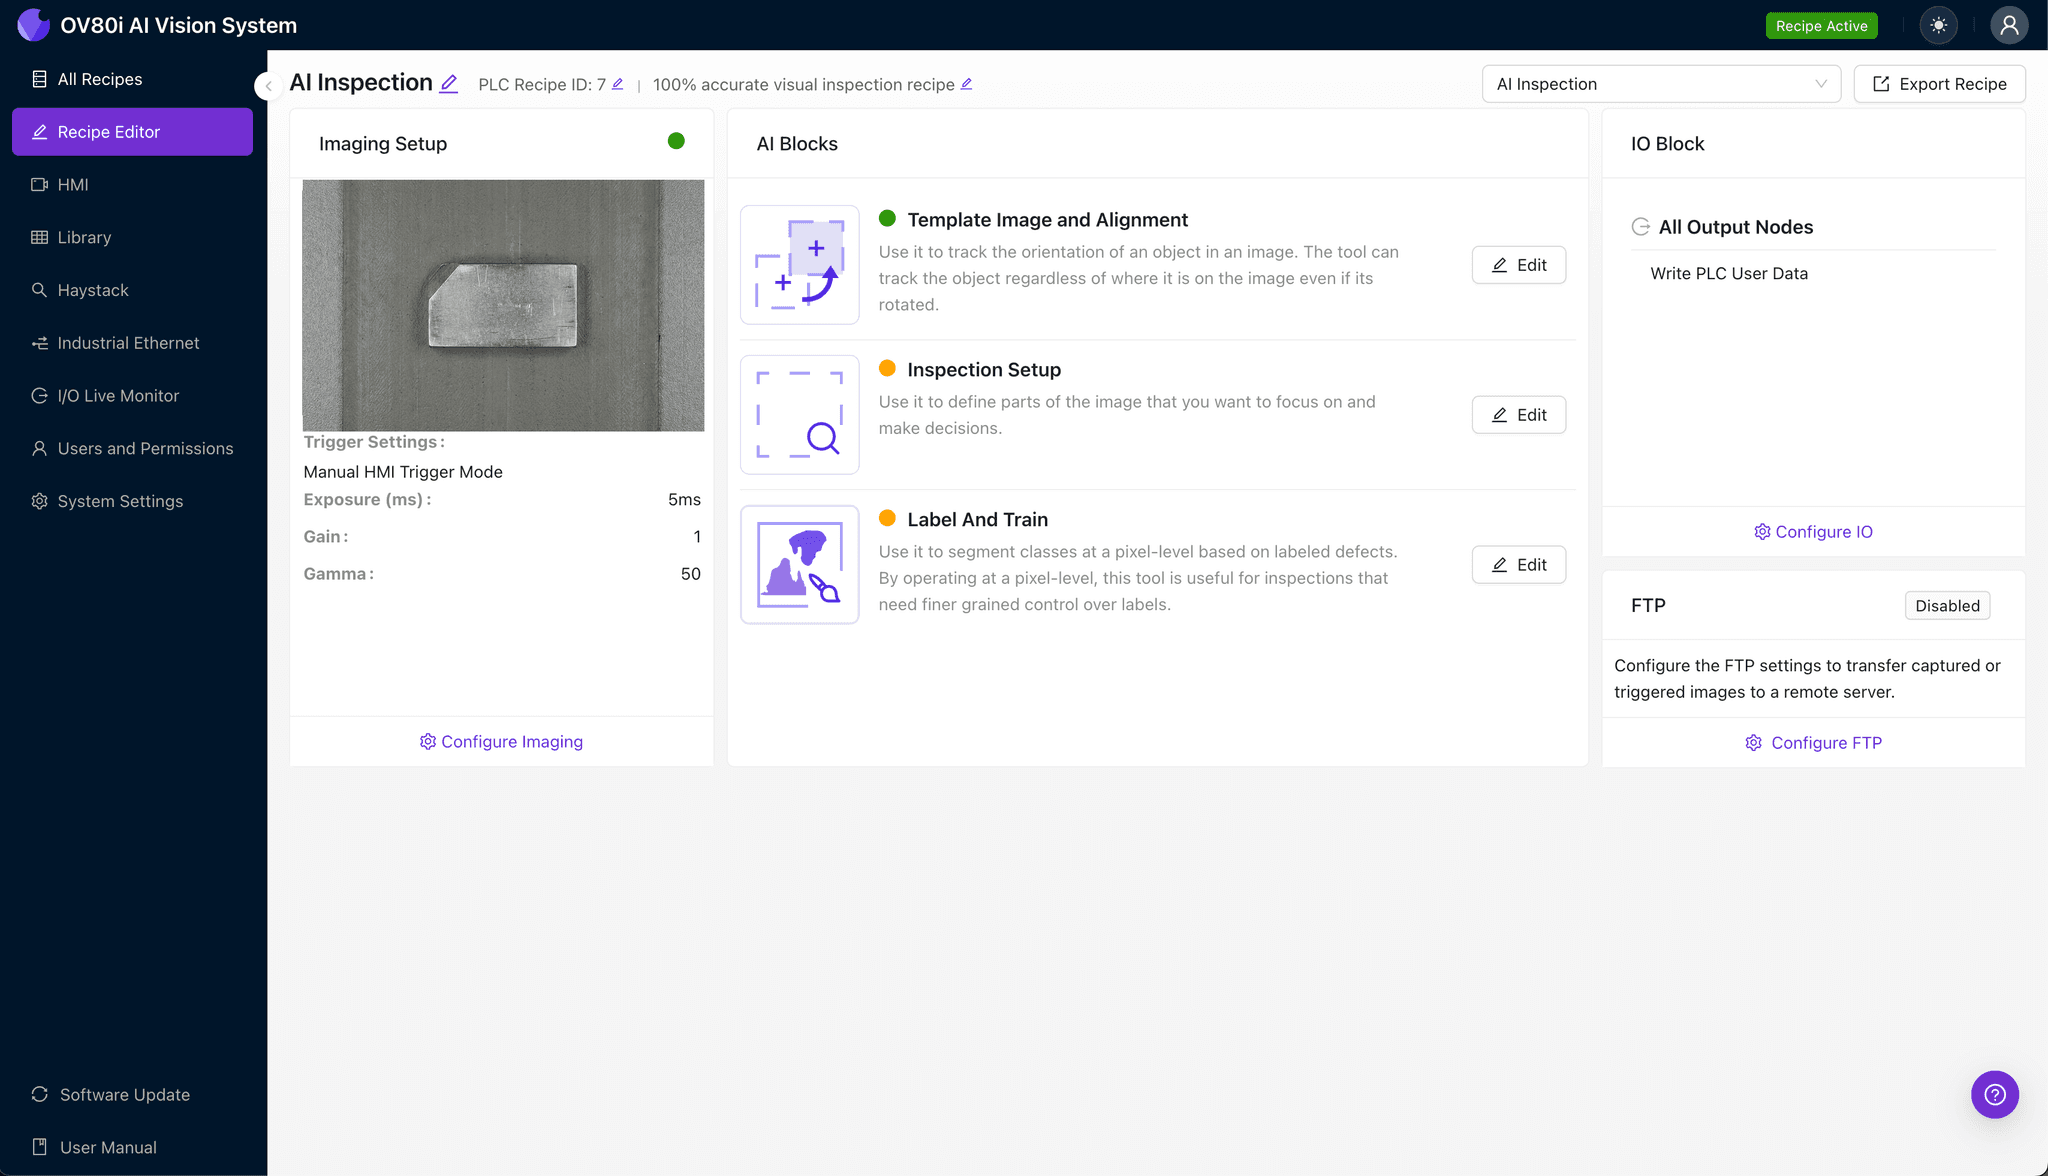
Navigate to "Template Image" in the software menu. Capture a Template using a known-good part with the sheared corner clearly visible.
Click "+ Rectangle" and draw a region around the main body of the keying feature. This anchors the alignment for consistent inspection positioning.
Set the "Rotation Range" to 20 degrees to accommodate minor part orientation variations on the line.
Step 3: Inspection Region Selection
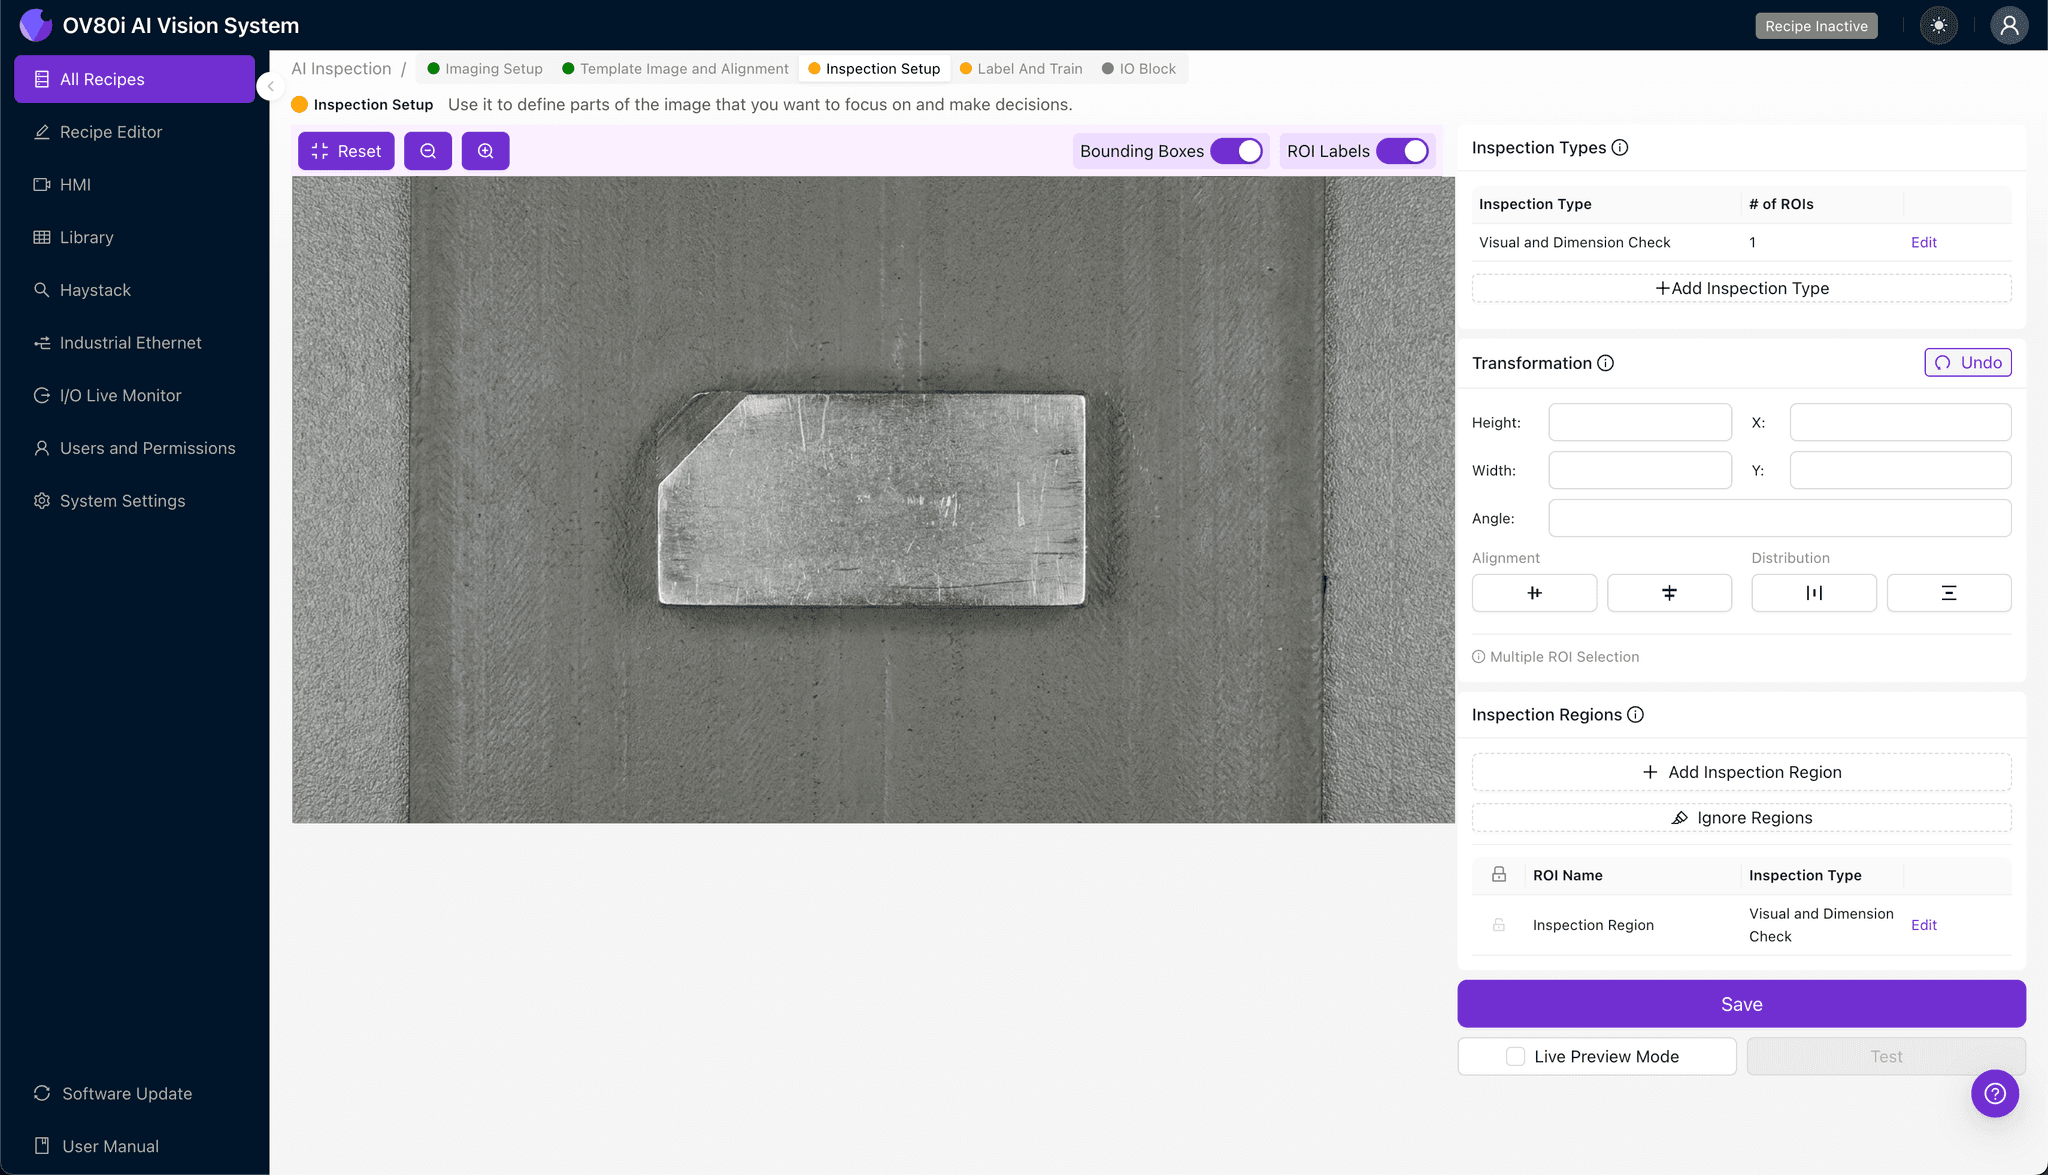
Navigate to "Inspection Setup" from the main configuration screen. Rename your "Inspection Types" to reflect the specific defects you're targeting—for example, "Shear Completeness," "Burr Detection," and "Corner Angle."
Click "+ Add Inspection Region" for each defect category. Resize the yellow bounding box to cover only the critical sheared corner area—tight regions improve model accuracy by focusing on relevant pixels.
Click "Save" after defining all inspection regions.
Step 4: Labeling Data
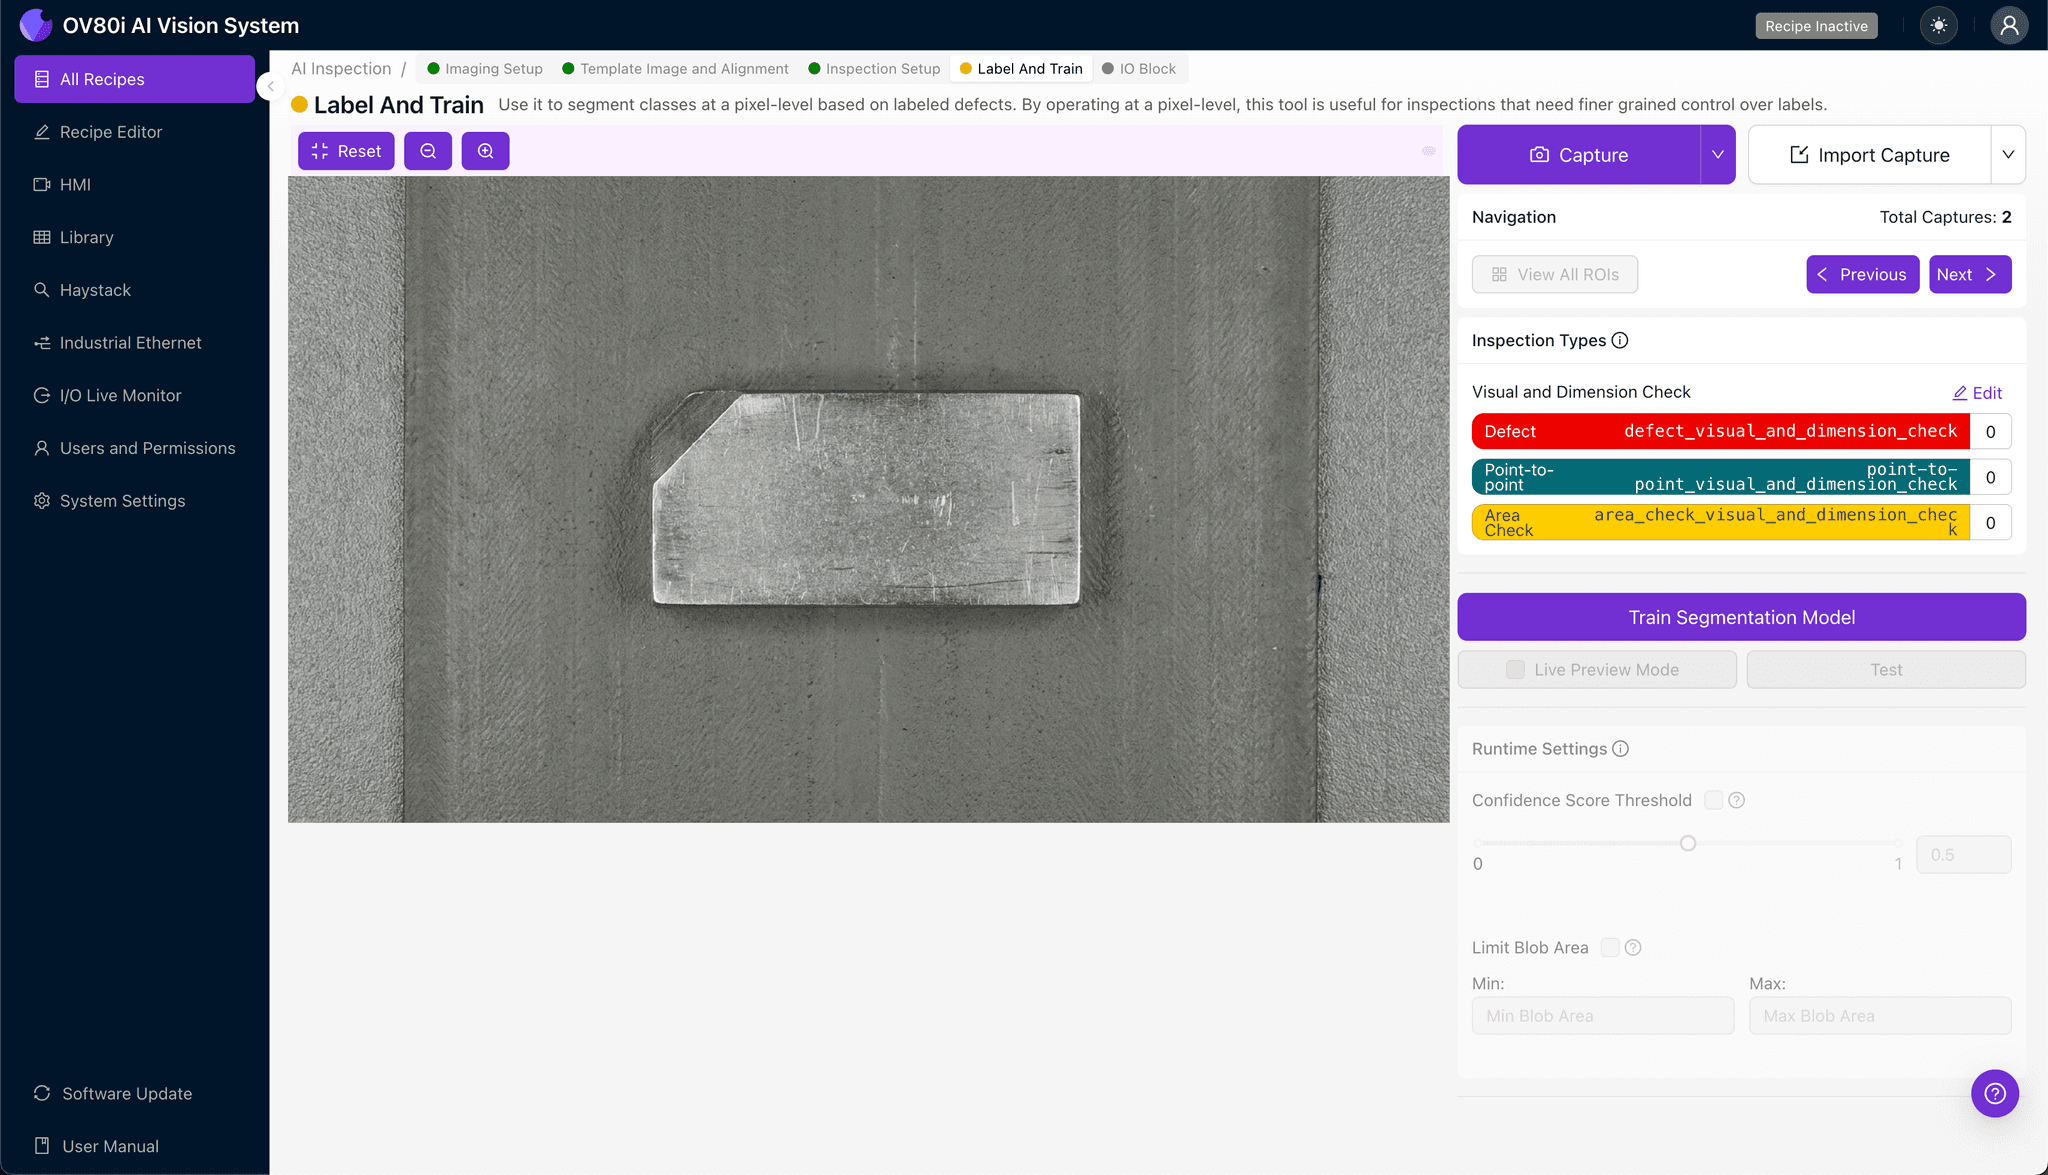
This human-in-the-loop process teaches the AI what "good" and "bad" actually look like for your specific parts. Review captured images and label each as Good or Bad based on your quality standards.
Include representative samples across the full range of acceptable variation. Critically, add known failure modes—incomplete shears, excessive burrs, and cracked corners—so the model learns your real-world reject criteria.
Step 5: Creating Rules
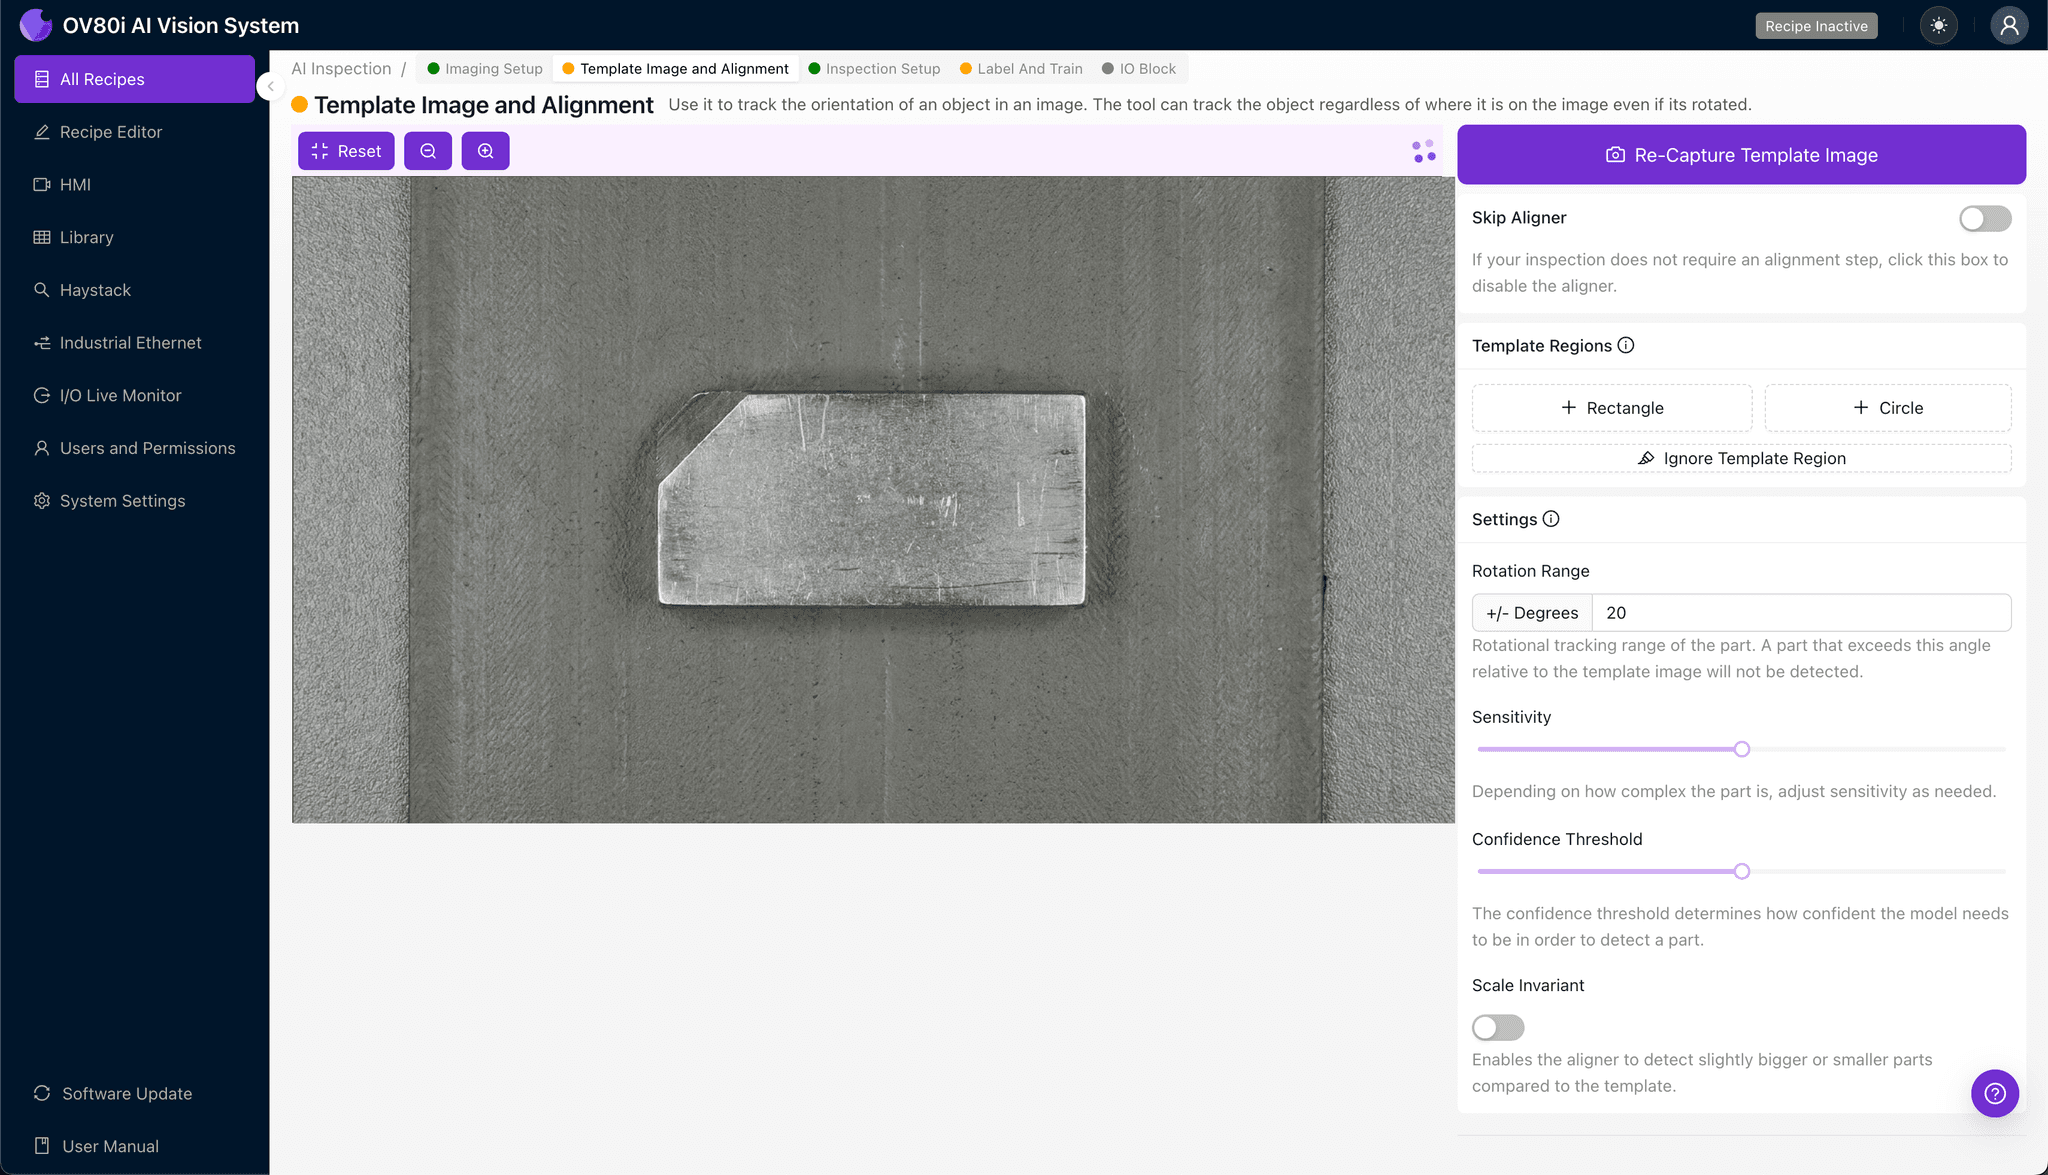
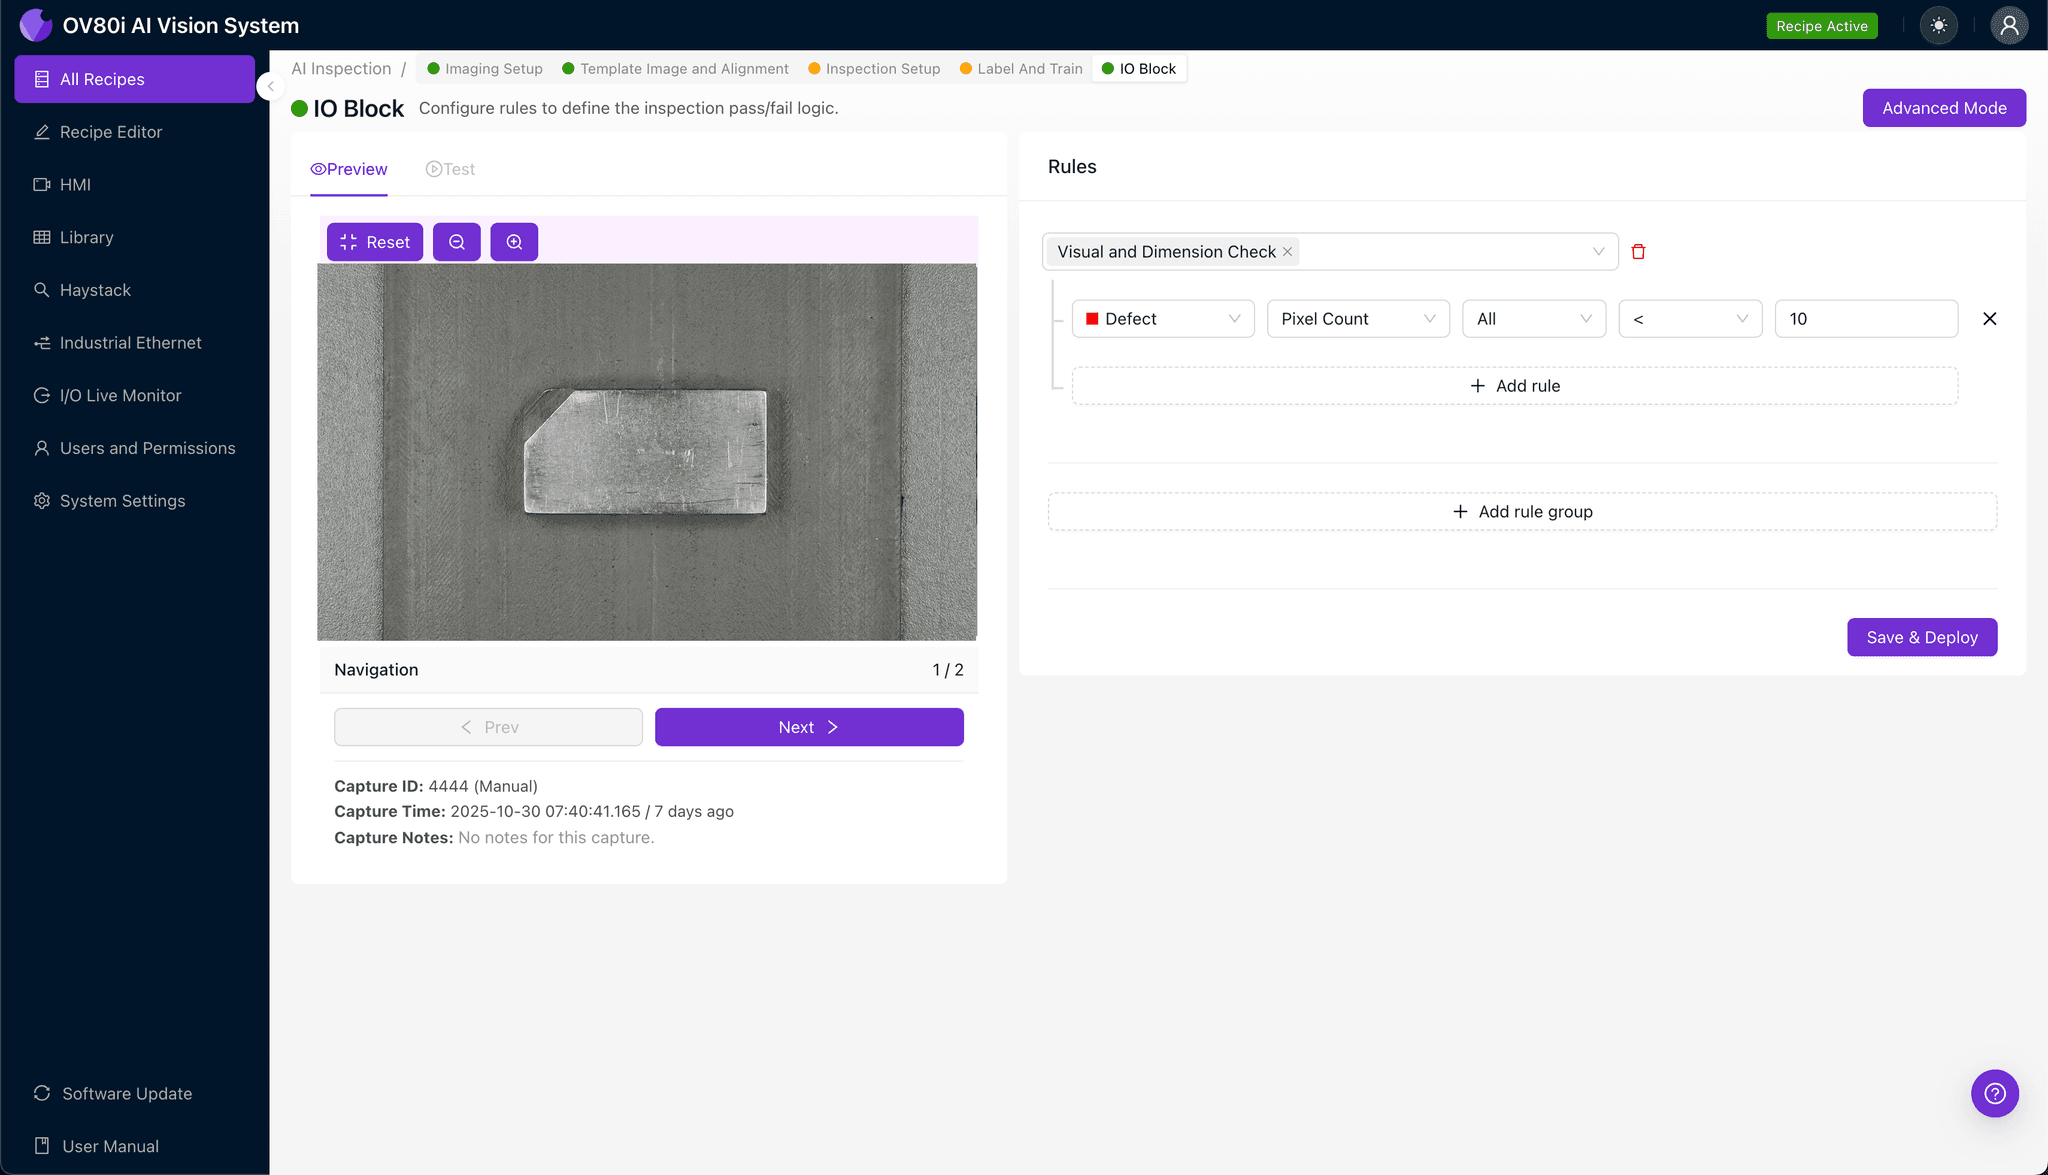
Set your pass/fail logic based on the Inspection Types you defined. For example, require "Pass" on all three regions (Shear Completeness, Burr Detection, Corner Angle) for a part to be accepted.
These rules gate automated acceptance on the line, triggering reject mechanisms or alerts when defects are detected.
Key Outcomes & ROI
Implementing AI-powered inspection for keying features with sheared corners delivers measurable business impact:
- Reduced scrap rates — catch defects before they progress to finished assemblies
- Higher throughput — inspect 100% of parts at full line speed without bottlenecks
- Compliance and traceability — maintain complete inspection records for automotive, aerospace, or medical audits
- Process improvement insights — identify upstream tooling wear or shearing parameter drift before quality escapes
With Overview.ai, manufacturers transform sheared corner inspection from a liability into a competitive advantage—delivering higher quality at lower cost with complete visibility into their process.
Eliminate Defects Today
Stop relying on manual inspection. Deploy Overview.ai to catch defects instantly.