How to Inspect Micro-USB/C Shields with Wobbly Tabs Using AI-Powered Vision
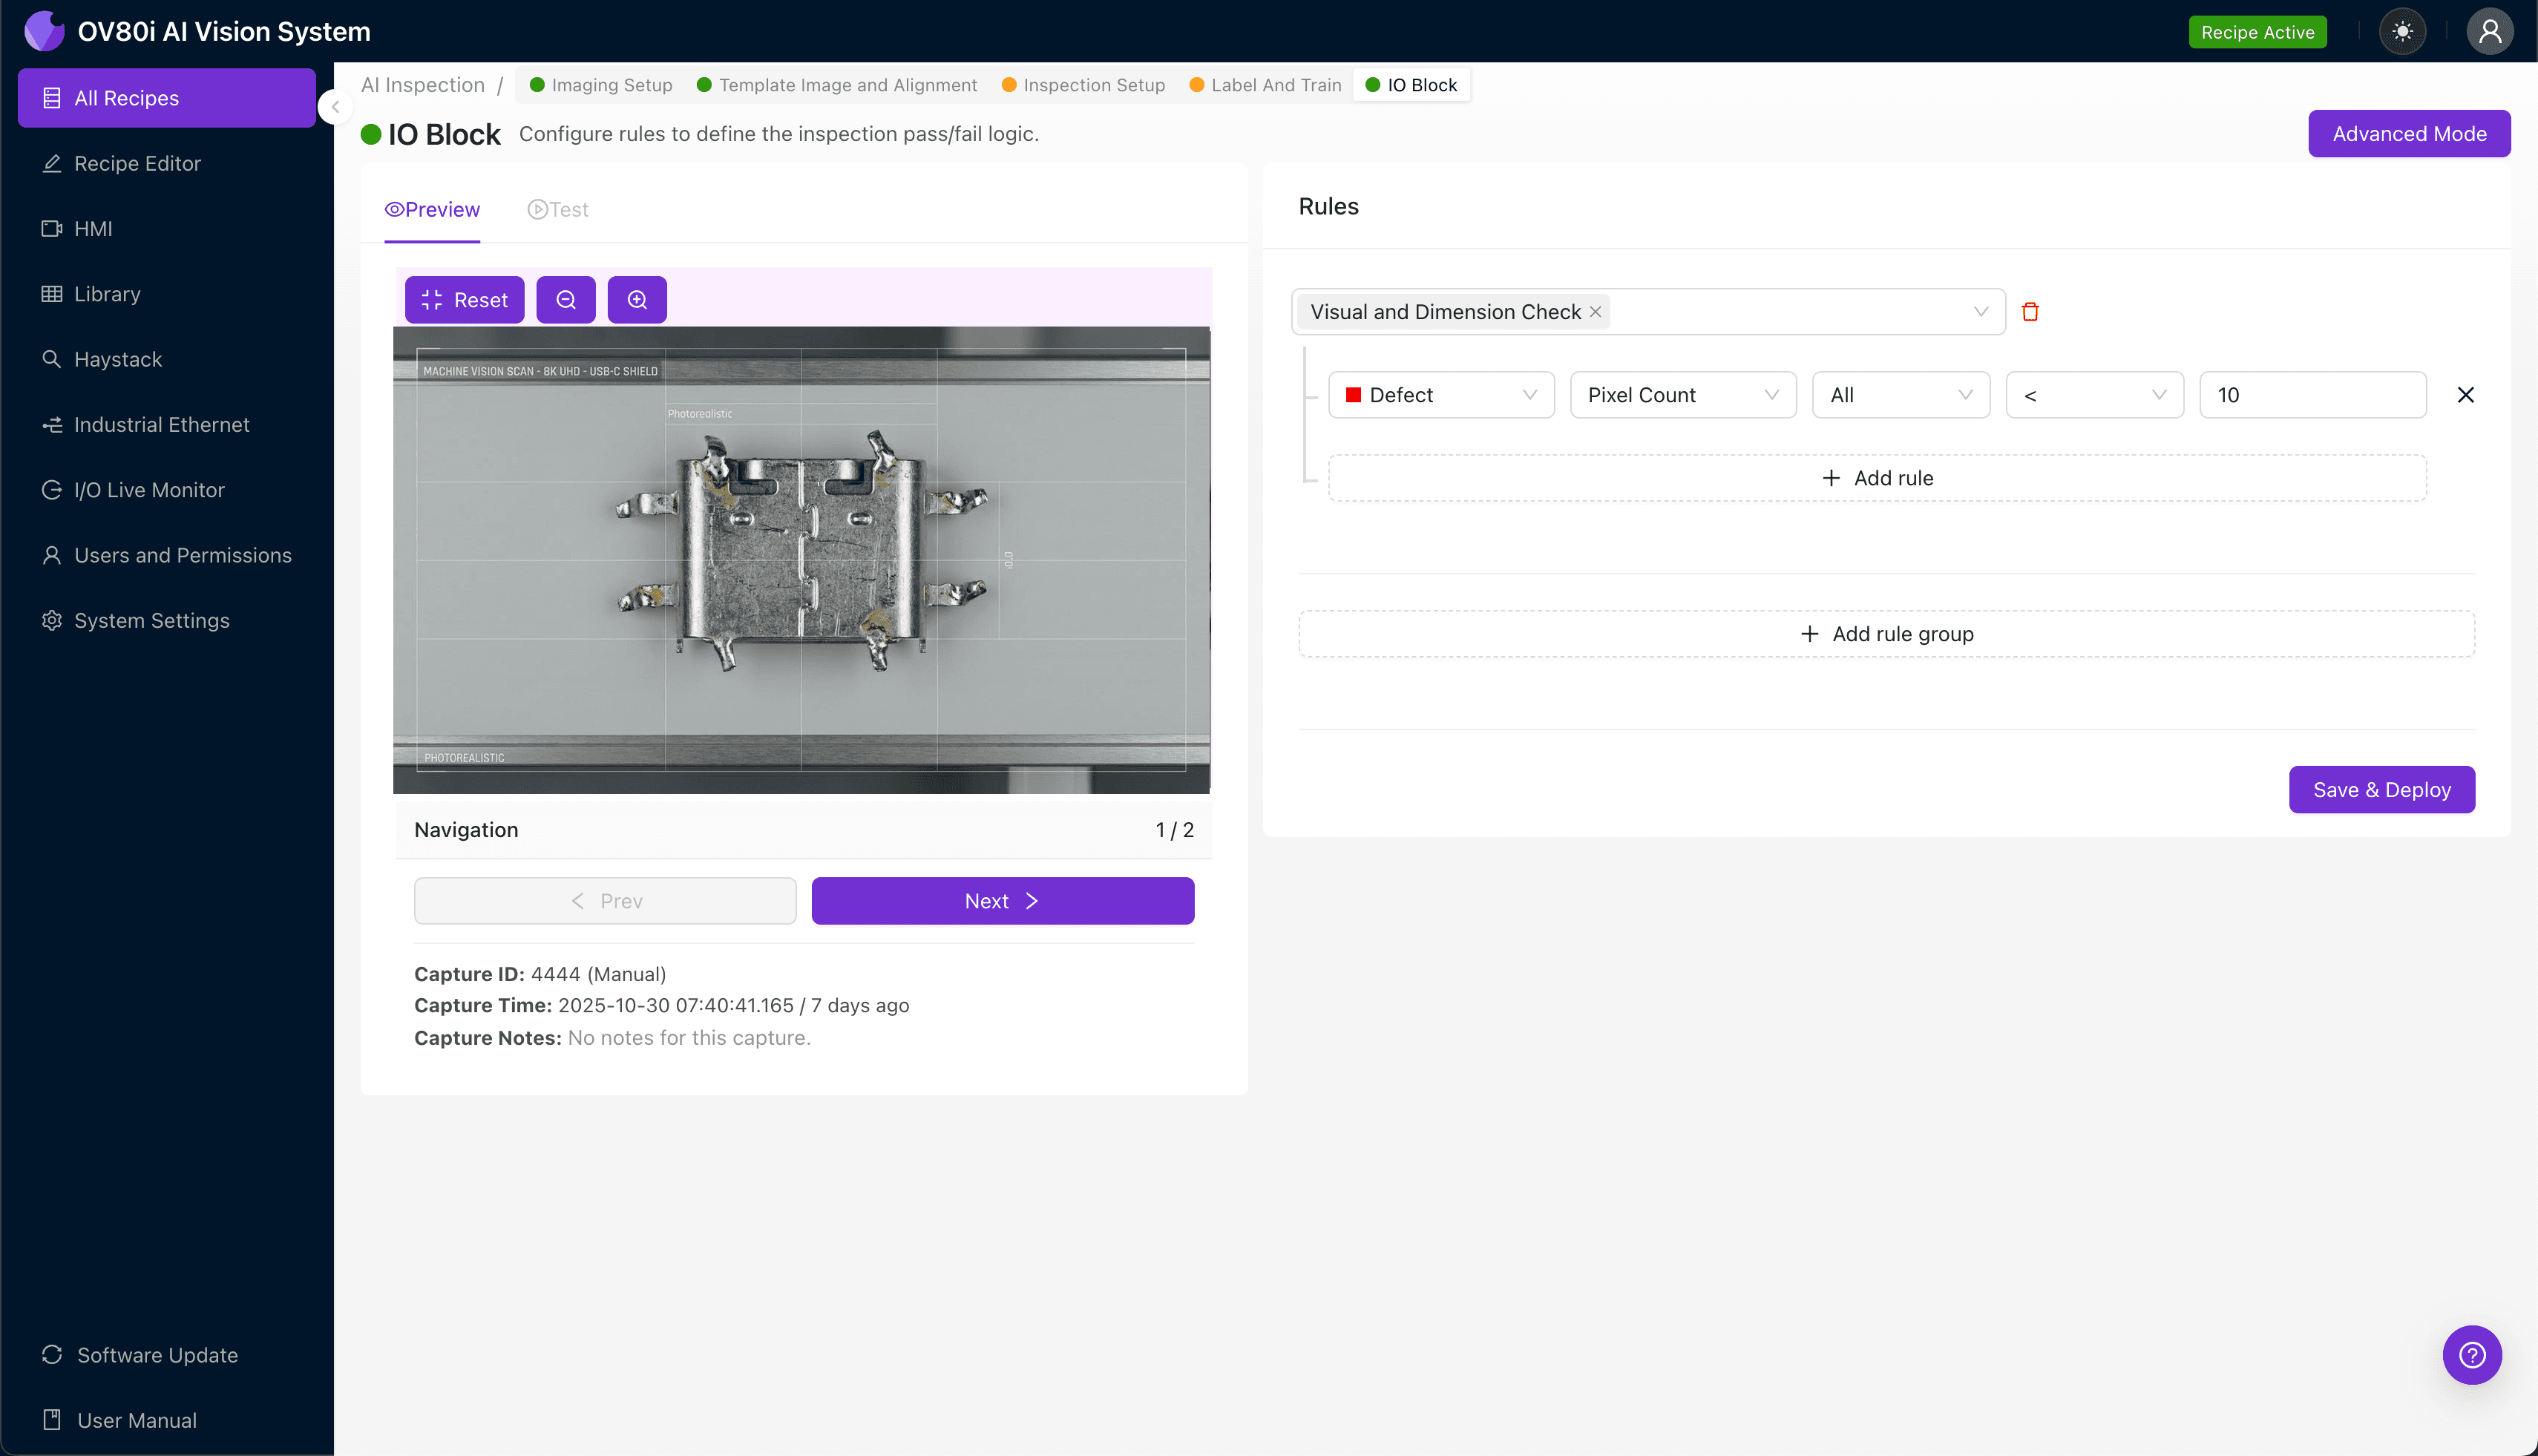
"Wobbly retention tabs on USB connector shields cause assembly failures and field returns, yet they're nearly impossible for human inspectors to catch consistently. AI-powered vision systems detect bent, missing, and misaligned tabs at full production speed with complete traceability."
The Problem: Why Wobbly Shield Tabs Slip Through Traditional QC
Micro-USB and USB-C connector shields rely on small metal retention tabs to secure the component during assembly and throughout product life. When these tabs become bent, misaligned, or structurally compromised during stamping or handling, the result is a "wobbly" shield that fails to meet mechanical specifications.
Common Defects Found in Micro-USB/C Shield Tab Inspection:
- Bent or deformed tabs — tabs pushed inward or outward beyond tolerance during stamping or pick-and-place
- Missing tabs — complete absence of one or more retention features due to tooling wear or material defects
- Inconsistent tab height — variation in vertical positioning that affects snap-fit engagement
- Cracked or fractured tab bases — micro-fractures at the bend point caused by material fatigue or improper forming
- Tab misalignment — lateral offset preventing proper mating with PCB cutouts or housing slots
- Burrs or flash on tab edges — excess material that interferes with assembly or creates electrical shorts
Human inspectors struggle with these defects because the tabs are typically less than 2mm in size and require consistent lighting angles to detect subtle deformations. Inspector fatigue sets in quickly when examining thousands of identical silver-colored components per shift, and the pressure for speed inevitably compromises detection accuracy.
The Solution: Machine Vision + Deep Learning
Traditional rule-based machine vision systems often fail on shield tab inspection because the acceptable variation in "good" parts overlaps with early-stage defects. Deep learning changes this equation by training neural networks to recognize the nuanced patterns that distinguish a structurally sound tab from a compromised one.
Overview.ai's approach delivers consistent, objective inspection at full line speed—examining every single unit without the variability introduced by shift changes, lighting fluctuations, or human judgment. The OV80i system learns from your specific production environment and failure modes, becoming more accurate as it processes more parts.
Step 1: Imaging Setup
Begin by placing a representative Micro-USB/C shield sample under the OV80i camera, positioning it so all retention tabs are clearly visible. For metallic shield components, you may need to angle the lighting to reduce specular reflection while highlighting tab geometry.
Click "Configure Imaging" to access the Camera Settings panel. Adjust the exposure to capture tab detail without washing out reflective surfaces, and fine-tune the gain to optimize signal-to-noise ratio for your specific shield finish.
Click "Save" to lock in your imaging configuration.
Step 2: Image Alignment
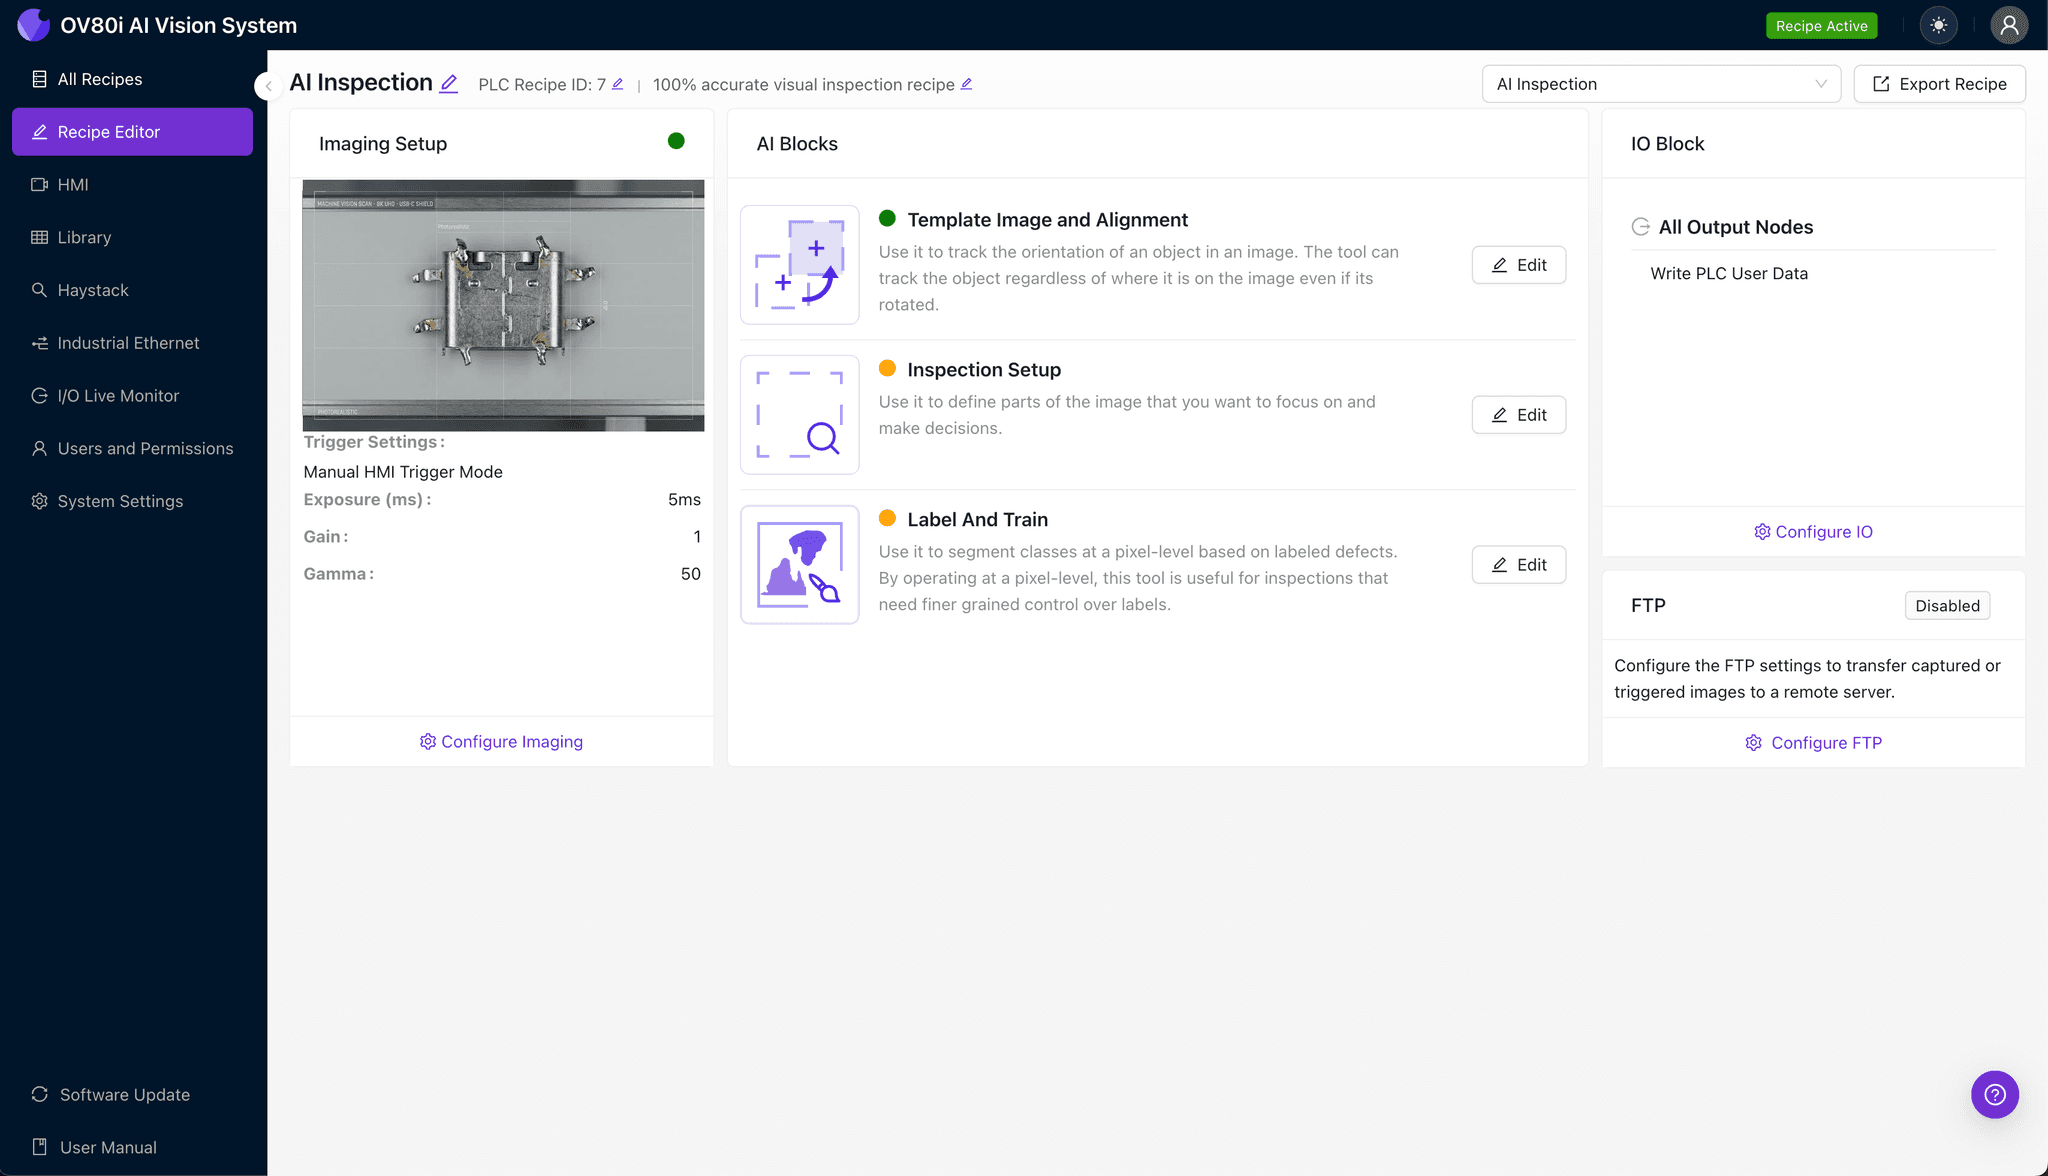
Navigate to the "Template Image" section and capture a Template using a known-good shield sample. This reference image allows the system to locate and align each incoming part regardless of minor positional variation on the conveyor.
Click "+ Rectangle" to add an alignment region around the main shield body, excluding the tabs themselves from the alignment calculation. Set the "Rotation Range" to 20 degrees to accommodate typical part orientation variance during feeding.
Step 3: Inspection Region Selection
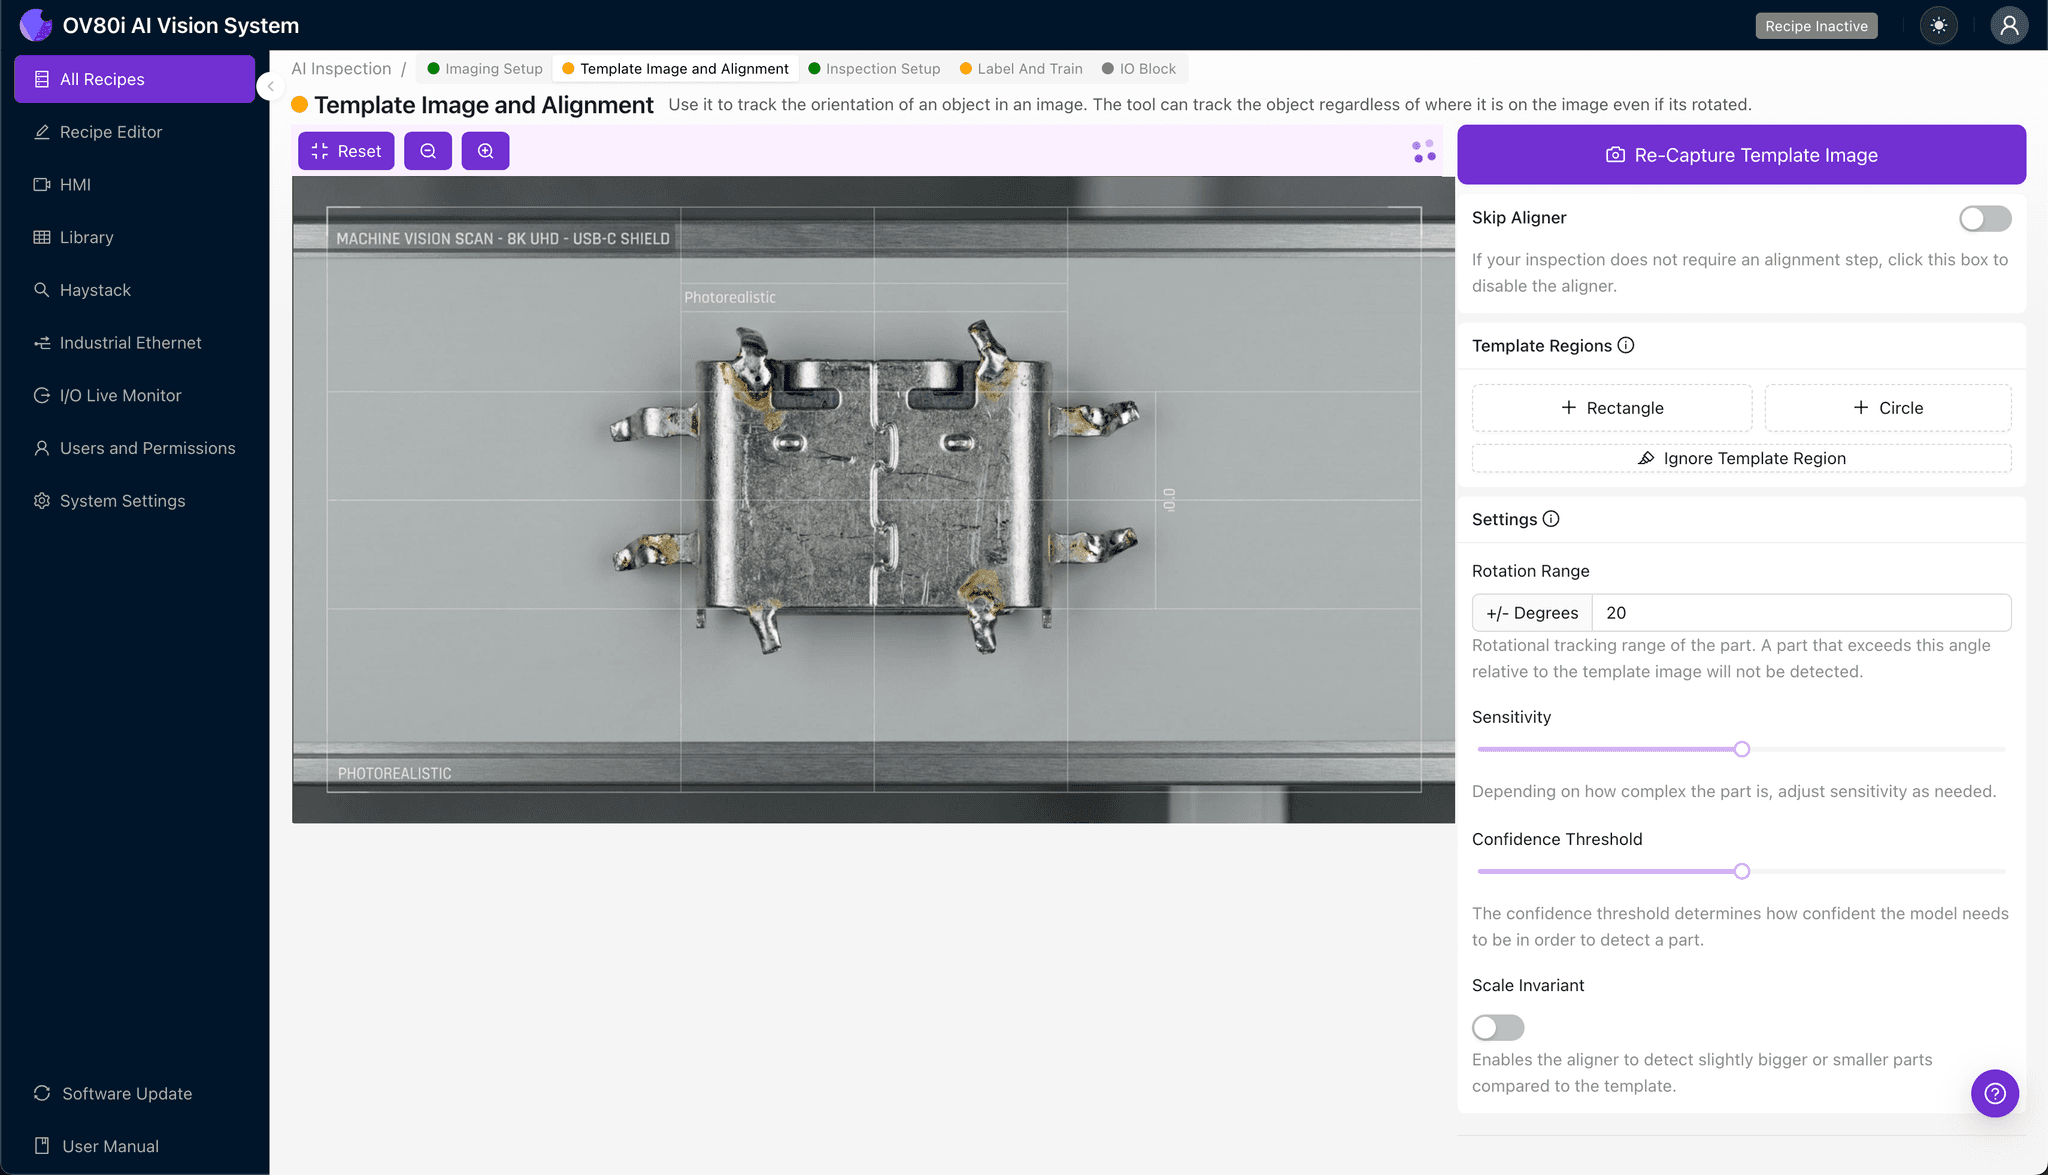
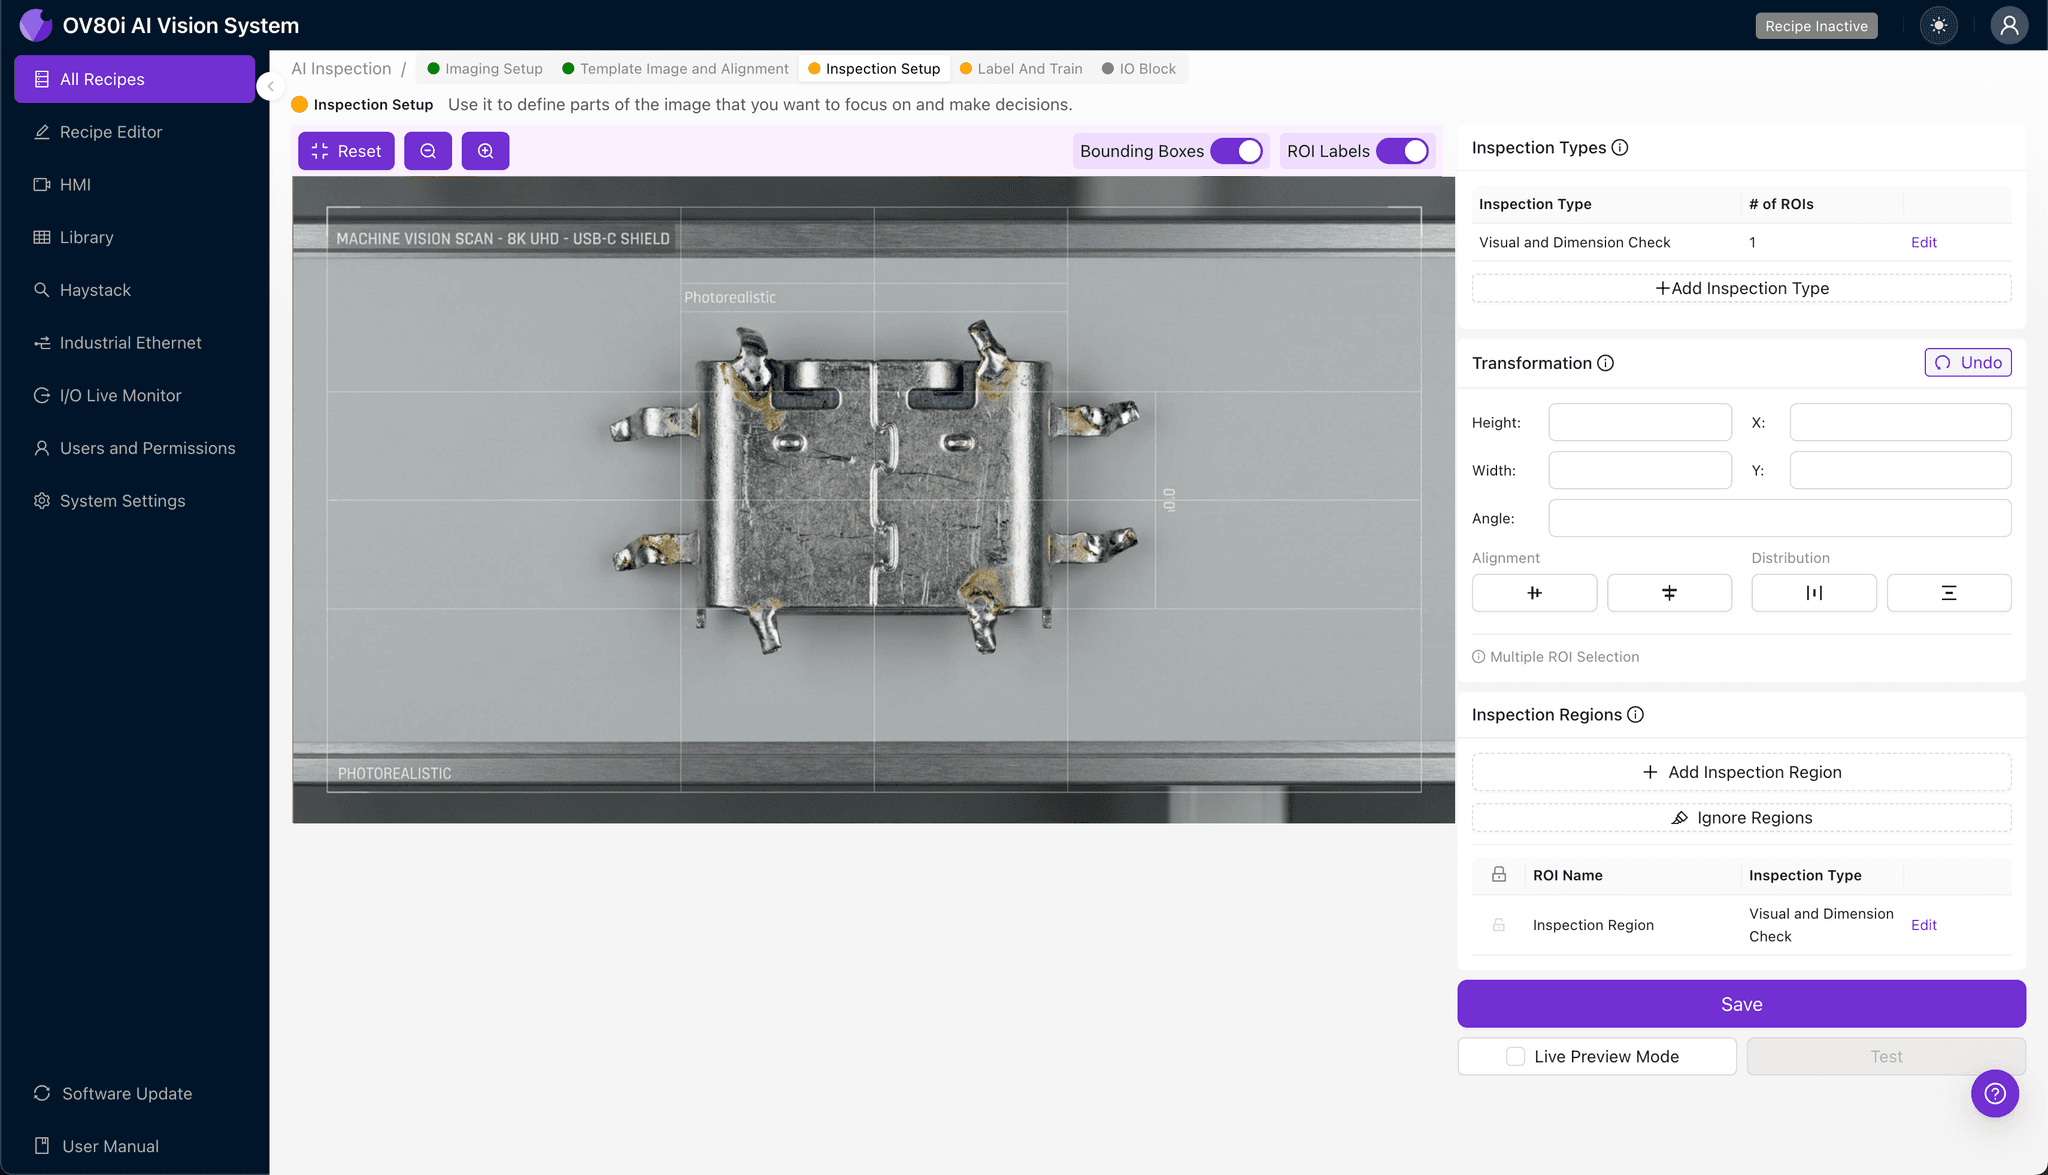
Navigate to "Inspection Setup" to define which areas of the shield require AI analysis. Rename your "Inspection Types" to reflect the specific defect categories—for example, "Left Tab Integrity," "Right Tab Alignment," or "Tab Base Fractures."
Click "+ Add Inspection Region" for each critical zone. Resize the yellow bounding box to cover individual tabs or tab clusters, ensuring adequate margin around each feature.
Click "Save" after defining all inspection regions.
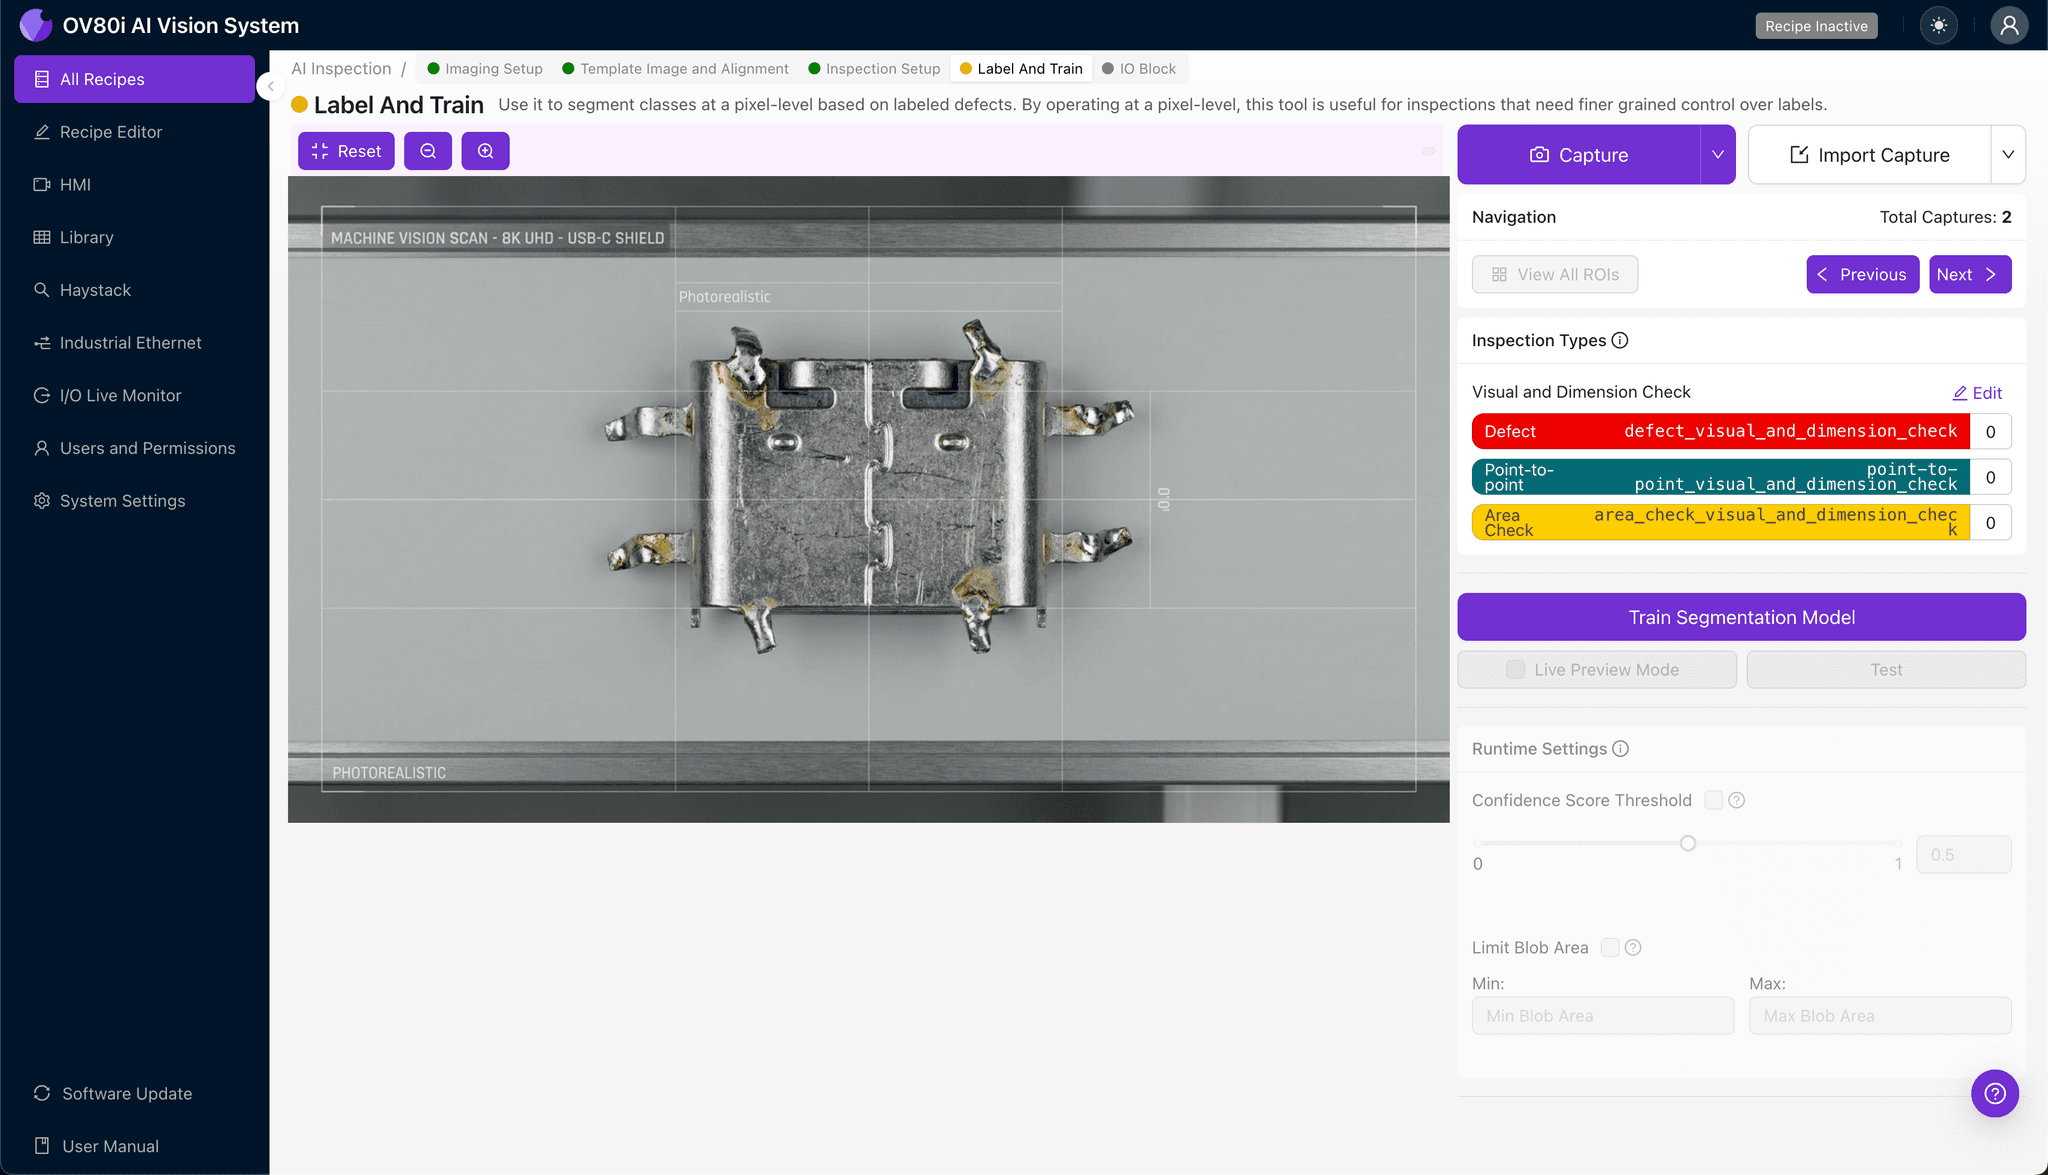
Step 4: Labeling Data
The human-in-the-loop labeling process is where your quality expertise trains the AI model. As production images flow into the system, you'll classify each inspection region as Good or Bad based on your acceptance criteria.
Include representative samples across the full spectrum of acceptable variation—different supplier lots, tool positions, and plating batches. Critically, ensure your labeled dataset contains examples of all known failure modes, including subtle defects that have historically escaped to customers.
Step 5: Creating Rules
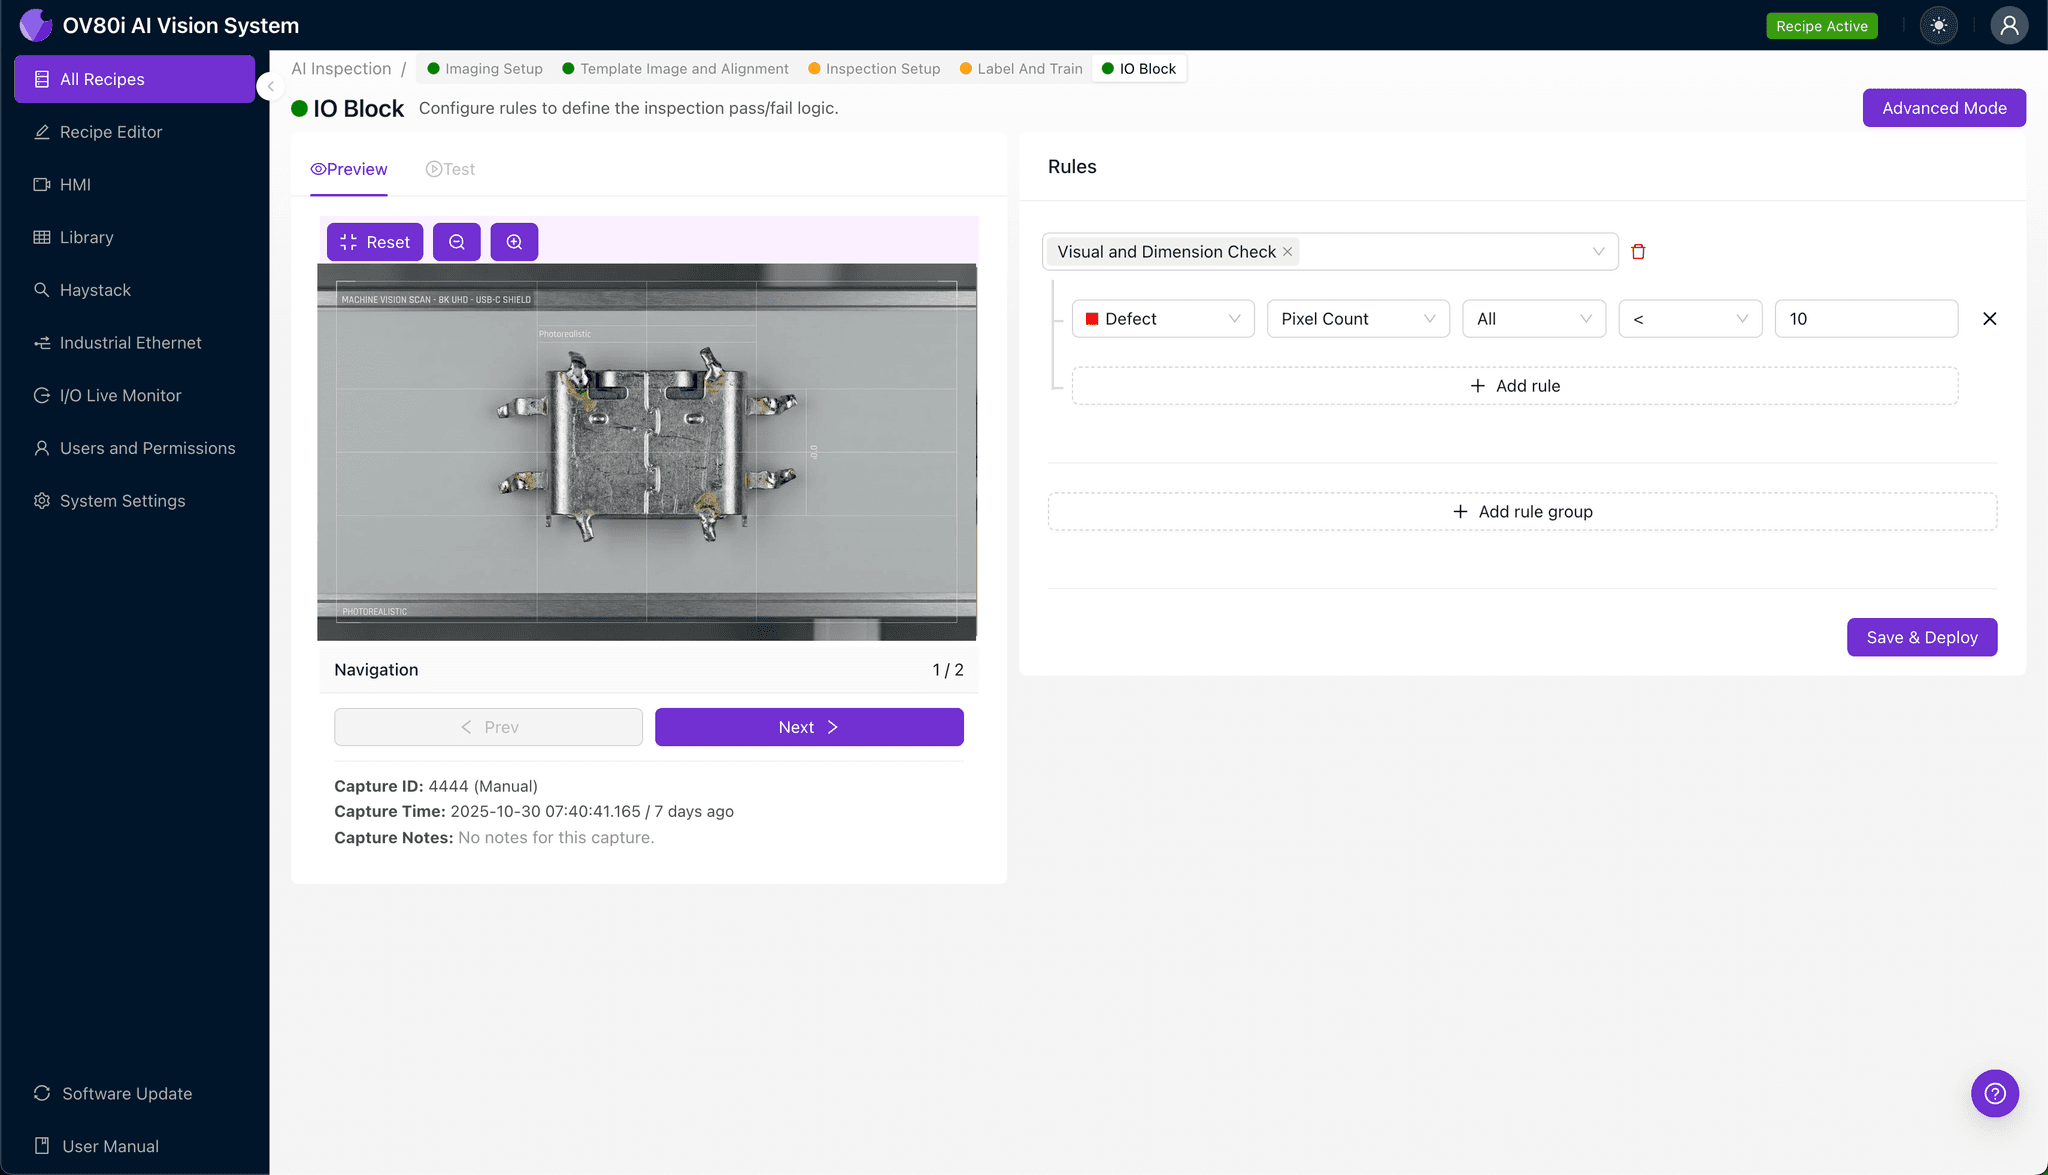
With your trained model deployed, navigate to the Rules configuration to set pass/fail logic based on your Inspection Types. You might require all four tabs to pass, or implement tiered logic where certain tab positions are more critical than others.
These rules gate automated acceptance on the line, triggering reject mechanisms or divert stations when the AI detects defective shields. The system logs every decision with full image evidence for traceability.
Key Outcomes & ROI
Manufacturers implementing AI-powered inspection for USB shield tabs consistently report significant operational improvements:
- Reduced scrap rates — catching tab defects before downstream assembly prevents costly rework and material waste
- Higher throughput — 100% inline inspection eliminates bottleneck sampling stations and reduces manual touch points
- Enhanced compliance and traceability — every inspection decision is logged with timestamped images for customer audits and root cause analysis
- Process improvement insights — trend data reveals tooling wear patterns, supplier quality variations, and process drift before they impact yield
Ready to Eliminate Wobbly Tab Escapes?
Transform your USB connector shield QC from a subjective, sample-based process into a consistent, data-driven operation. See the OV80i in action with your actual production parts.