Detecting Resistance Weld Electrode Sticking Marks: A Complete Machine Vision Inspection Guide
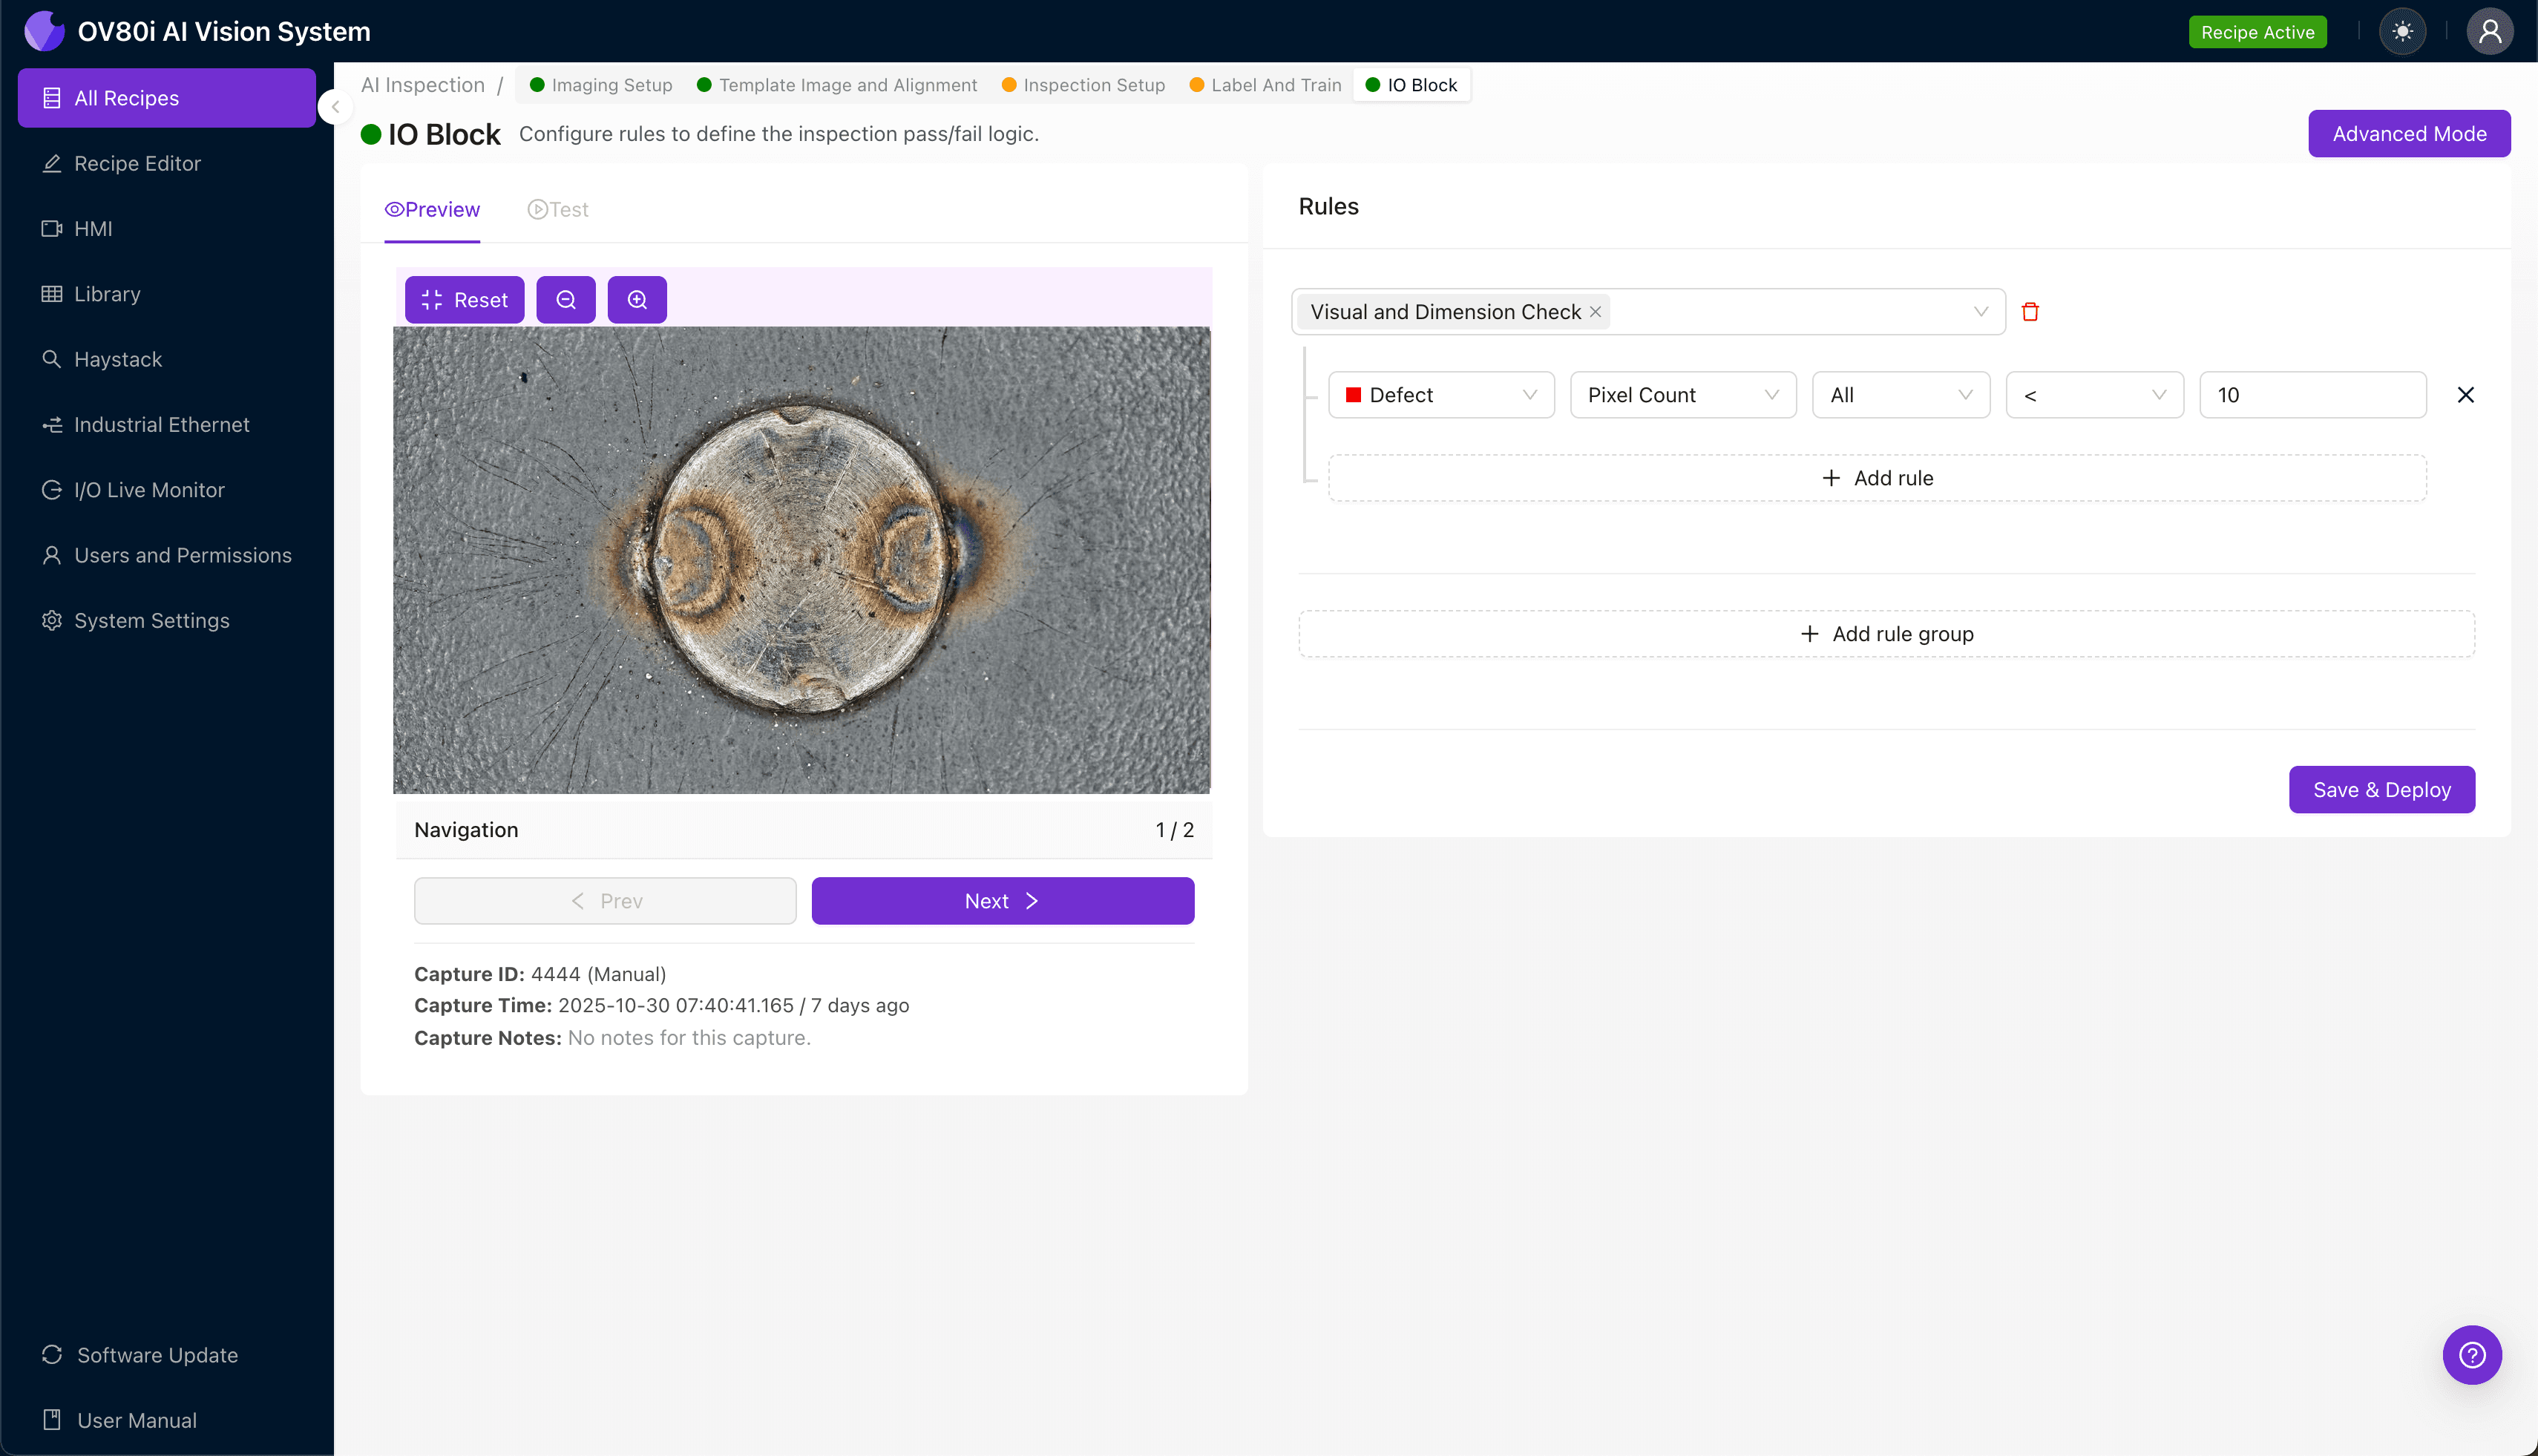
"Electrode sticking marks—caused by excessive heat, contamination, or worn electrodes—create defects that threaten both structural integrity and cosmetic quality. Machine vision systems eliminate the inconsistency inherent in manual inspection, detecting these defects at full line speed with deep learning algorithms."
The Problem: Why Electrode Sticking Marks Compromise Weld Integrity
Resistance welding is a cornerstone of automotive, appliance, and metal fabrication manufacturing. However, electrode sticking marks—caused by excessive heat, contamination, or worn electrodes—create defects that threaten both structural integrity and cosmetic quality.
Common Defects Associated with Electrode Sticking Marks:
- Surface pitting and craters — Material pulled away when the electrode separates from the workpiece
- Copper contamination deposits — Electrode material transferred onto the weld surface
- Irregular weld nugget formation — Inconsistent fusion due to uneven current distribution
- Surface discoloration and burn marks — Excessive heat concentration causing oxidation patterns
- Material thinning at contact points — Localized erosion where sticking occurred repeatedly
- Micro-cracks radiating from stick points — Stress fractures from sudden electrode release
Human inspectors struggle to consistently identify these defects across thousands of welds per shift. Fatigue sets in quickly when examining repetitive, visually similar parts—and subtle copper deposits or micro-cracks are easily missed at production speeds.
The Solution: Machine Vision and Deep Learning
Machine vision systems eliminate the inconsistency inherent in manual inspection. By capturing high-resolution images of every weld and analyzing them with deep learning algorithms, manufacturers can detect defects invisible to the human eye—including subtle surface anomalies that indicate electrode degradation.
Overview.ai's approach delivers consistent, objective inspection at full line speed. The system learns to recognize the specific defect signatures unique to your welding process, adapting to variations in part geometry, lighting conditions, and material finishes without sacrificing accuracy.
Step 1: Imaging Setup
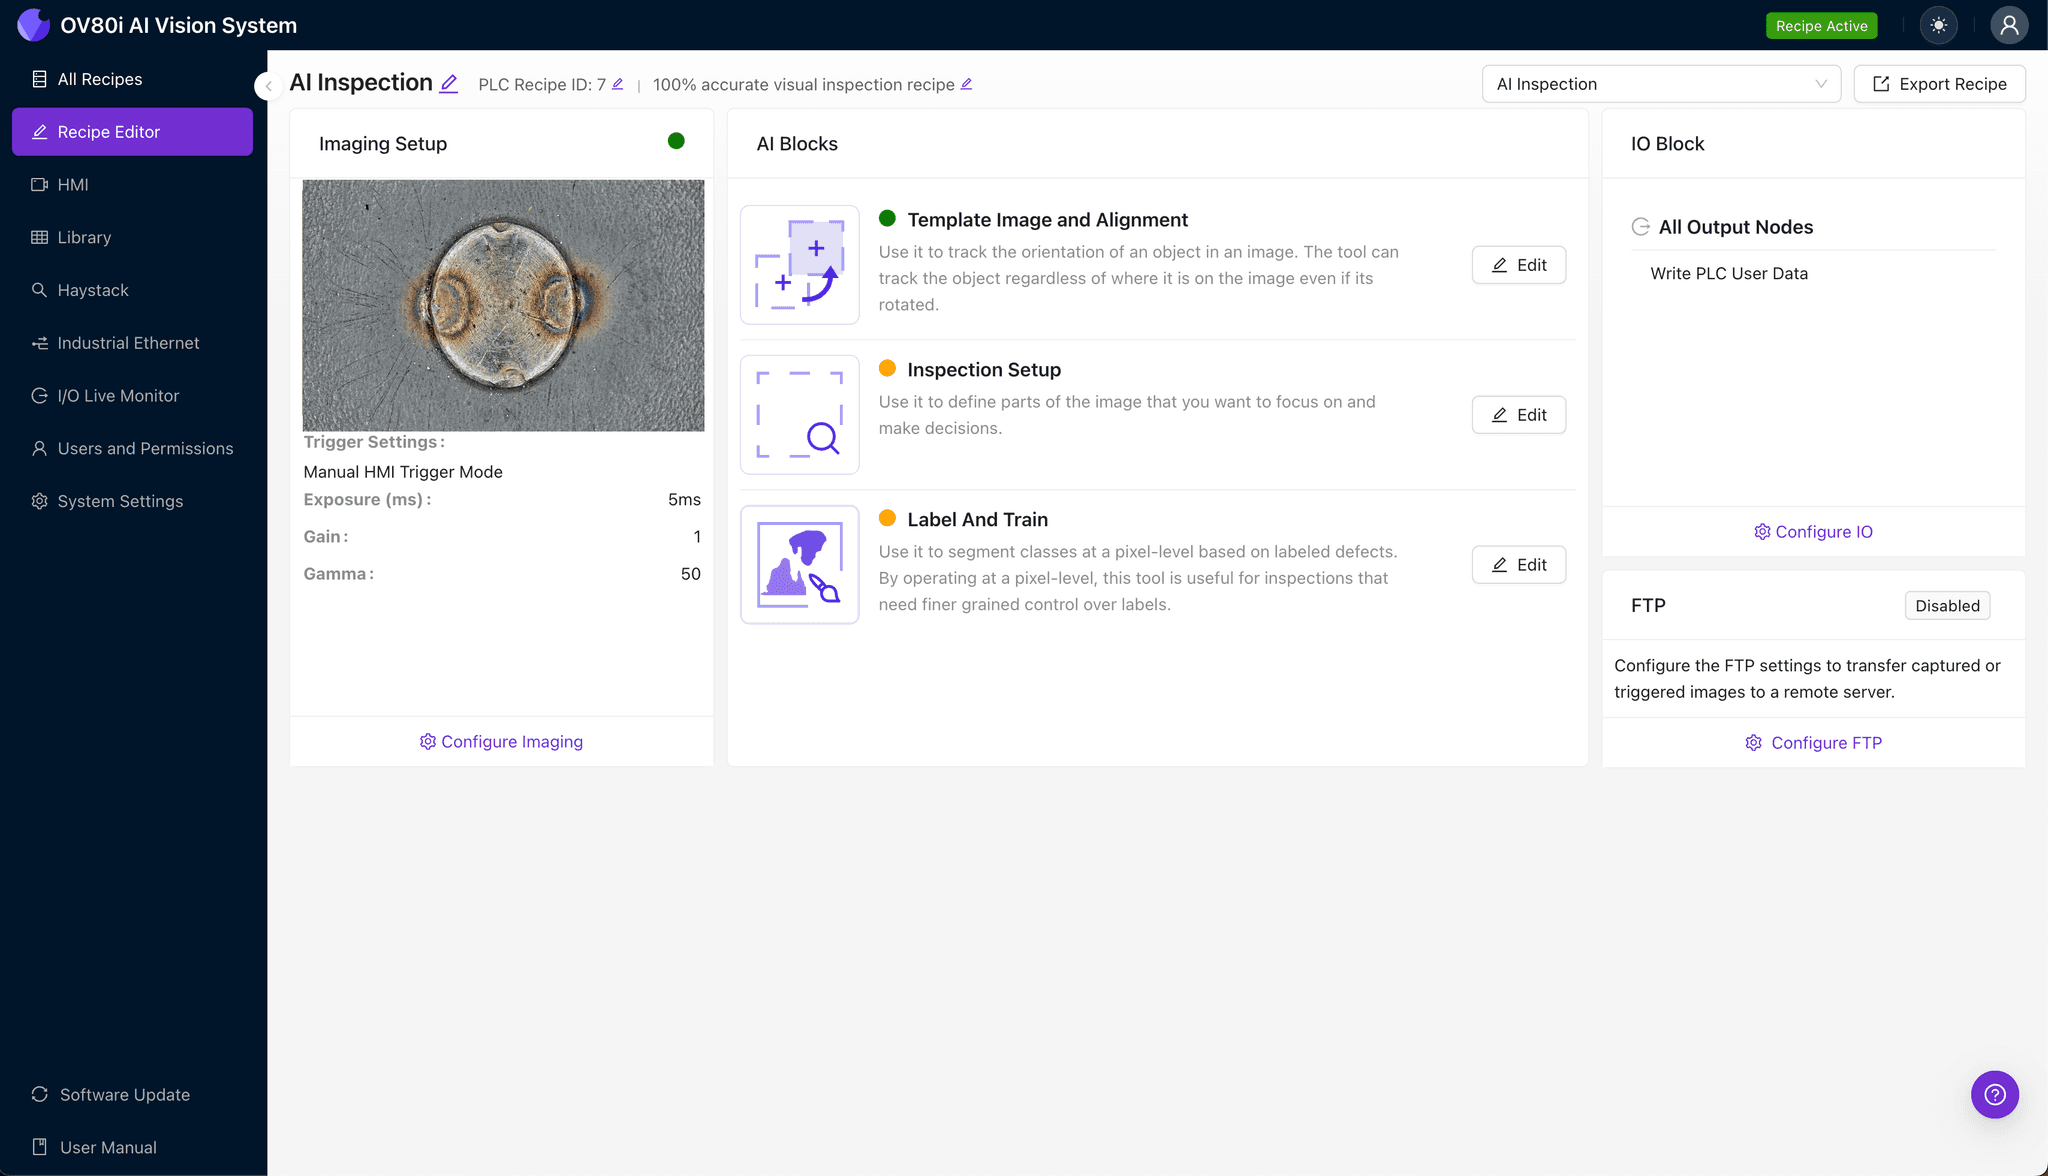
Position the resistance-welded component under the OV80i camera, ensuring the weld zone and surrounding electrode contact area are clearly visible. Proper positioning is critical—the sticking marks and associated surface defects must fall within the camera's field of view.
Click "Configure Imaging" to access the Camera Settings panel. Adjust exposure to reveal surface texture details and gain to balance brightness without introducing noise—electrode marks often appear as subtle tonal variations that require precise calibration.
Click "Save" to lock in your optimized imaging parameters.
Step 2: Image Alignment
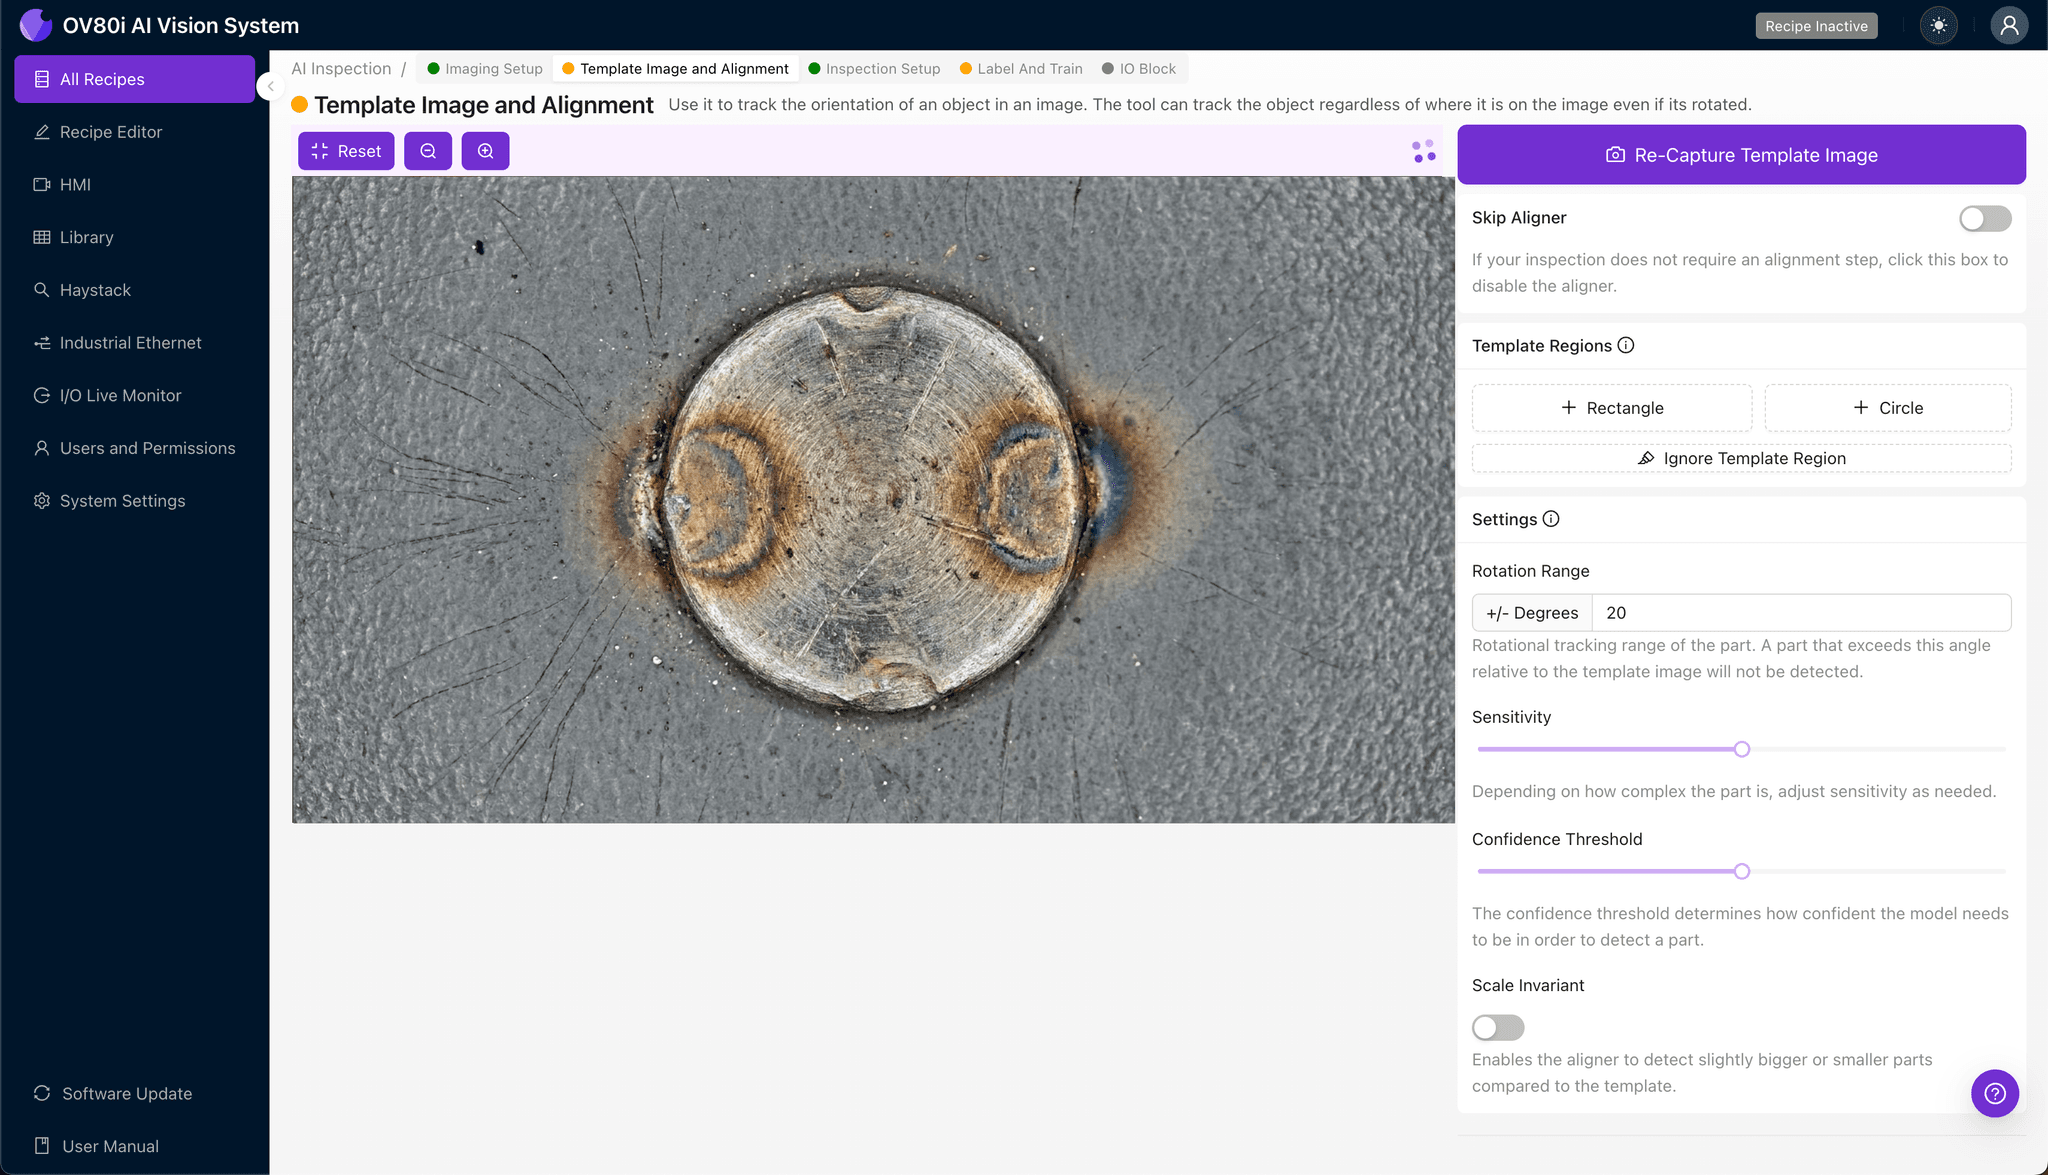
Navigate to "Template Image" and capture a reference image of a properly positioned weld. This template ensures every subsequent part aligns correctly for consistent inspection, regardless of minor placement variations on the conveyor or fixture.
Click "+ Rectangle" to add an alignment region around the main weld body and electrode contact zone. Set the "Rotation Range" to 20 degrees to accommodate typical part orientation variability during automated handling.
Step 3: Inspection Region Selection
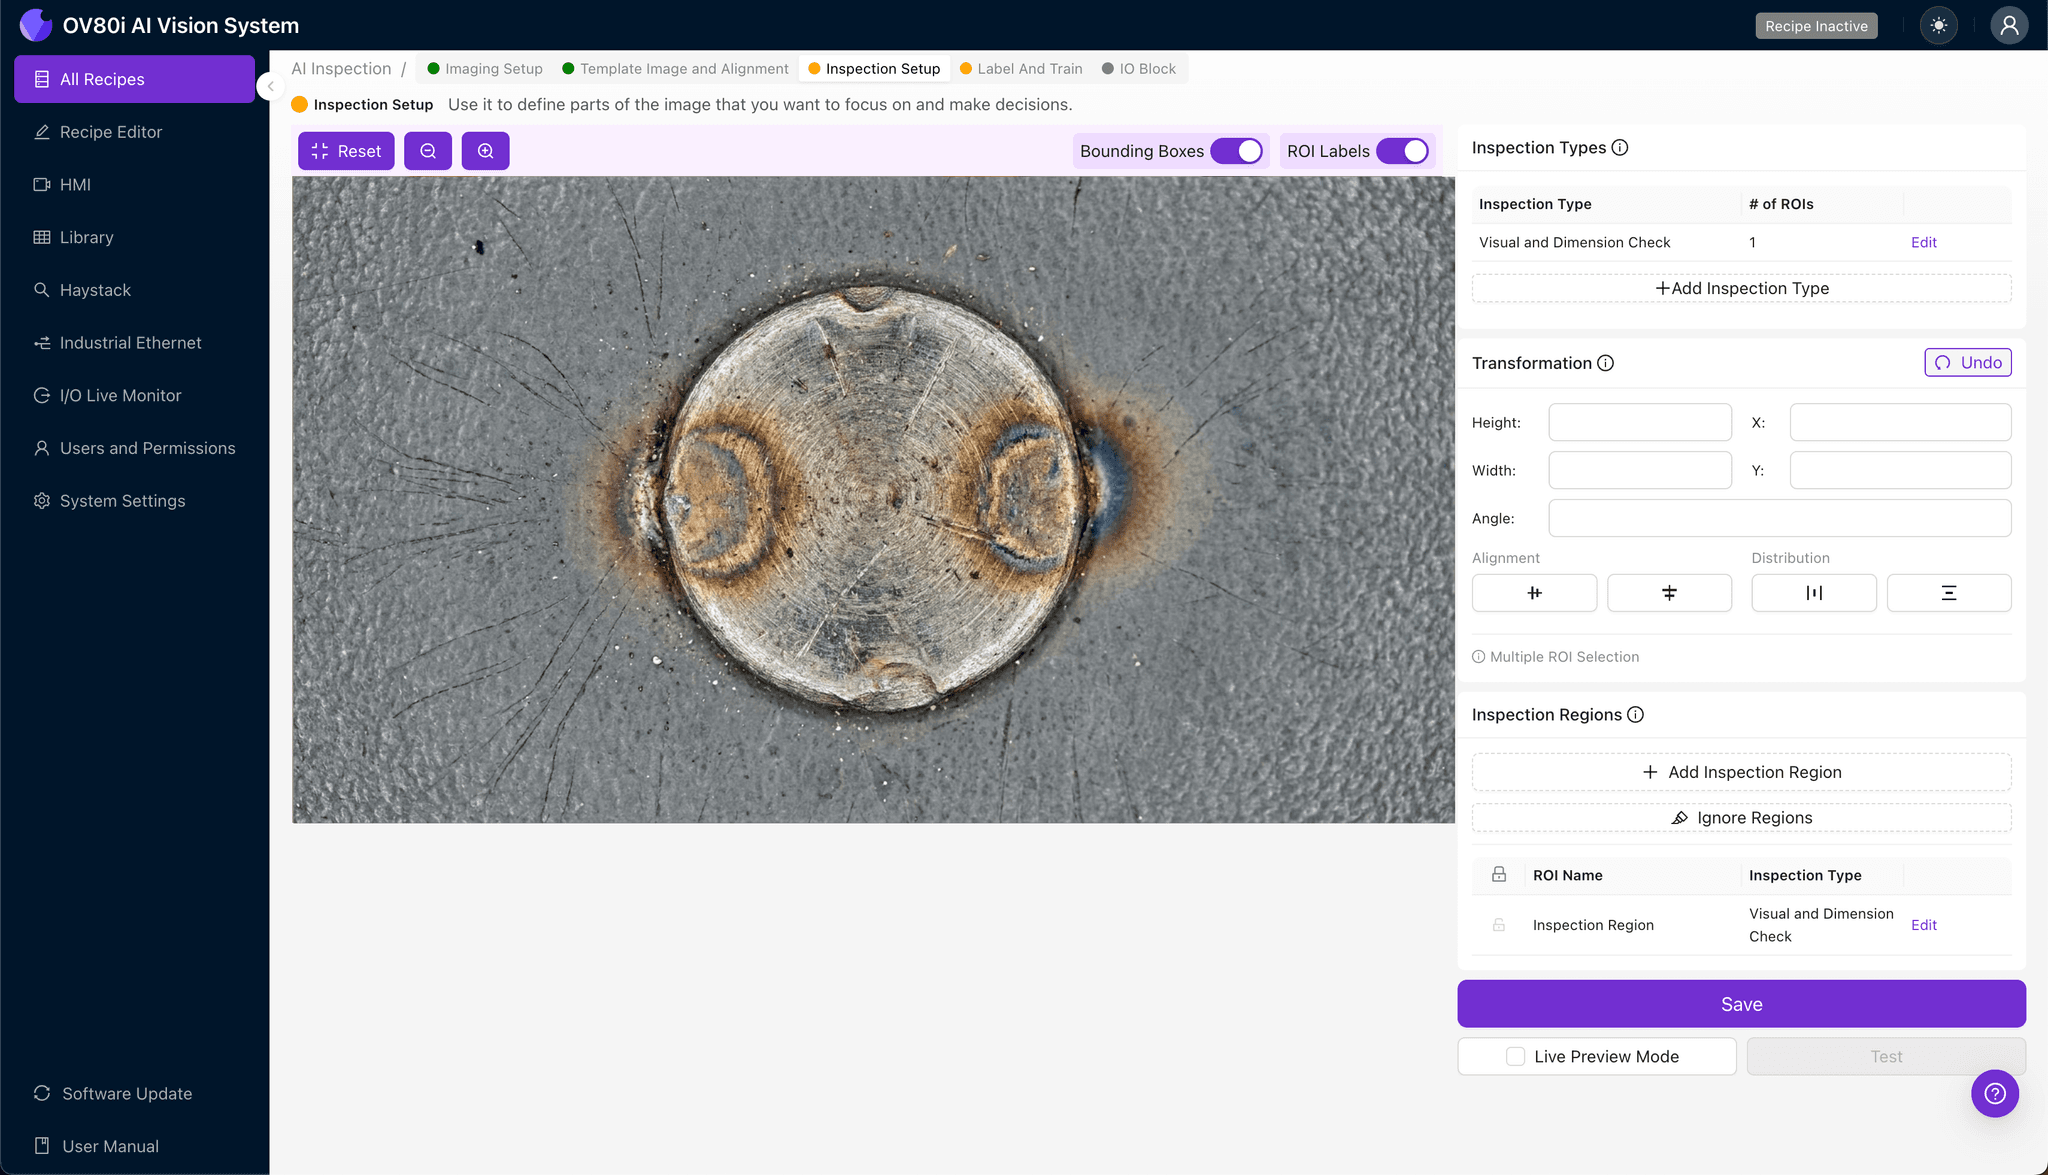
Navigate to "Inspection Setup" to define where the system should look for defects. Rename your "Inspection Types" with descriptive labels such as "Electrode_Stick_Surface" or "Weld_Nugget_Zone" for clear traceability.
Click "+ Add Inspection Region" to create a new detection area. Resize the yellow bounding box to cover the critical electrode contact surfaces where sticking marks typically appear—focus on the weld crown and the peripheral heat-affected zones.
Click "Save" to confirm your inspection configuration.
Step 4: Labeling Data
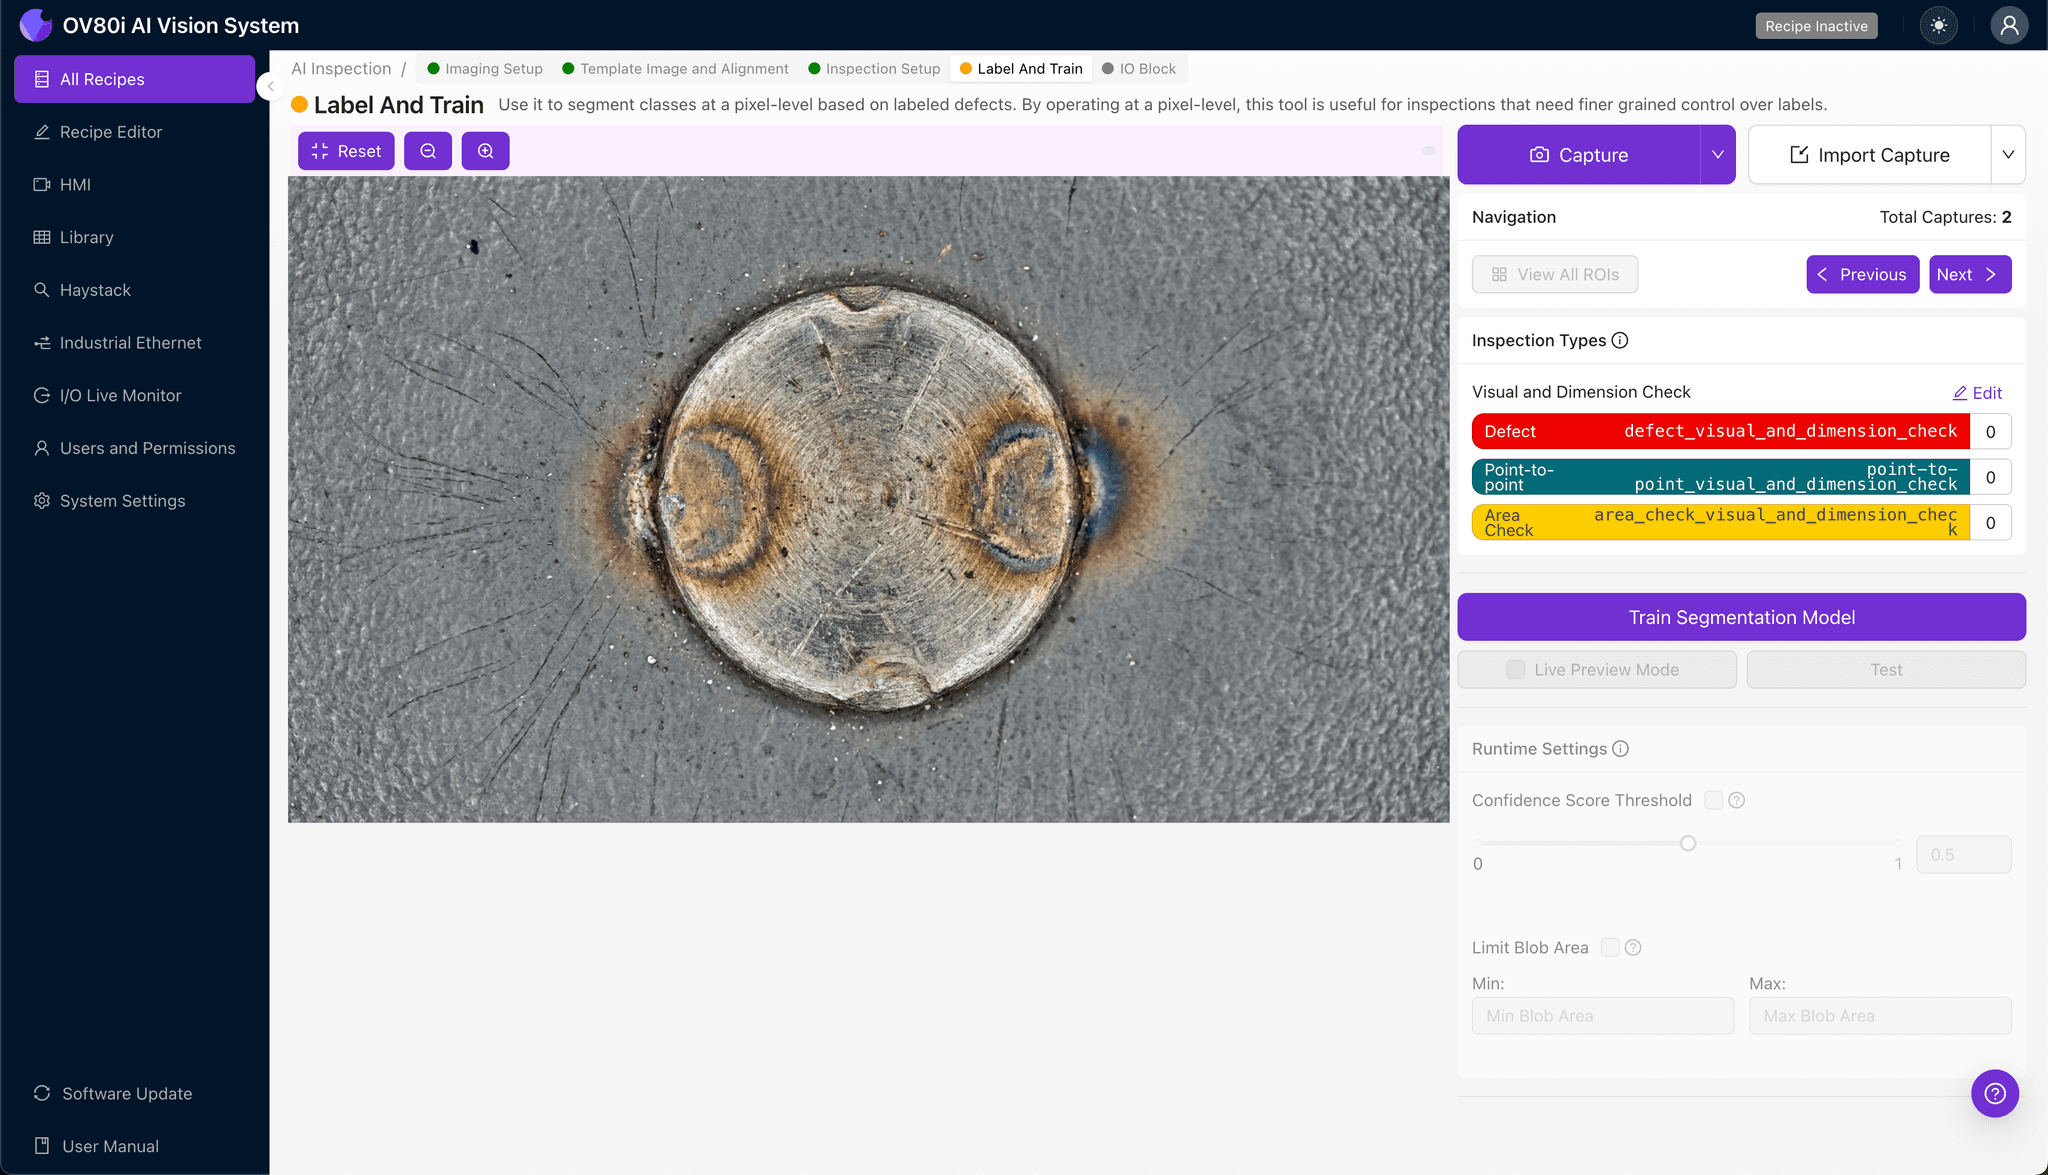
The human-in-the-loop labeling process teaches the AI what constitutes acceptable versus defective welds. Review captured images and categorize each as Good (clean weld surface, no sticking evidence) or Bad (visible pitting, copper transfer, discoloration).
Include representative samples across your full range of production conditions—different material batches, electrode wear states, and weld schedules. Be sure to label known failure modes like heavy copper contamination and crater formation to build a robust detection model.
Step 5: Creating Rules
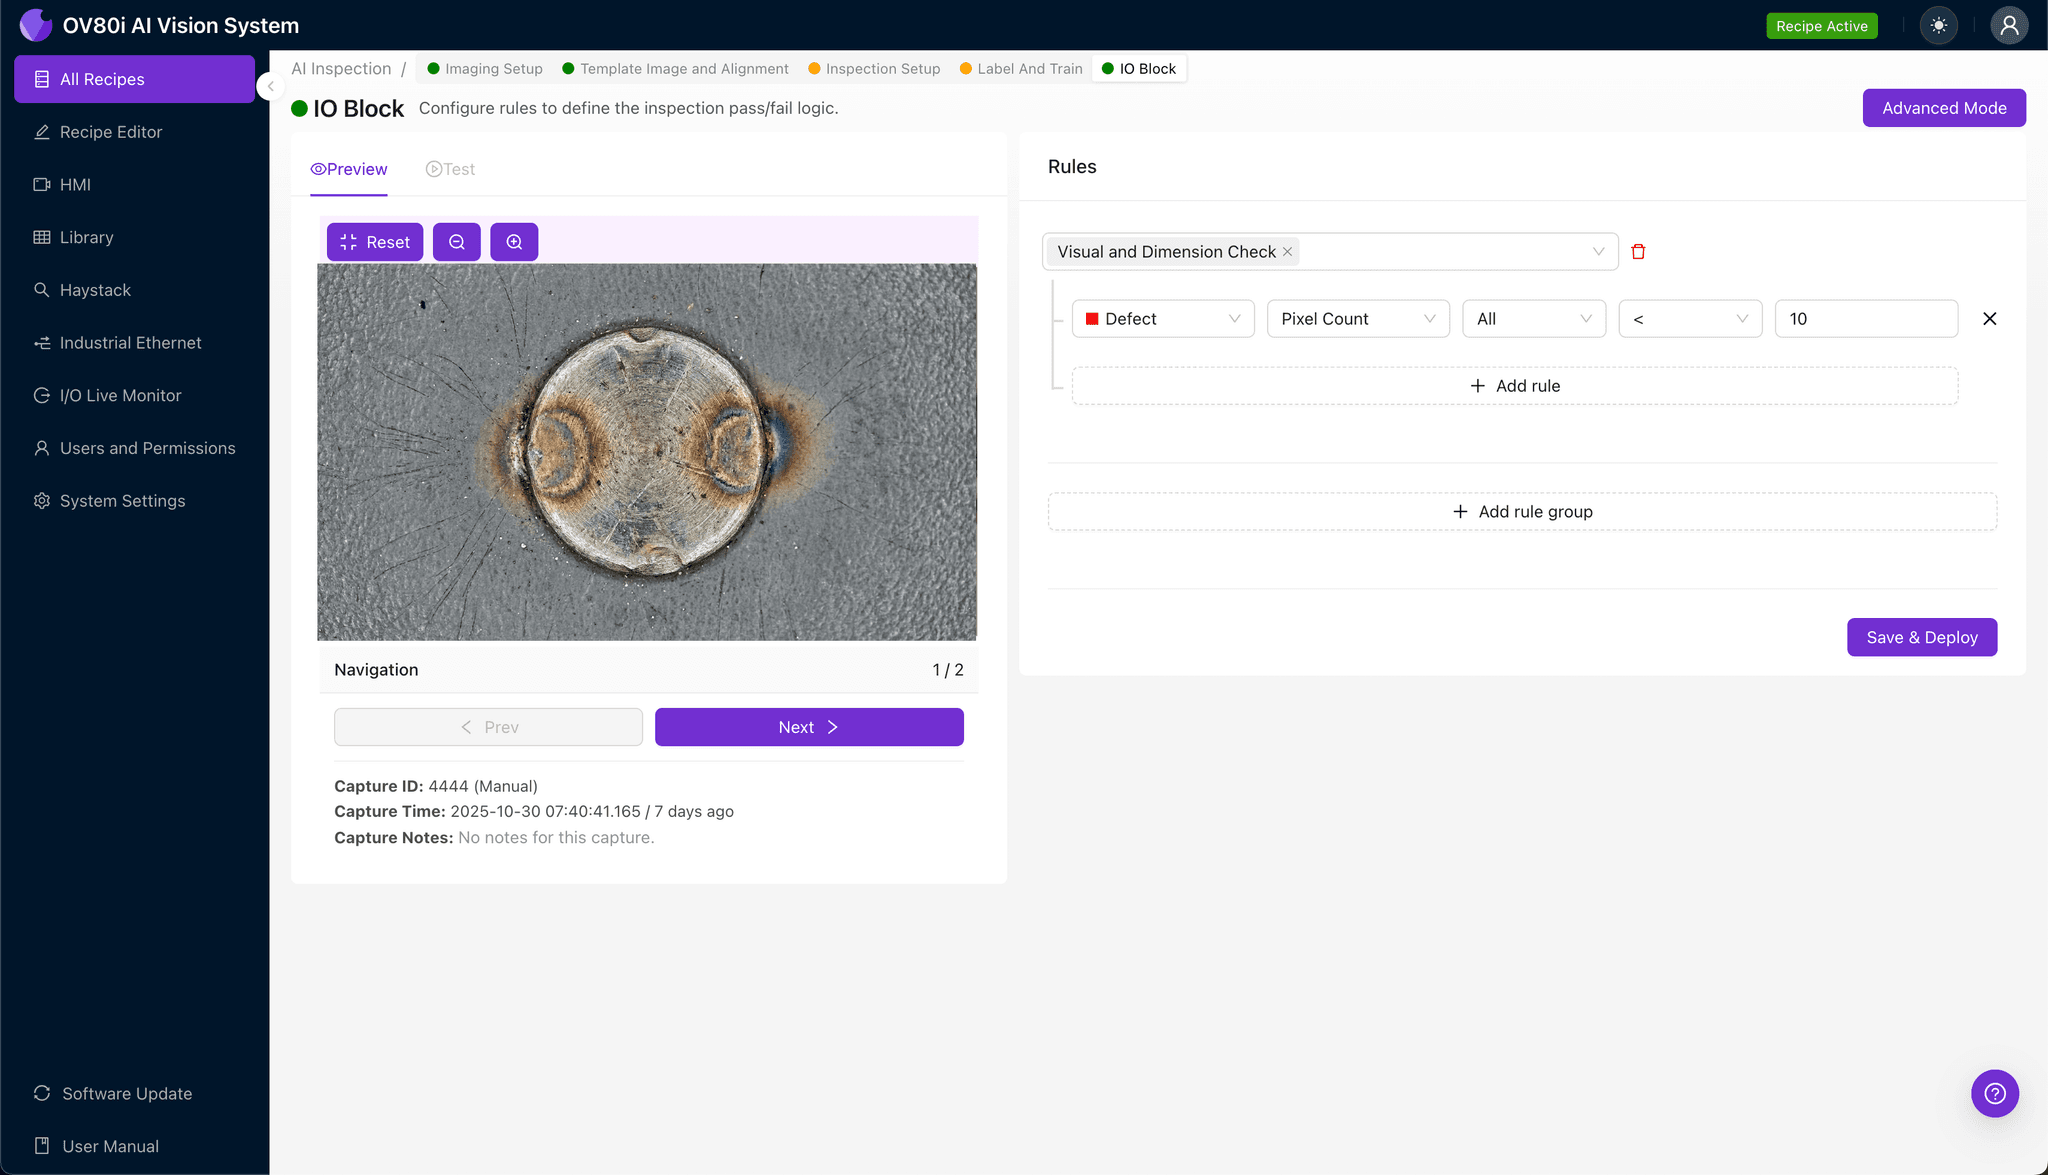
Set your pass/fail logic based on the Inspection Types you defined earlier. For example, configure the system to reject any part where "Electrode_Stick_Surface" returns a defect confidence score above your validated threshold.
Gate automated acceptance on the production line so that flagged parts route to rework or quarantine stations. This closed-loop approach ensures no defective welds reach downstream assembly or final customers.
Key Outcomes & ROI
Implementing automated visual inspection for electrode sticking marks delivers measurable business value:
- Reduced scrap rates — Catch defective welds before they advance through costly downstream processes
- Higher throughput — Inspect 100% of production at line speed without creating bottlenecks
- Compliance and traceability — Maintain complete inspection records for quality audits and customer requirements
- Process improvement insights — Identify electrode wear patterns and sticking trends to optimize maintenance schedules
Conclusion
Electrode sticking marks represent a persistent challenge in resistance welding operations—but they don't have to compromise your quality metrics. With Overview.ai's deep learning-powered visual inspection, you can detect these defects consistently, objectively, and at the speed your production demands.
Ready to eliminate electrode sticking escapes from your welding line? Contact Overview.ai to schedule a demonstration with your actual production parts.
Eliminate Electrode Sticking Defects Today
Stop relying on manual inspection for your resistance welding line. Deploy Overview.ai to catch electrode sticking marks instantly and protect your quality metrics.