
How to Detect Broken Wire Strands in Shielding Braid Using AI-Powered Visual Inspection
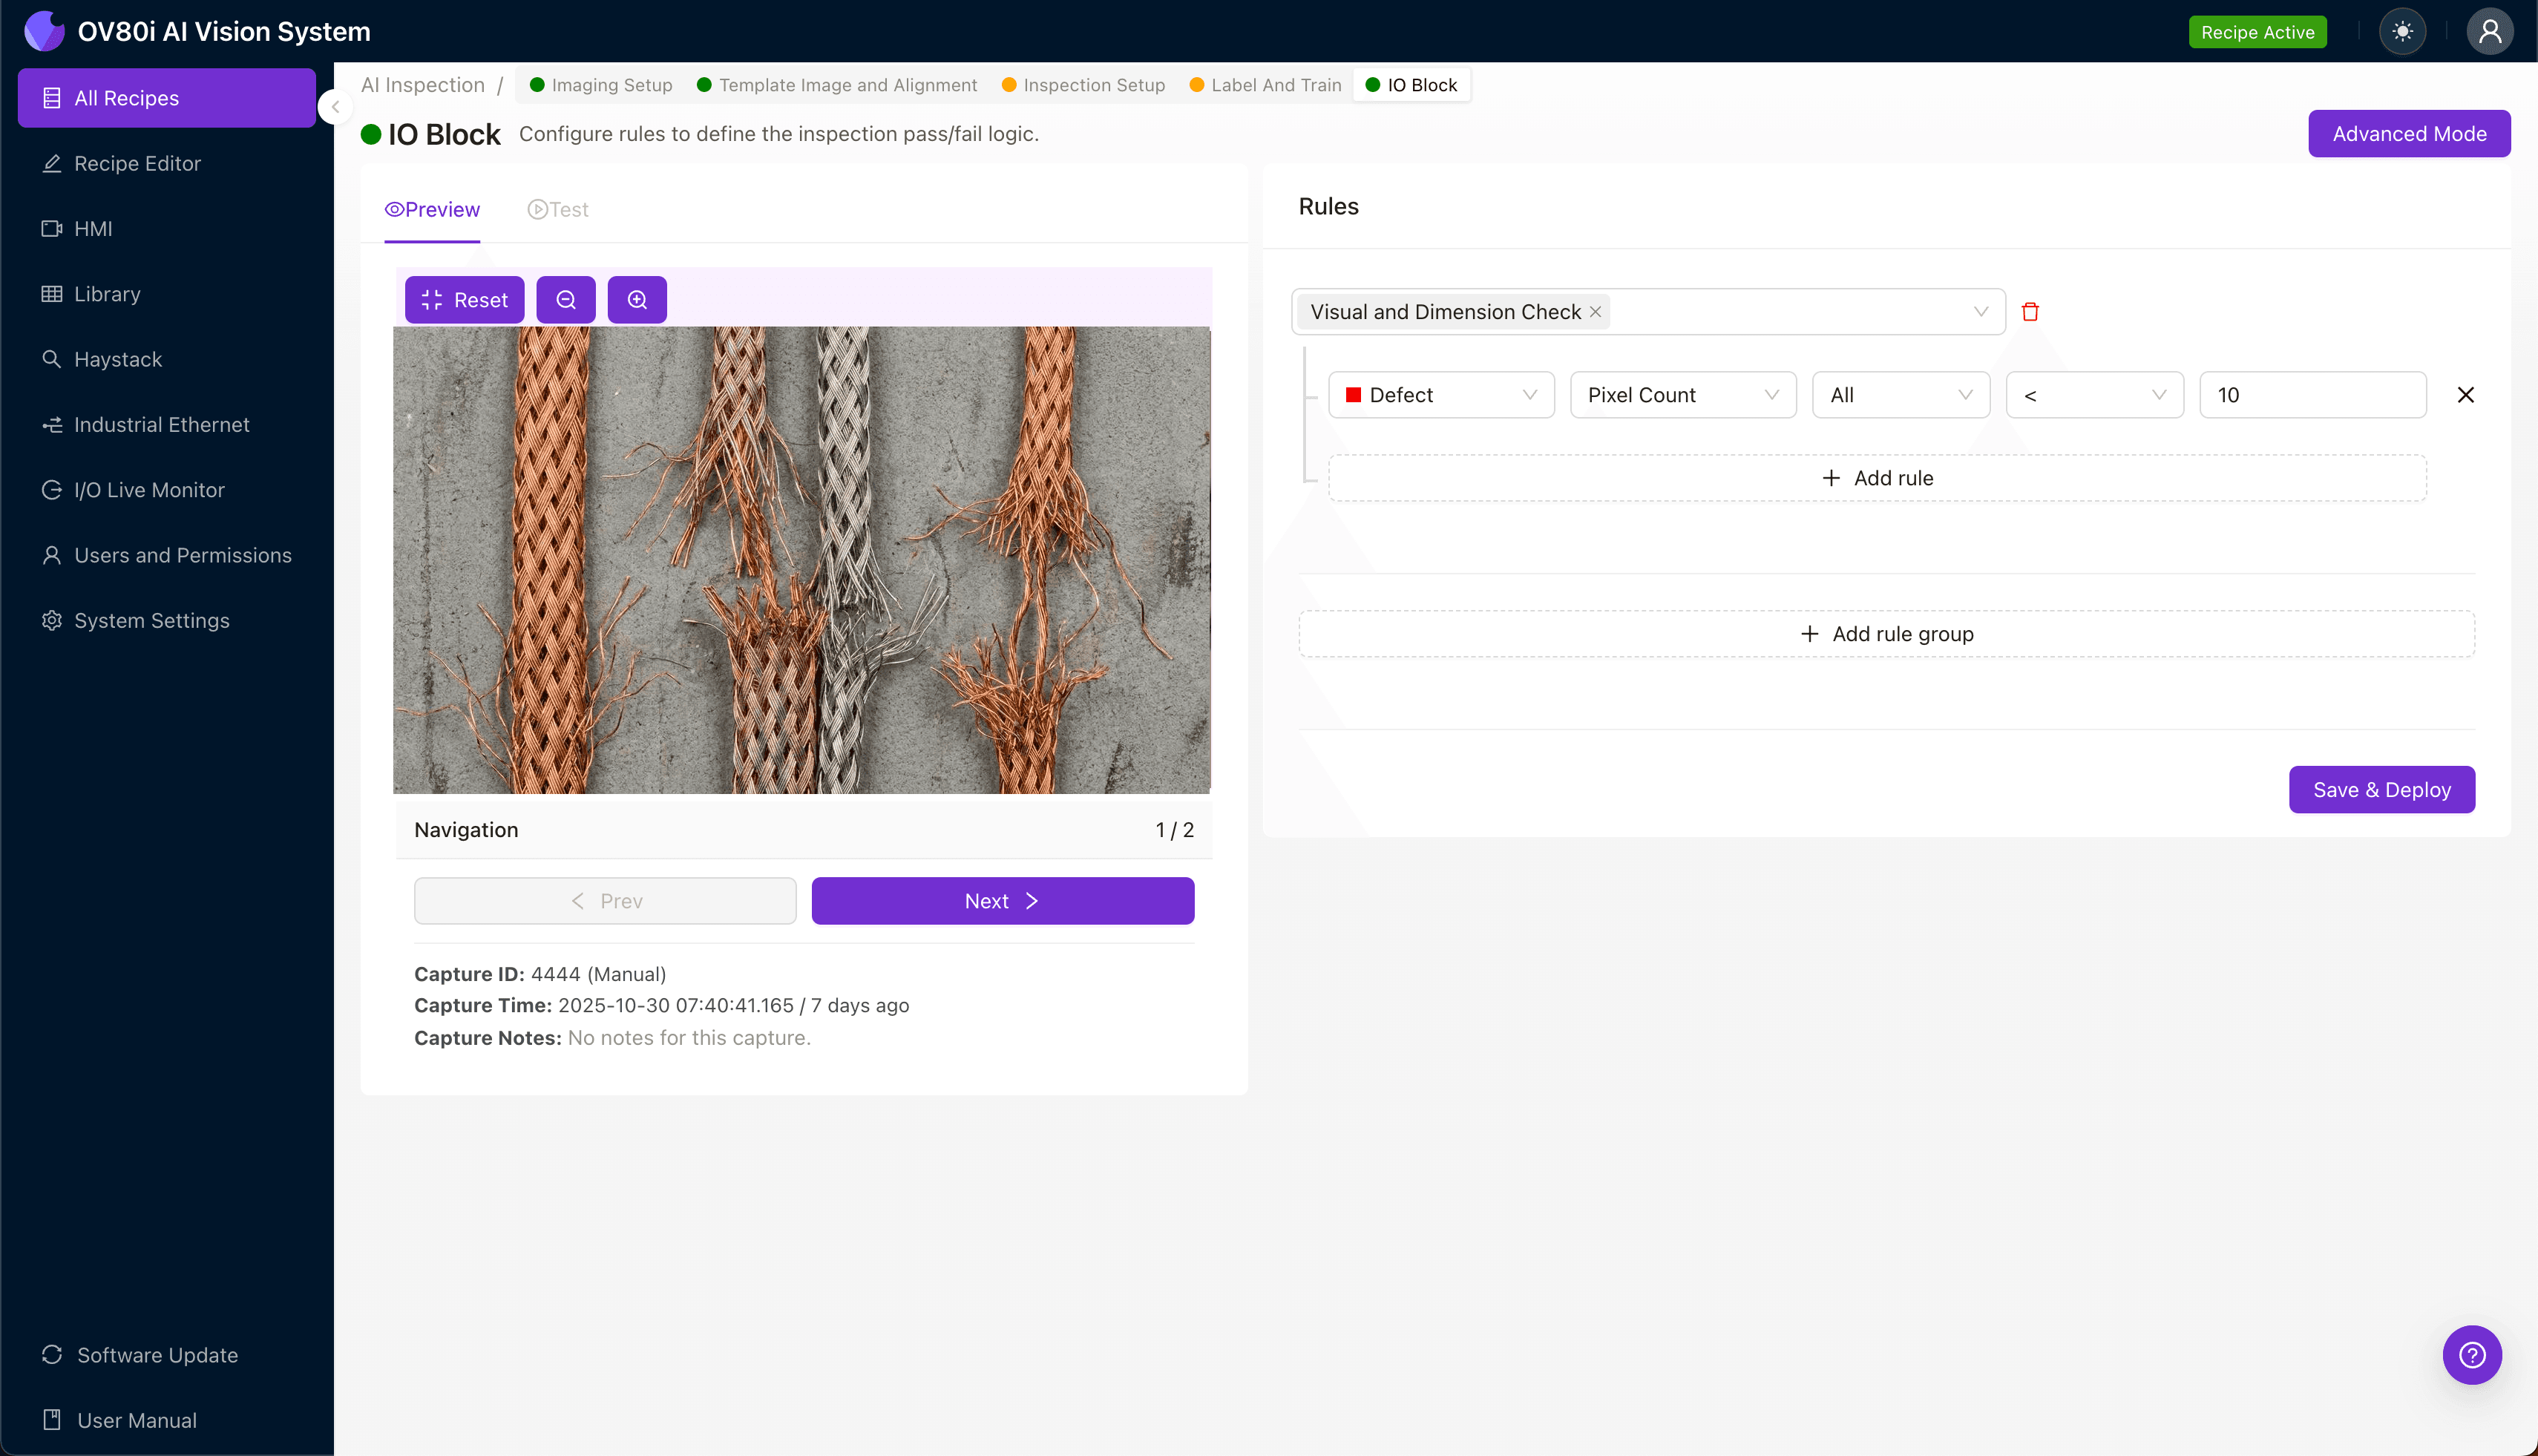
"Broken wire strands in shielding braid compromise EMI protection and often escape manual detection due to their fine 0.1mm diameter. Overview.ai's deep learning system inspects 100% of production at line speed, catching defects that human inspectors miss over 30% of the time."
The Problem: Why Broken Wire Strands Go Undetected
Shielding braid is critical for electromagnetic interference (EMI) protection in cables used across aerospace, automotive, and telecommunications applications. Even a single broken wire strand can compromise shielding effectiveness, leading to signal degradation and product failures in the field.
Common Defects in Shielding Braid Manufacturing
- Broken or fractured wire strands — Individual filaments that have snapped during braiding or handling
- Protruding wire ends — Broken strands that extend beyond the braid surface, creating snag hazards
- Strand separation — Gaps where broken wires have pulled away from the weave pattern
- Frayed termination points — Damaged areas where strands have begun to unravel
- Inconsistent braid density — Thin spots caused by missing or broken filaments
- Surface contamination — Metal shavings or debris from broken strands trapped in the weave
Manual inspection of shielding braid is notoriously unreliable. The fine wire strands—often just 0.1mm in diameter—create a visually complex, reflective surface that causes inspector fatigue within minutes.
Human inspectors typically catch fewer than 70% of broken strand defects, and consistency drops dramatically across shifts and operators.
The Solution: Machine Vision and Deep Learning
AI-powered visual inspection eliminates the variability inherent in human inspection. Deep learning models can be trained to recognize the subtle visual signatures of broken wire strands—even when they're partially hidden within the braid pattern.
Unlike rule-based machine vision, deep learning adapts to the natural variation in braided products without requiring perfect positioning or lighting conditions.
Overview.ai's approach delivers consistent, objective inspection at full line speed. The OV80i system inspects 100% of production rather than relying on sampling, catching defects that would otherwise ship to customers.
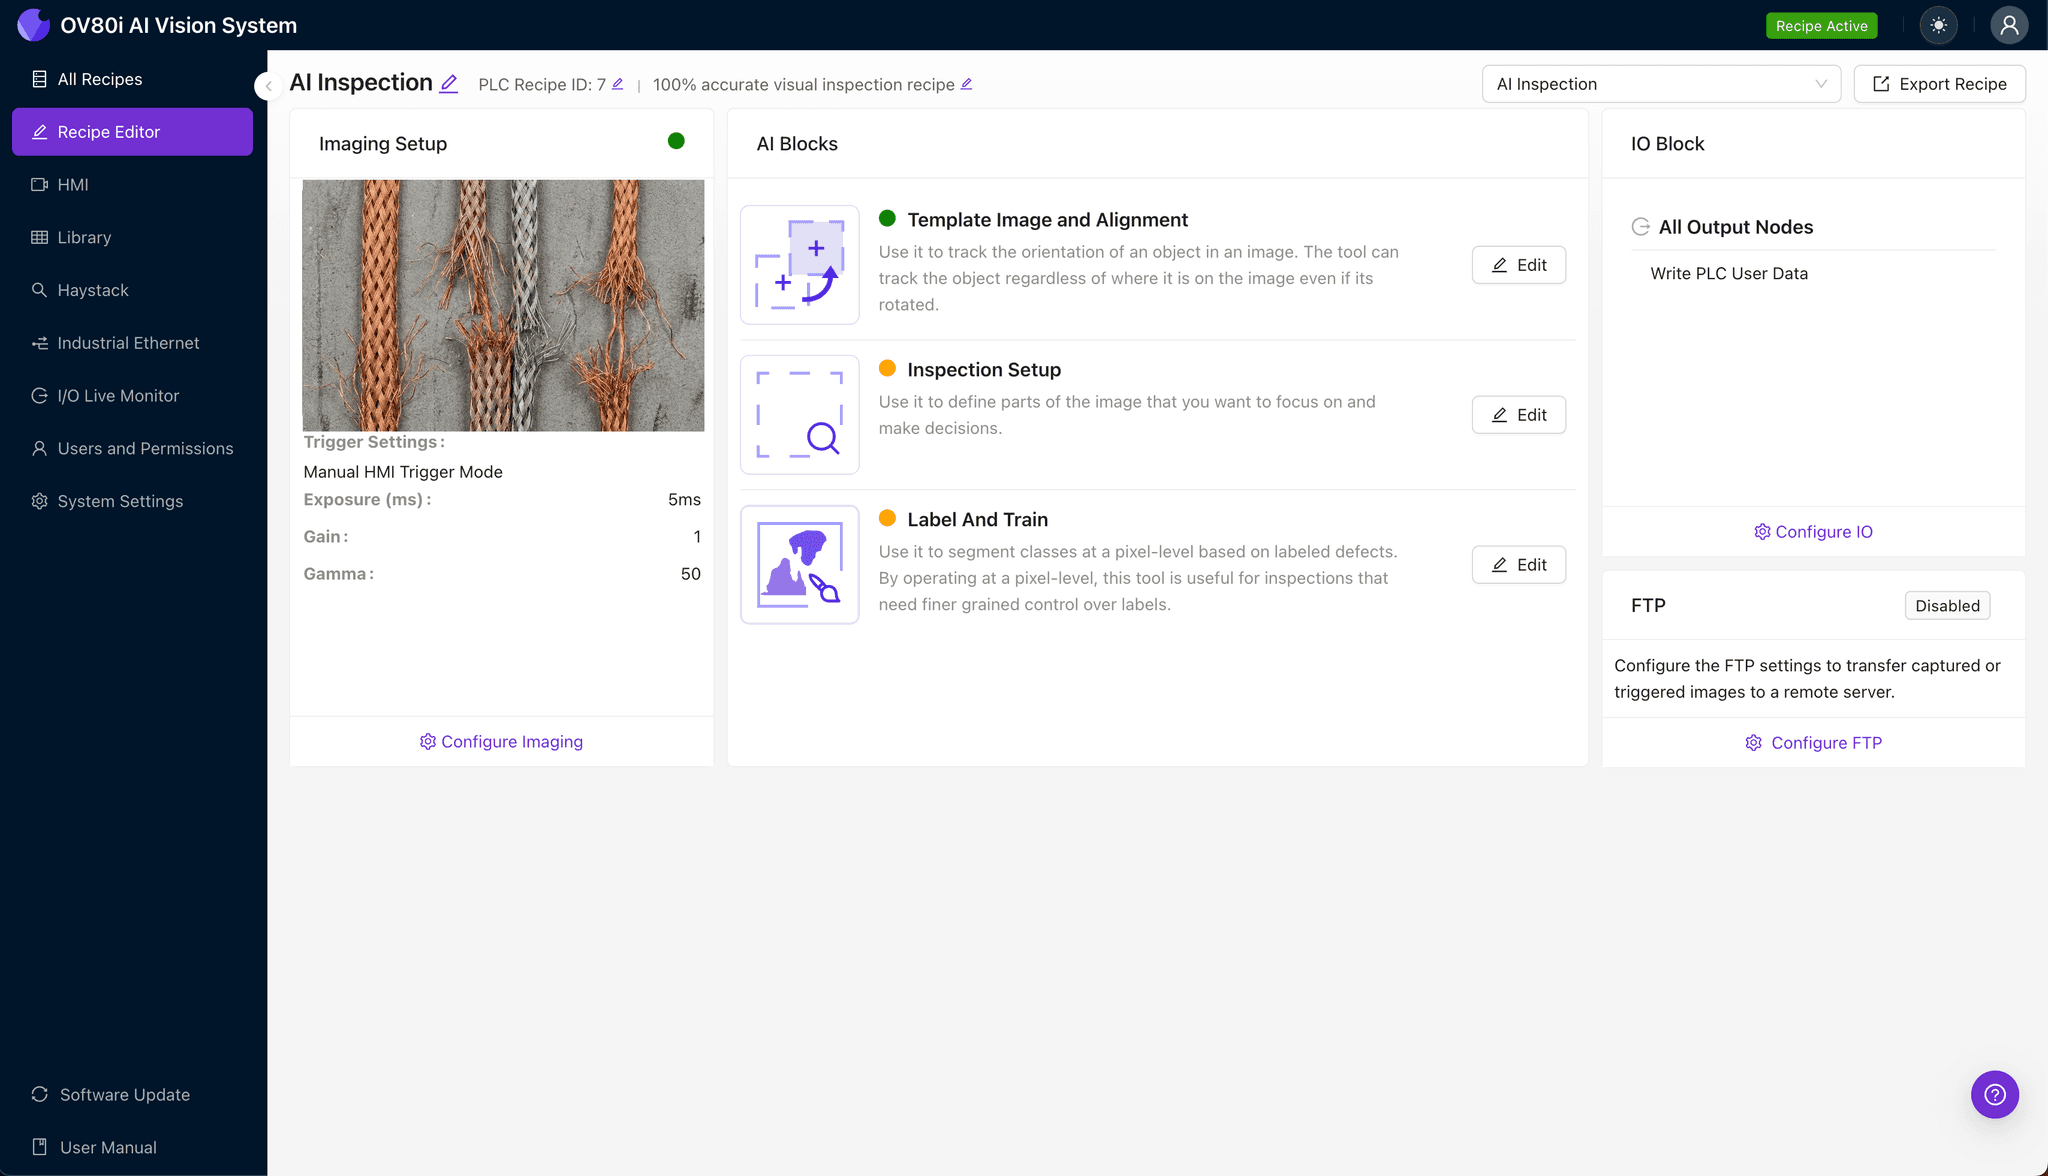
Step 1: Imaging Setup
Position the shielding braid sample under the OV80i camera, ensuring the inspection area is fully visible in the field of view. Proper lighting is essential—use diffuse illumination to minimize glare from the metallic wire surfaces.
Click "Configure Imaging" in the Overview interface. Adjust the Camera Settings, including exposure time and gain, until broken strands are clearly distinguishable from intact braid.
Click "Save" to lock in your imaging parameters.
Step 2: Image Alignment
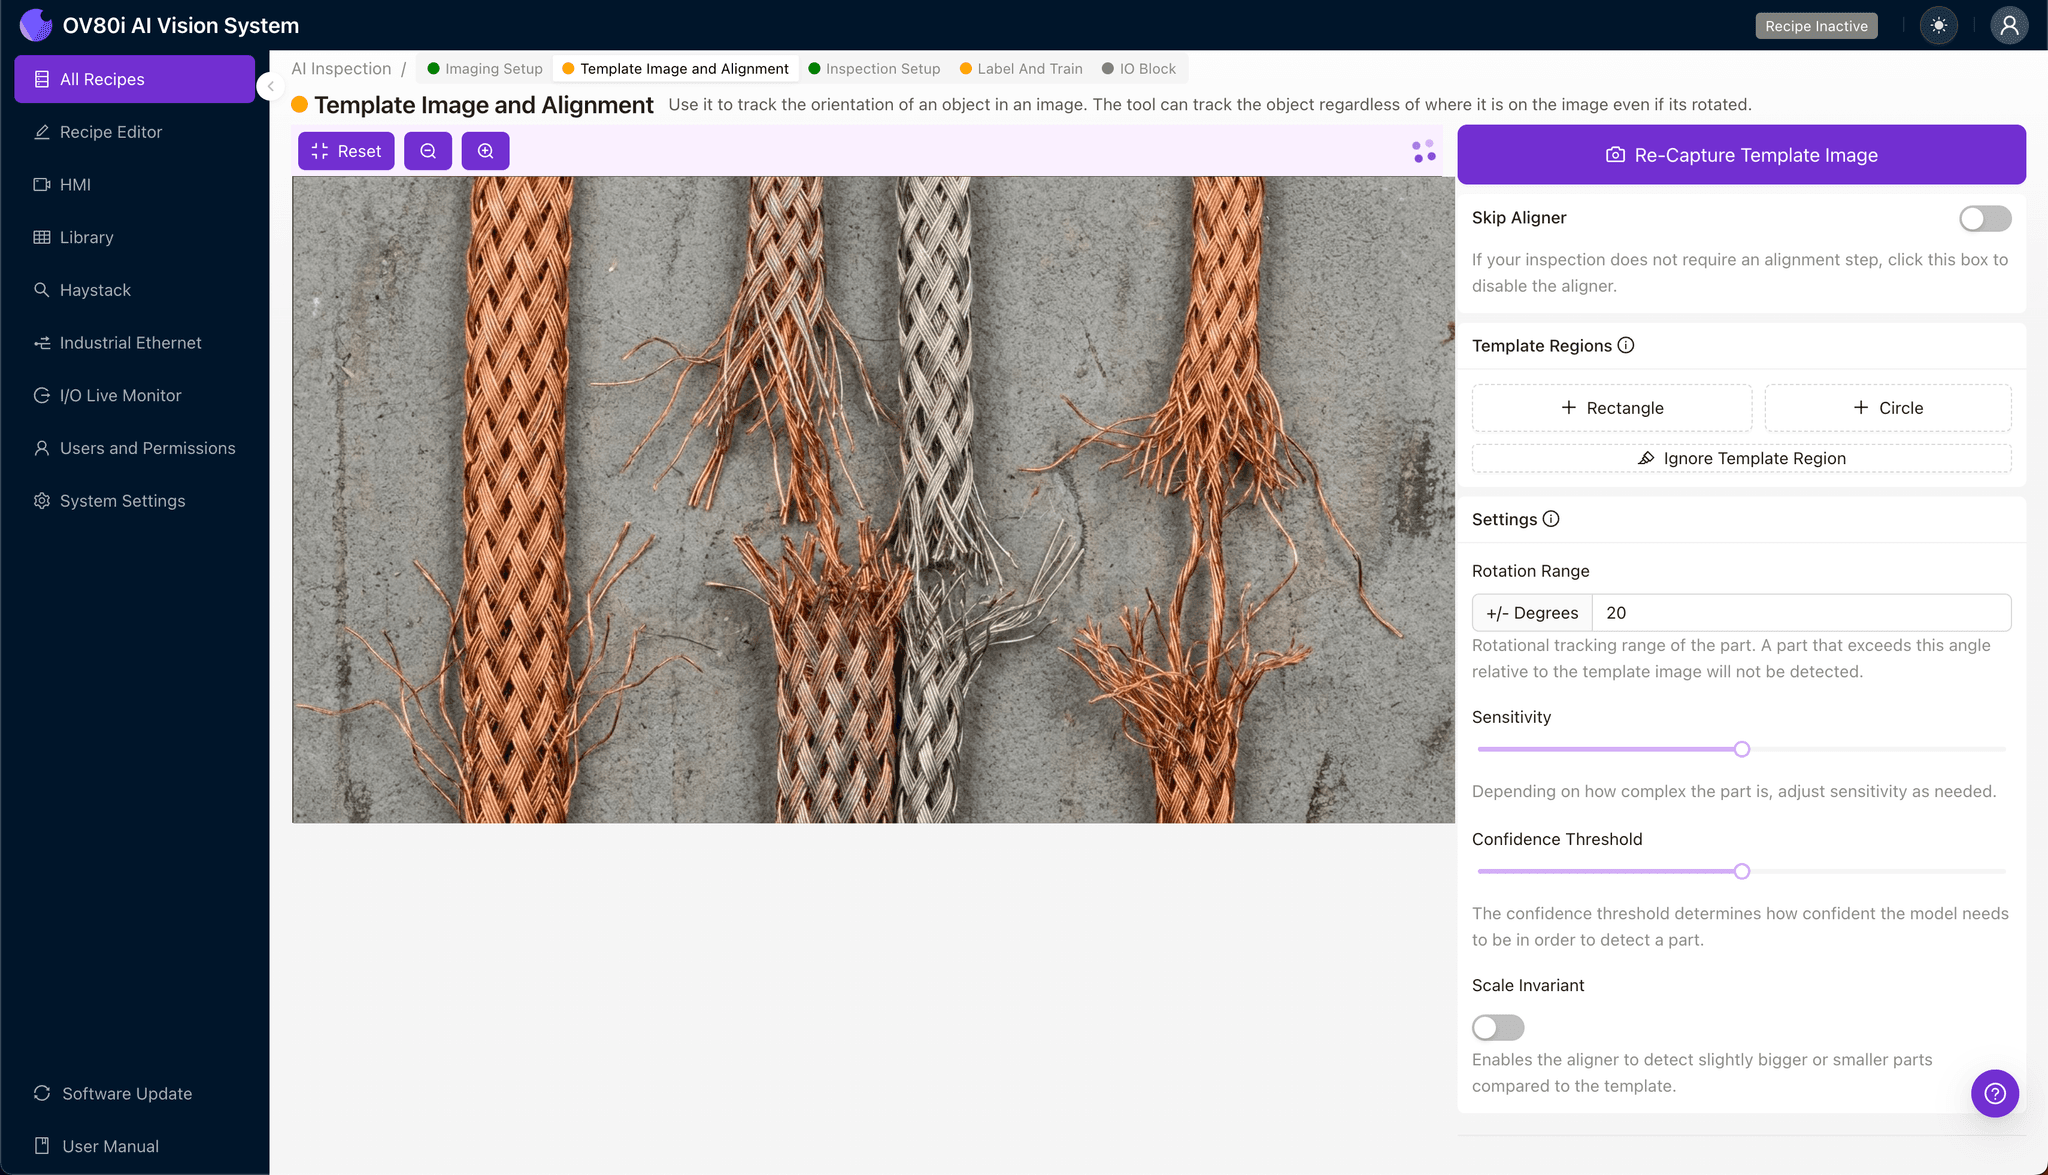
Navigate to the "Template Image" tab and capture a Template of your shielding braid in its standard orientation. This reference image enables the system to track part position across production variation.
Click "+ Rectangle" to add a region around the main body of the braid section. Set the "Rotation Range" to 20 degrees to accommodate normal variation in how parts present to the camera.
Step 3: Inspection Region Selection
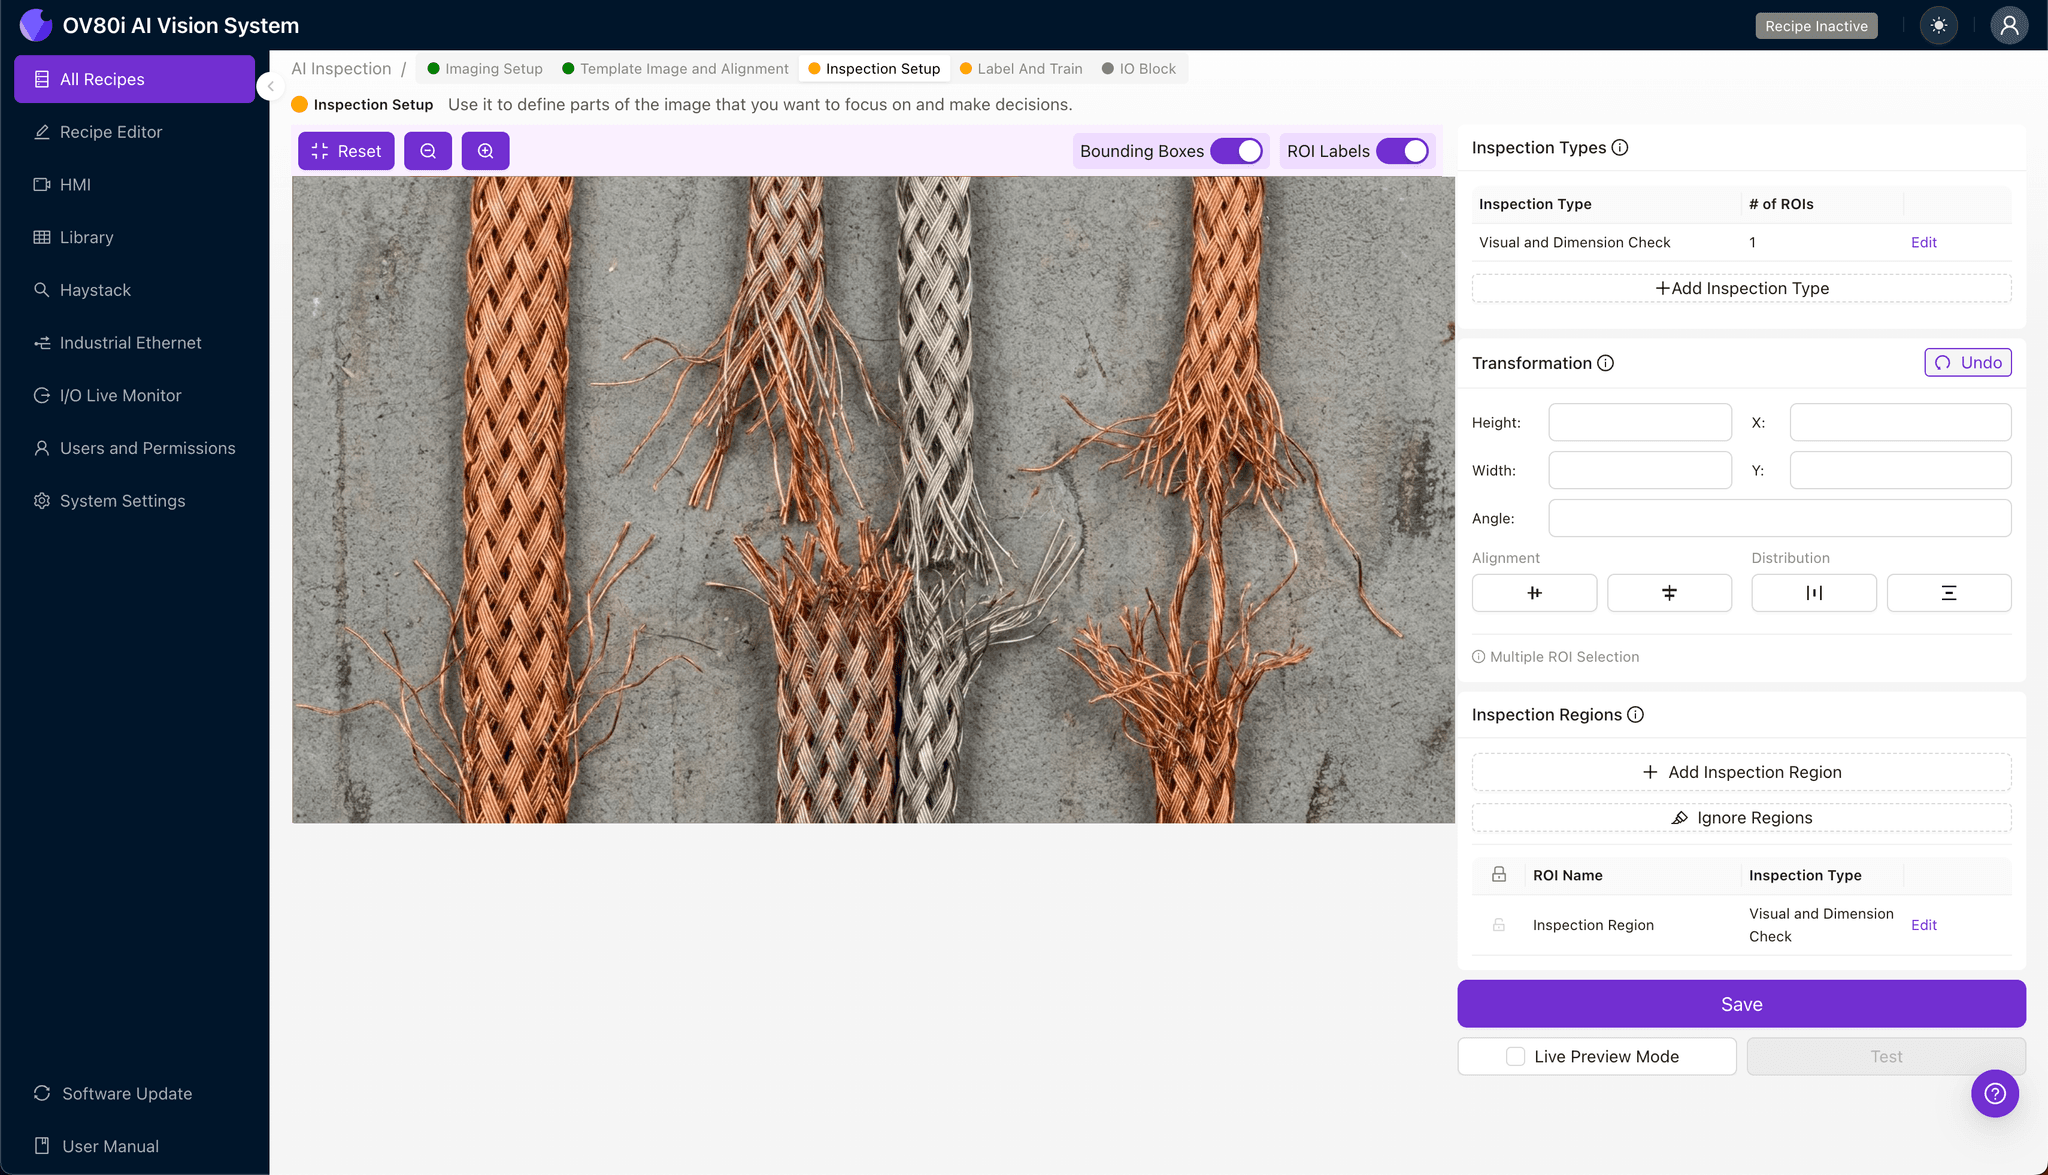
Navigate to "Inspection Setup" to define where the system should look for defects. Rename your "Inspection Types" to match your quality criteria—for example, "Broken_Strand" and "Frayed_Edge."
Click "+ Add Inspection Region" to create a new zone. Resize the yellow bounding box to cover the critical defect areas—typically the full braid surface and termination points.
Click "Save" to confirm your inspection regions.
Step 4: Labeling Data
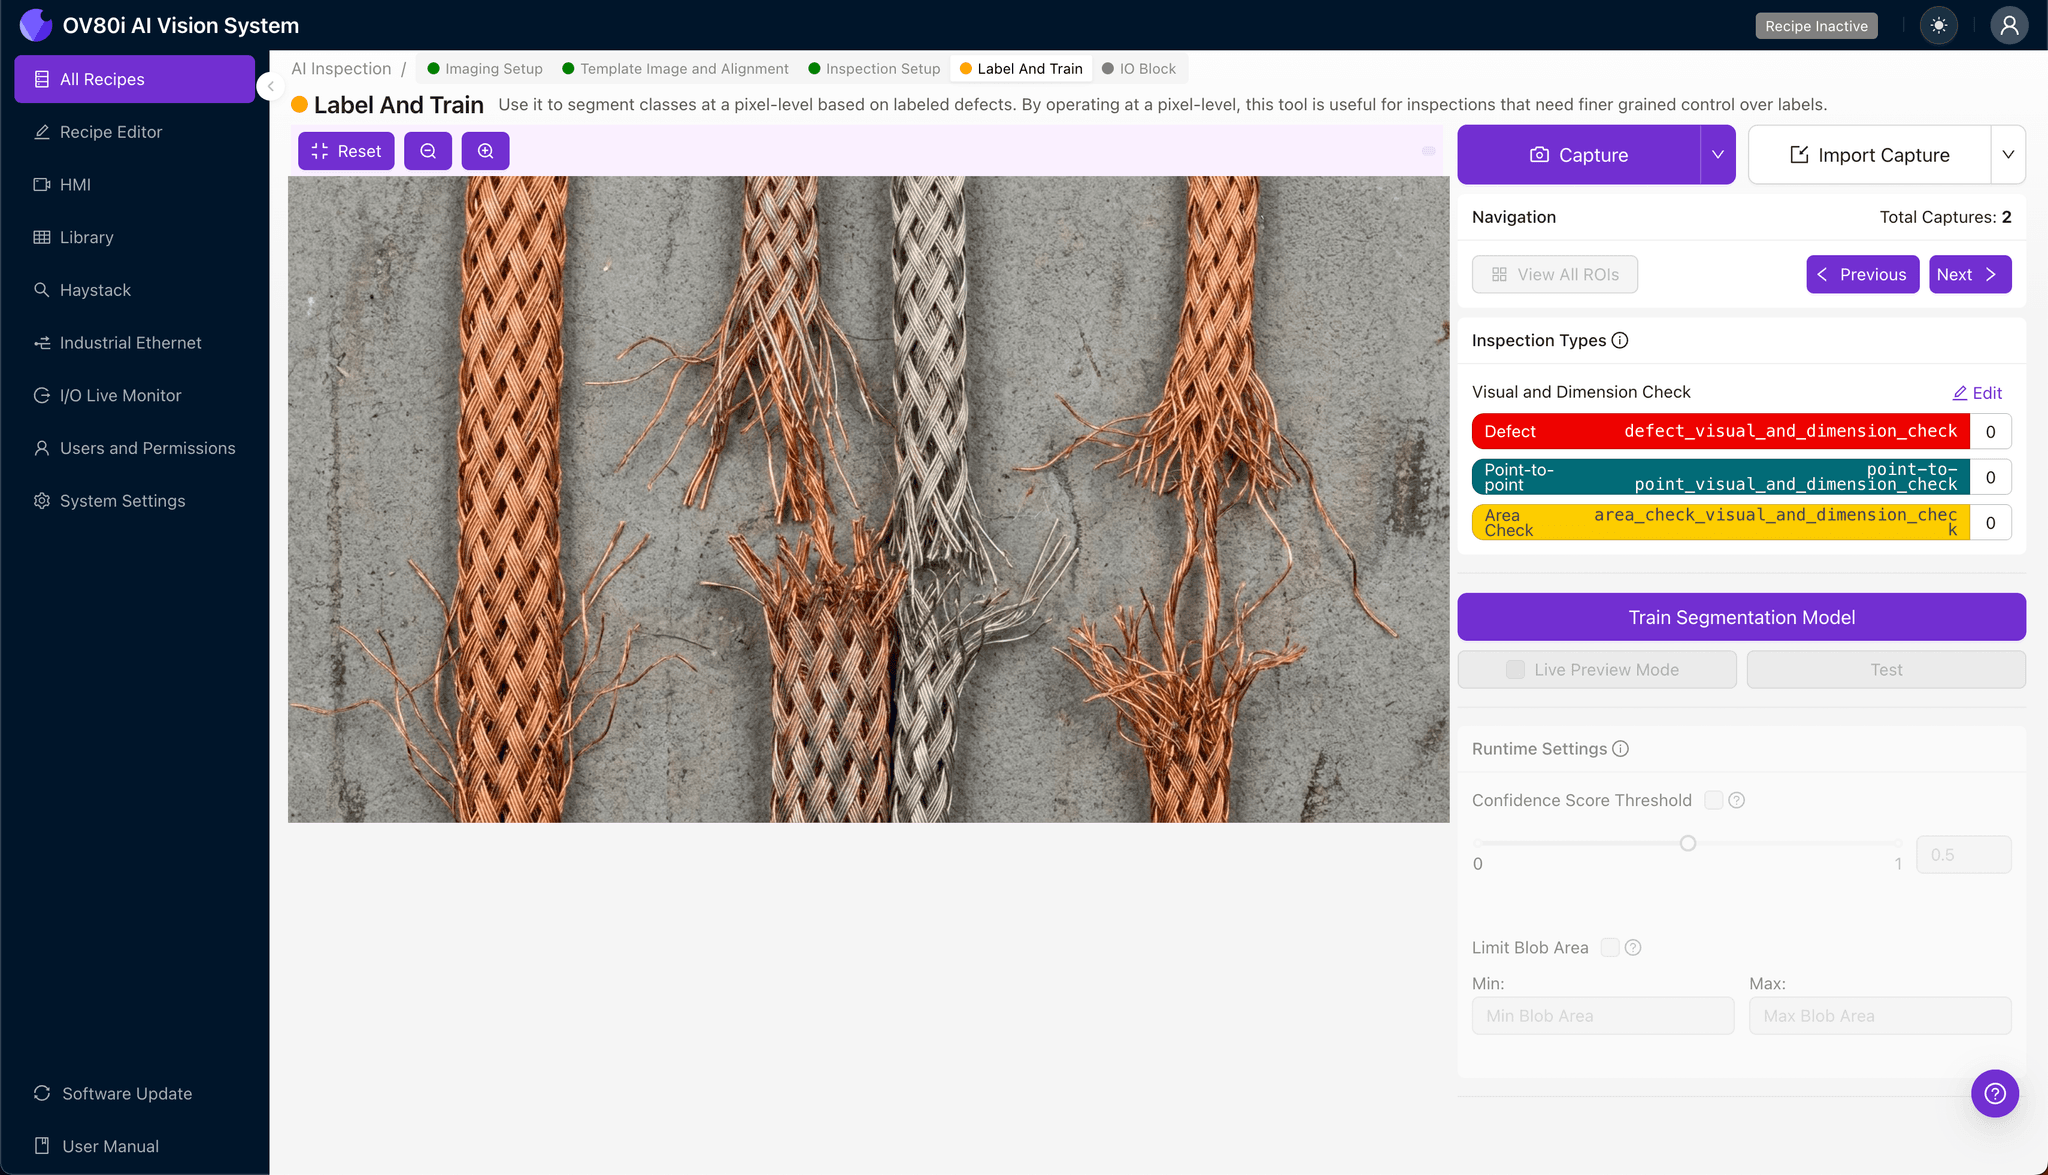
The human-in-the-loop labeling process trains your AI model to distinguish acceptable parts from rejects. As production runs, review captured images and label them as Good or Bad based on your quality standards.
Include representative samples of all known failure modes in your training set. The more examples of broken strands, protrusions, and edge defects you label, the more robust your model becomes.
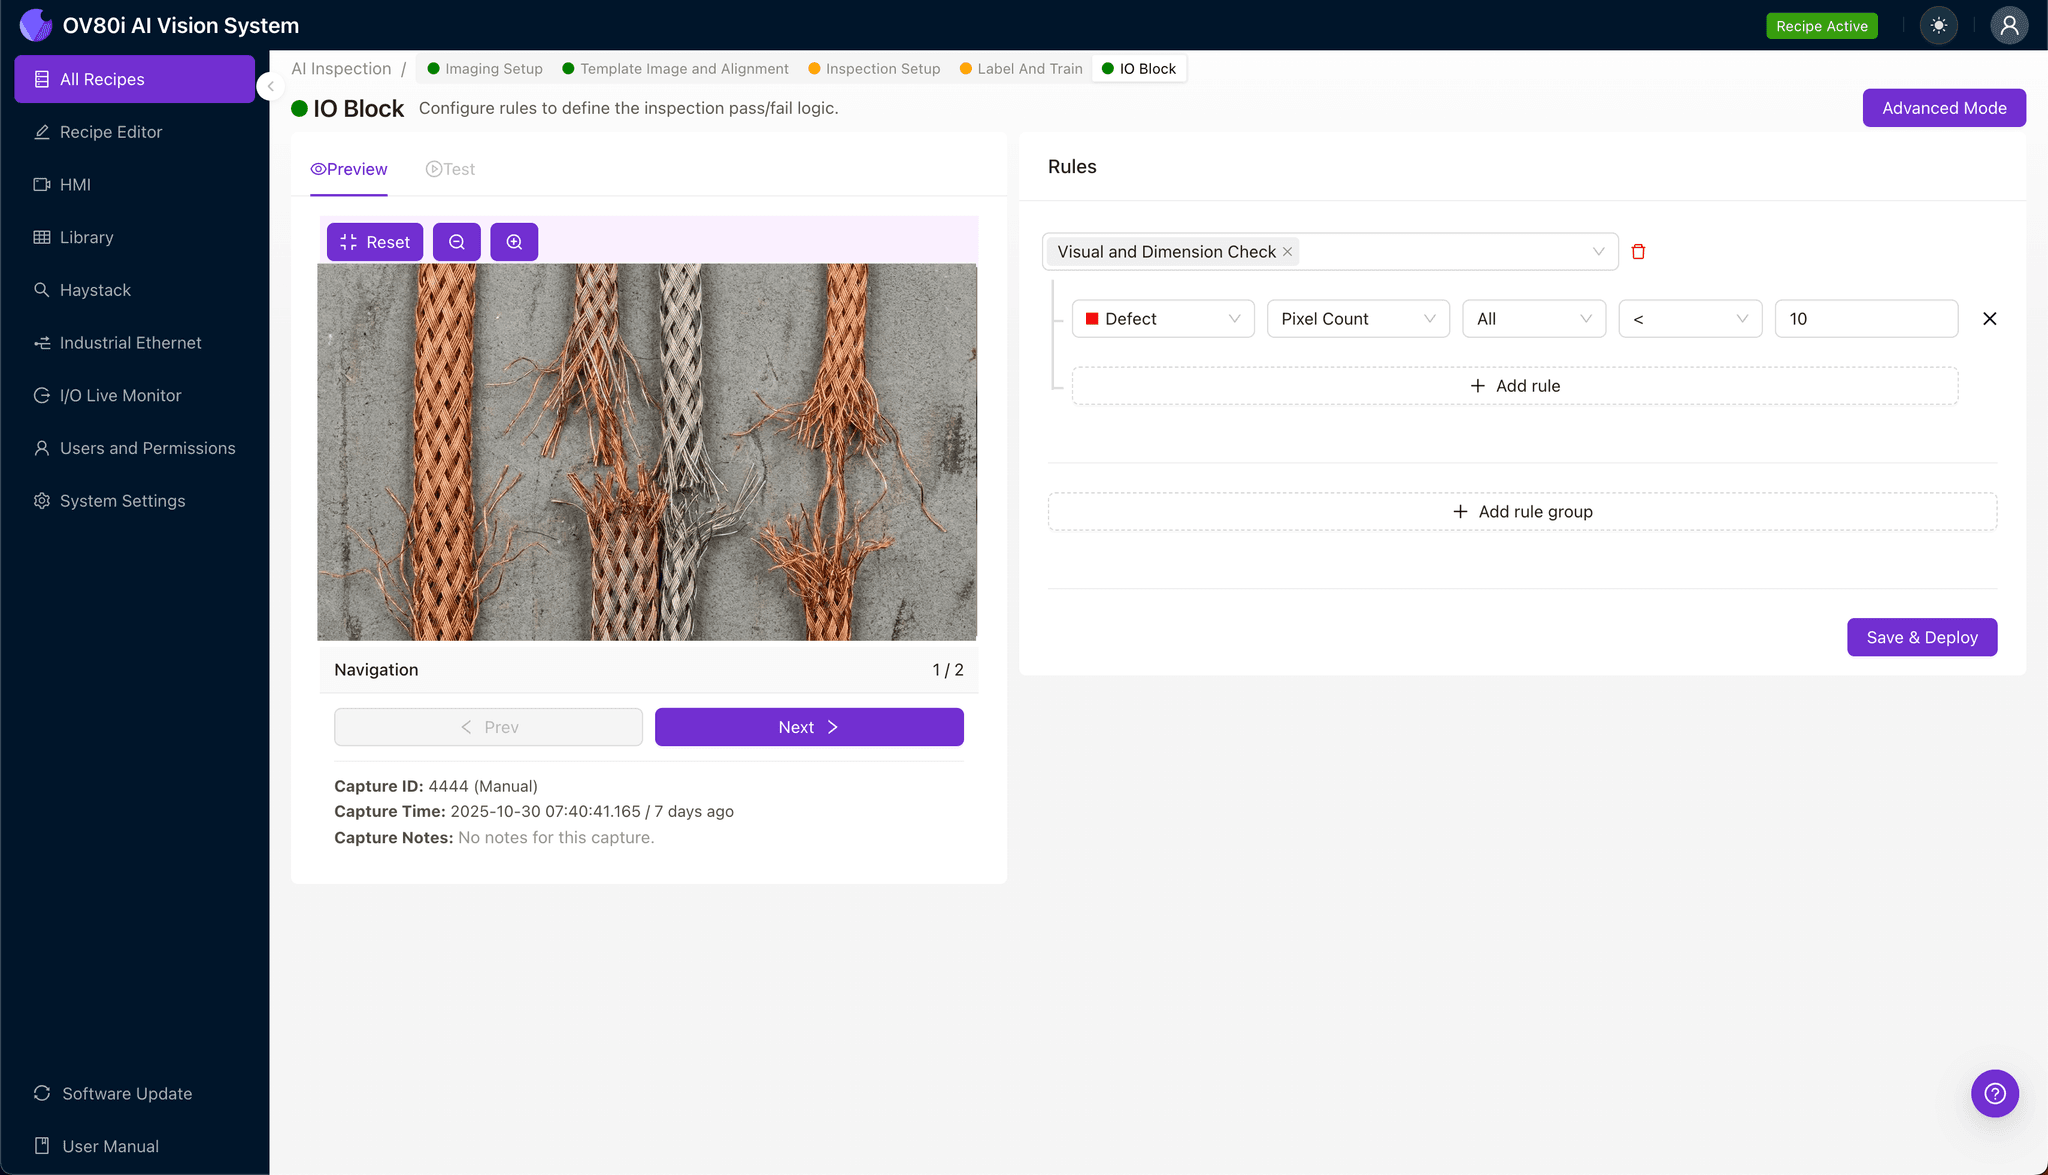
Step 5: Creating Rules
Set your pass/fail logic based on the Inspection Types you've defined. For example, configure the system to reject any part where "Broken_Strand" confidence exceeds your threshold.
Gate automated acceptance on the line to ensure defective braid is diverted before it reaches downstream assembly. This creates a quality firewall that operates continuously without human intervention.
Key Outcomes & ROI
Implementing AI-powered inspection for shielding braid delivers measurable business impact:
- Reduced scrap rates — Catch defects earlier in the process before value-added operations
- Higher throughput — Inspect at line speed without creating bottlenecks or requiring batch sampling
- Compliance and traceability — Automatically log inspection images and results for audit trails and customer documentation
- Process improvement insights — Analyze defect trends to identify upstream issues in braiding equipment or material quality
Conclusion
Broken wire strands in shielding braid represent a critical quality risk that manual inspection simply cannot address reliably. Overview.ai's visual inspection platform transforms this challenge into a solved problem—delivering consistent, objective detection at production speed.
Ready to eliminate broken strand escapes from your manufacturing line? Contact Overview.ai to schedule a demo with your actual product samples.
Eliminate Broken Strand Defects Today
Stop relying on manual inspection for your shielding braid. Deploy Overview.ai to catch broken wire strands instantly at full line speed.