Detecting Compromised Shielding Layers in Antistatic Bags: A Machine Vision Walkthrough
"Compromised shielding layers in antistatic bags expose sensitive electronics to ESD damage, yet subtle defects like delamination and micro-scratches escape manual inspection. Machine vision with deep learning detects these hidden failures at 100% line speed, protecting components before they reach customers."
The Problem: Why Compromised Shielding Layers Slip Past Manual Inspection
Antistatic bags protect sensitive electronic components from electrostatic discharge (ESD), but their effectiveness depends entirely on the integrity of their metallic shielding layer. When this critical barrier becomes compromised, the consequences range from latent damage to complete component failure—often discovered only after products reach customers.
Common Defects in Compromised Shielding Layers:
- Delamination zones — separation between the polyester outer layer and the aluminum shielding film
- Micro-scratches and abrasions — surface damage that penetrates through to the conductive layer
- Pinhole perforations — tiny punctures that create pathways for electrostatic discharge
- Oxidation patches — corrosion spots where moisture has degraded the aluminum barrier
- Seal contamination — foreign particles trapped in heat-sealed edges that compromise conductivity
- Layer thinning — uneven coating thickness that reduces shielding effectiveness below spec
Human inspectors struggle to catch these defects consistently. Shielding layer anomalies are often subtle, appearing as faint discolorations or barely visible texture changes across reflective surfaces.
Inspector fatigue sets in quickly when examining hundreds of nearly identical bags per hour, and the pressure of production speeds makes thorough examination nearly impossible.
The Solution: Machine Vision and Deep Learning
Machine vision systems equipped with deep learning algorithms excel precisely where human inspection fails. These systems analyze every square millimeter of bag surface with identical precision, whether it's the first unit of the shift or the ten-thousandth.
Deep learning models learn to recognize the subtle visual signatures of compromised shielding—patterns too nuanced for traditional rule-based machine vision and too inconsistent for tired human eyes.
Overview.ai's approach delivers consistent, objective inspection at full line speed. The OV80i system integrates directly into existing packaging lines, providing 100% inline inspection without creating bottlenecks or requiring dedicated inspection stations.
Step 1: Imaging Setup
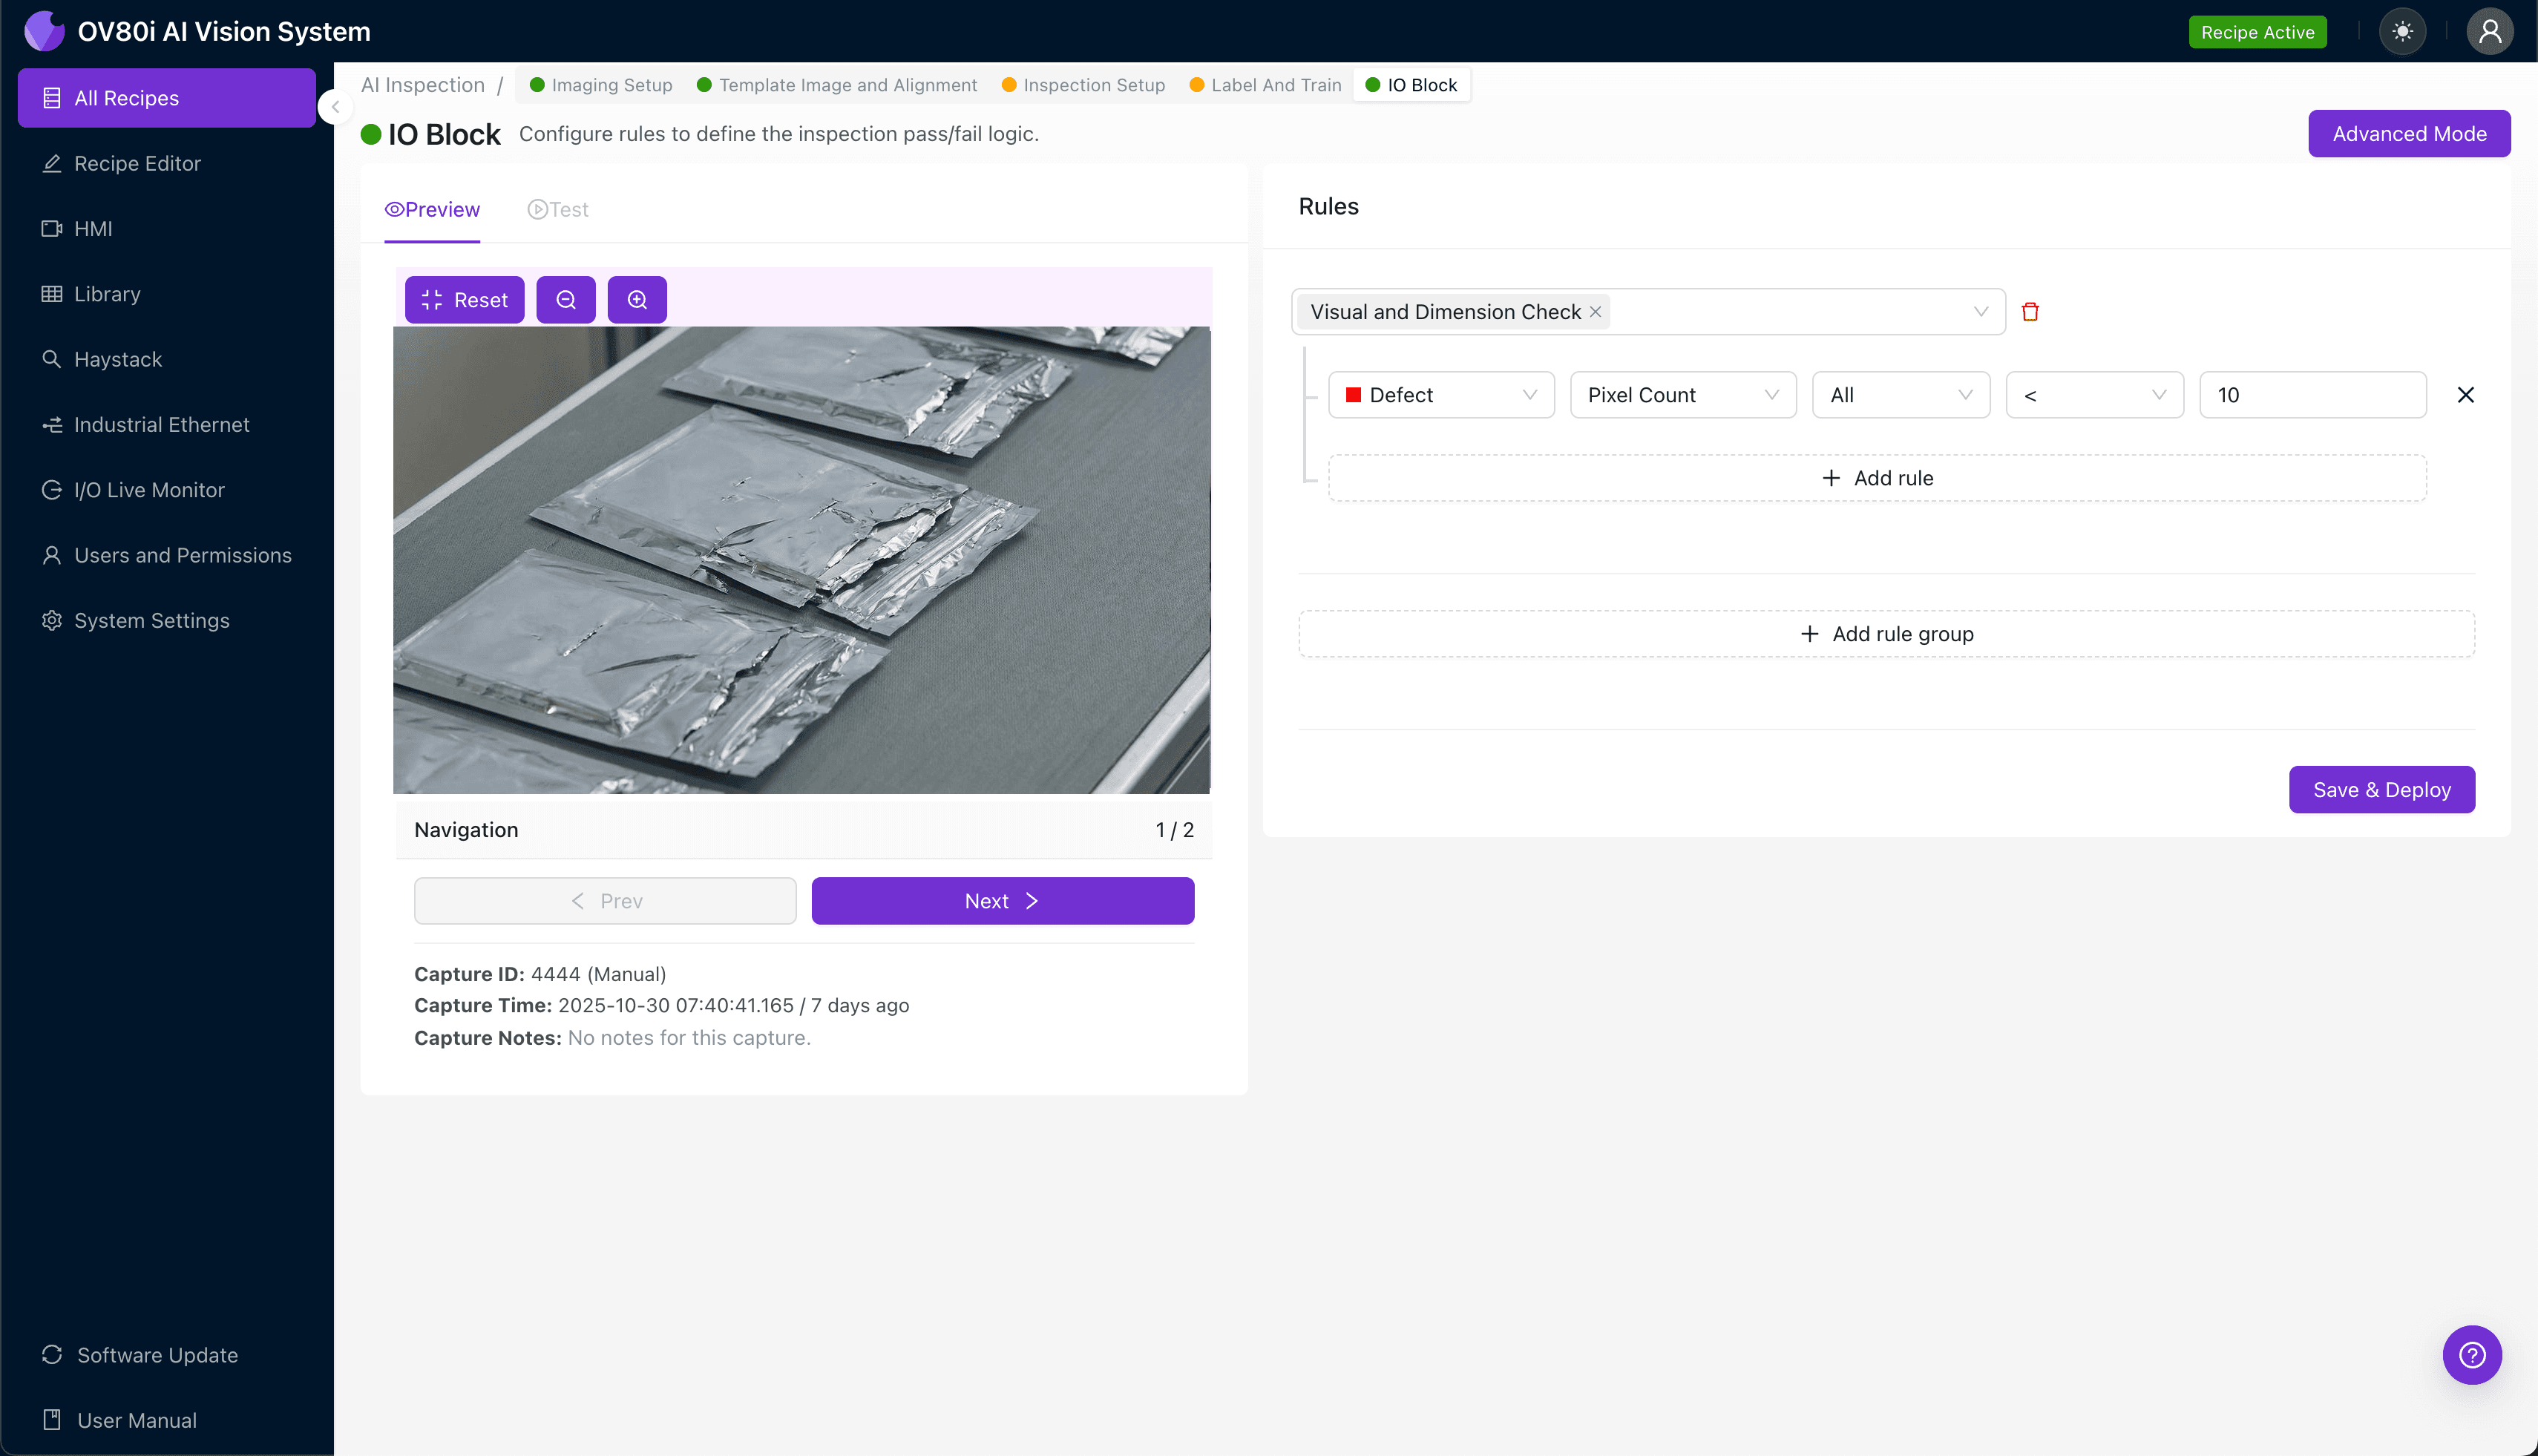
Position the antistatic bag flat under the camera, ensuring the shielding layer faces upward with minimal wrinkles or folds. Proper orientation is critical for consistent defect detection across the bag's surface.
Click "Configure Imaging" to access the camera controls. Adjust Camera Settings including exposure time and gain to optimize visibility of the metallic shielding layer—you'll want settings that reveal subtle surface variations without creating glare from the reflective material.
Click "Save" to lock in your imaging configuration.
Step 2: Image Alignment
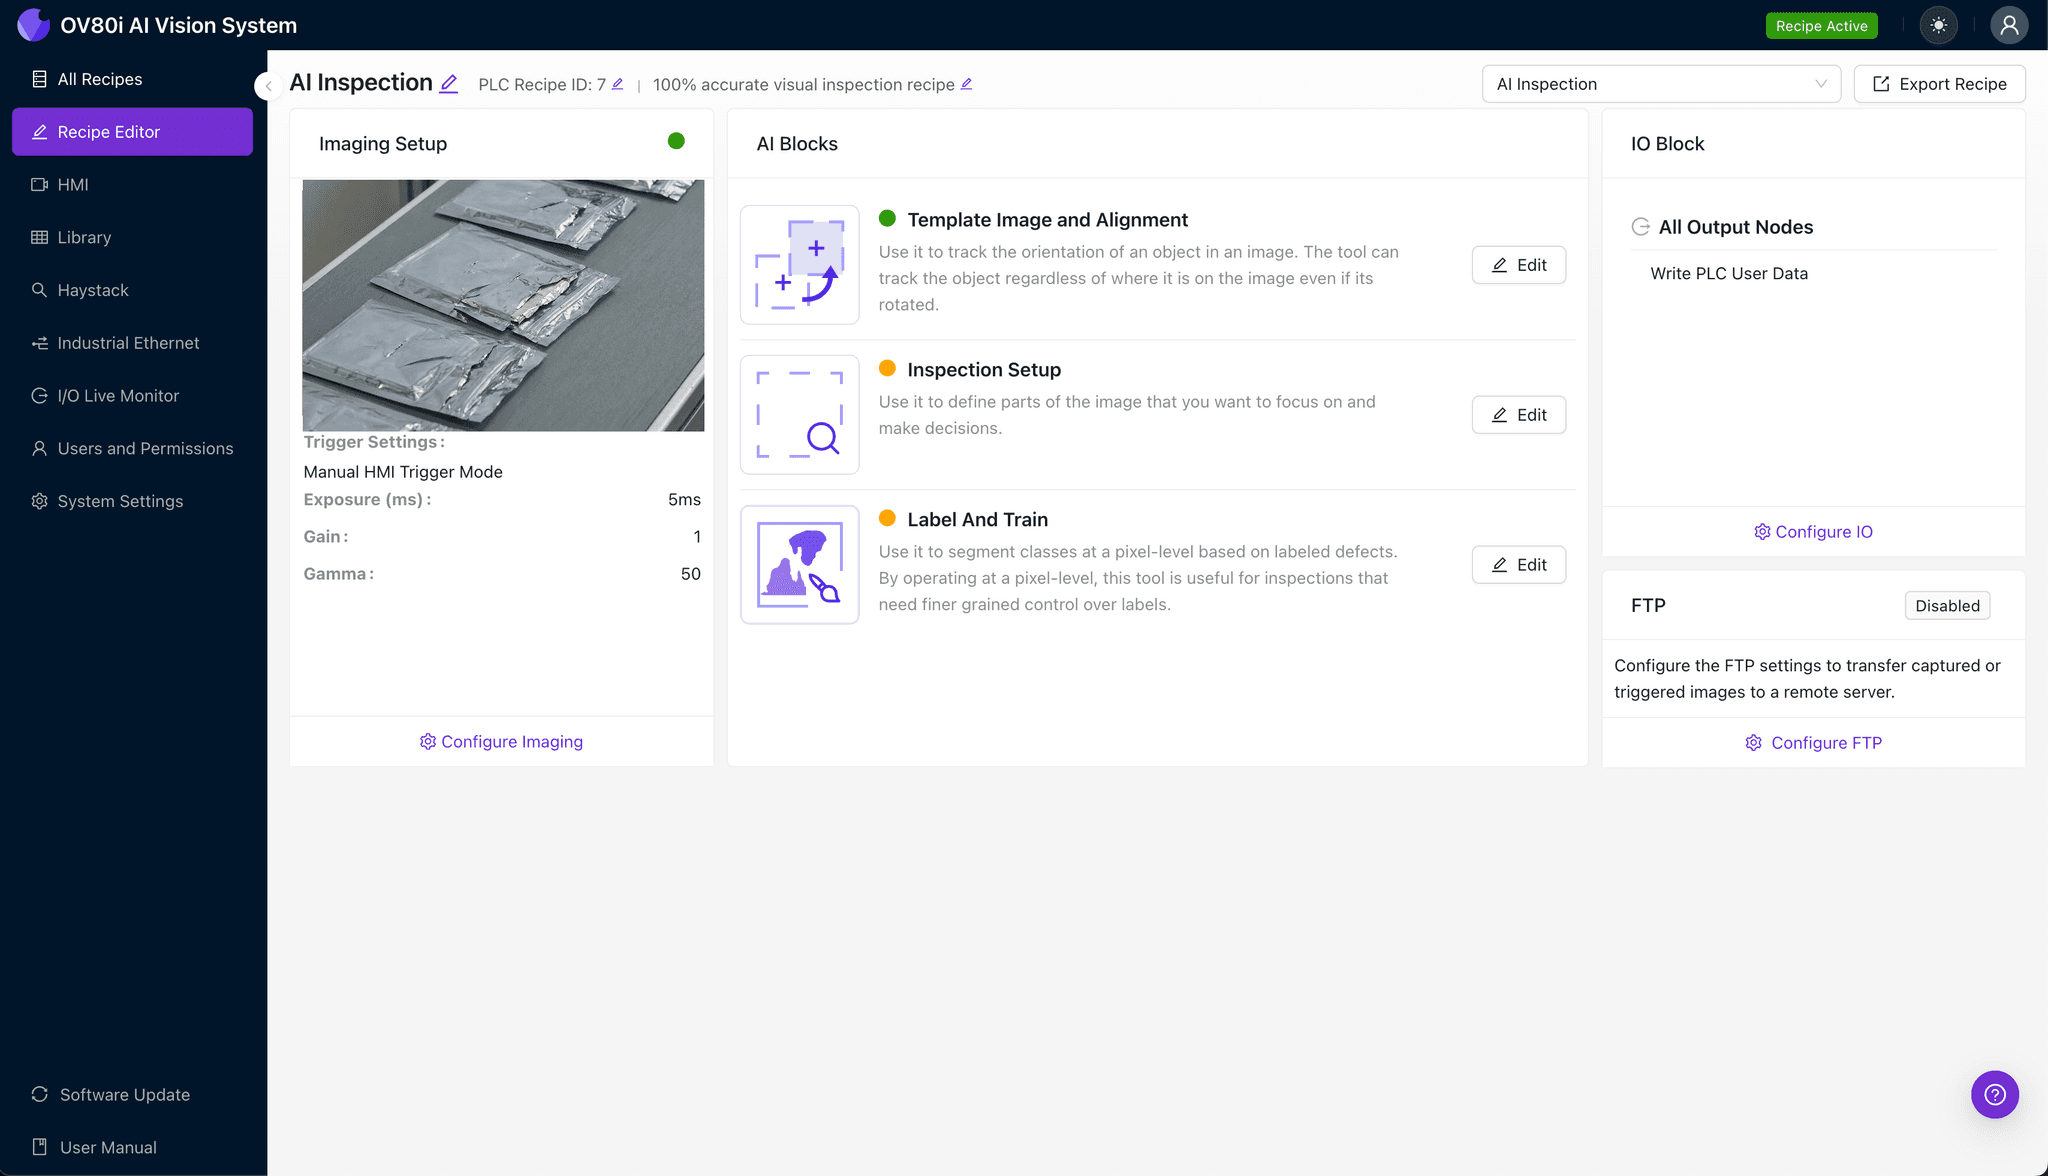
Navigate to the "Template Image" section within the configuration menu. Capture a Template of a properly positioned bag that represents your standard inspection orientation.
Click "+ Rectangle" to add an alignment region around the main body of the bag. This teaches the system to recognize and track the bag's position regardless of minor placement variations.
Set the "Rotation Range" to 20 degrees to accommodate slight angular differences as bags move through the inspection zone.
Step 3: Inspection Region Selection
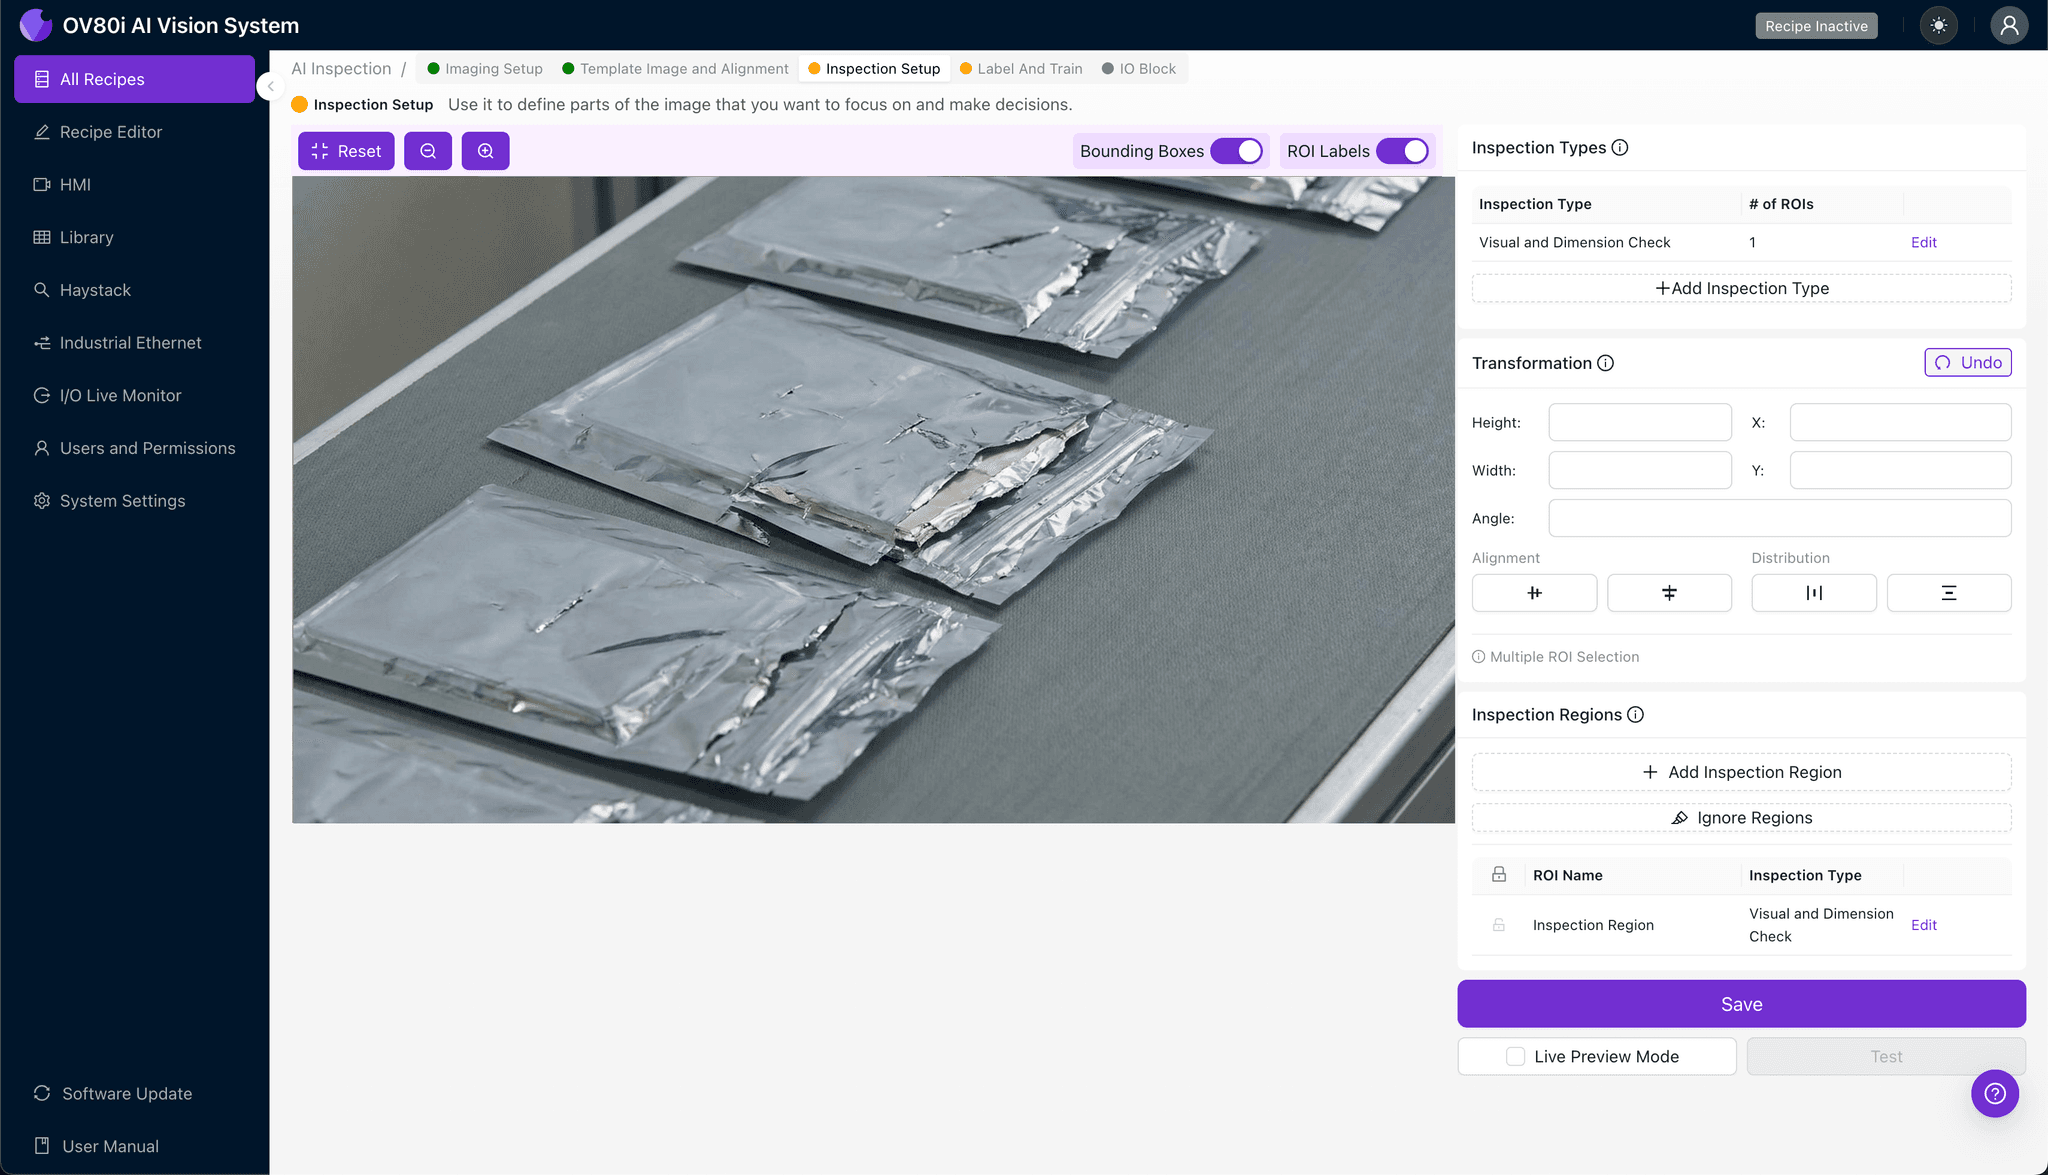
Navigate to "Inspection Setup" to define where the system should focus its analysis. Rename your "Inspection Types" to reflect the specific defects you're targeting—for example, "Shielding_Delamination," "Surface_Abrasion," and "Seal_Integrity."
Click "+ Add Inspection Region" for each critical area. Resize the yellow bounding box to cover the full shielding surface, paying special attention to edges, corners, and seal lines where defects most commonly occur.
Click "Save" after defining all inspection regions.
Step 4: Labeling Data
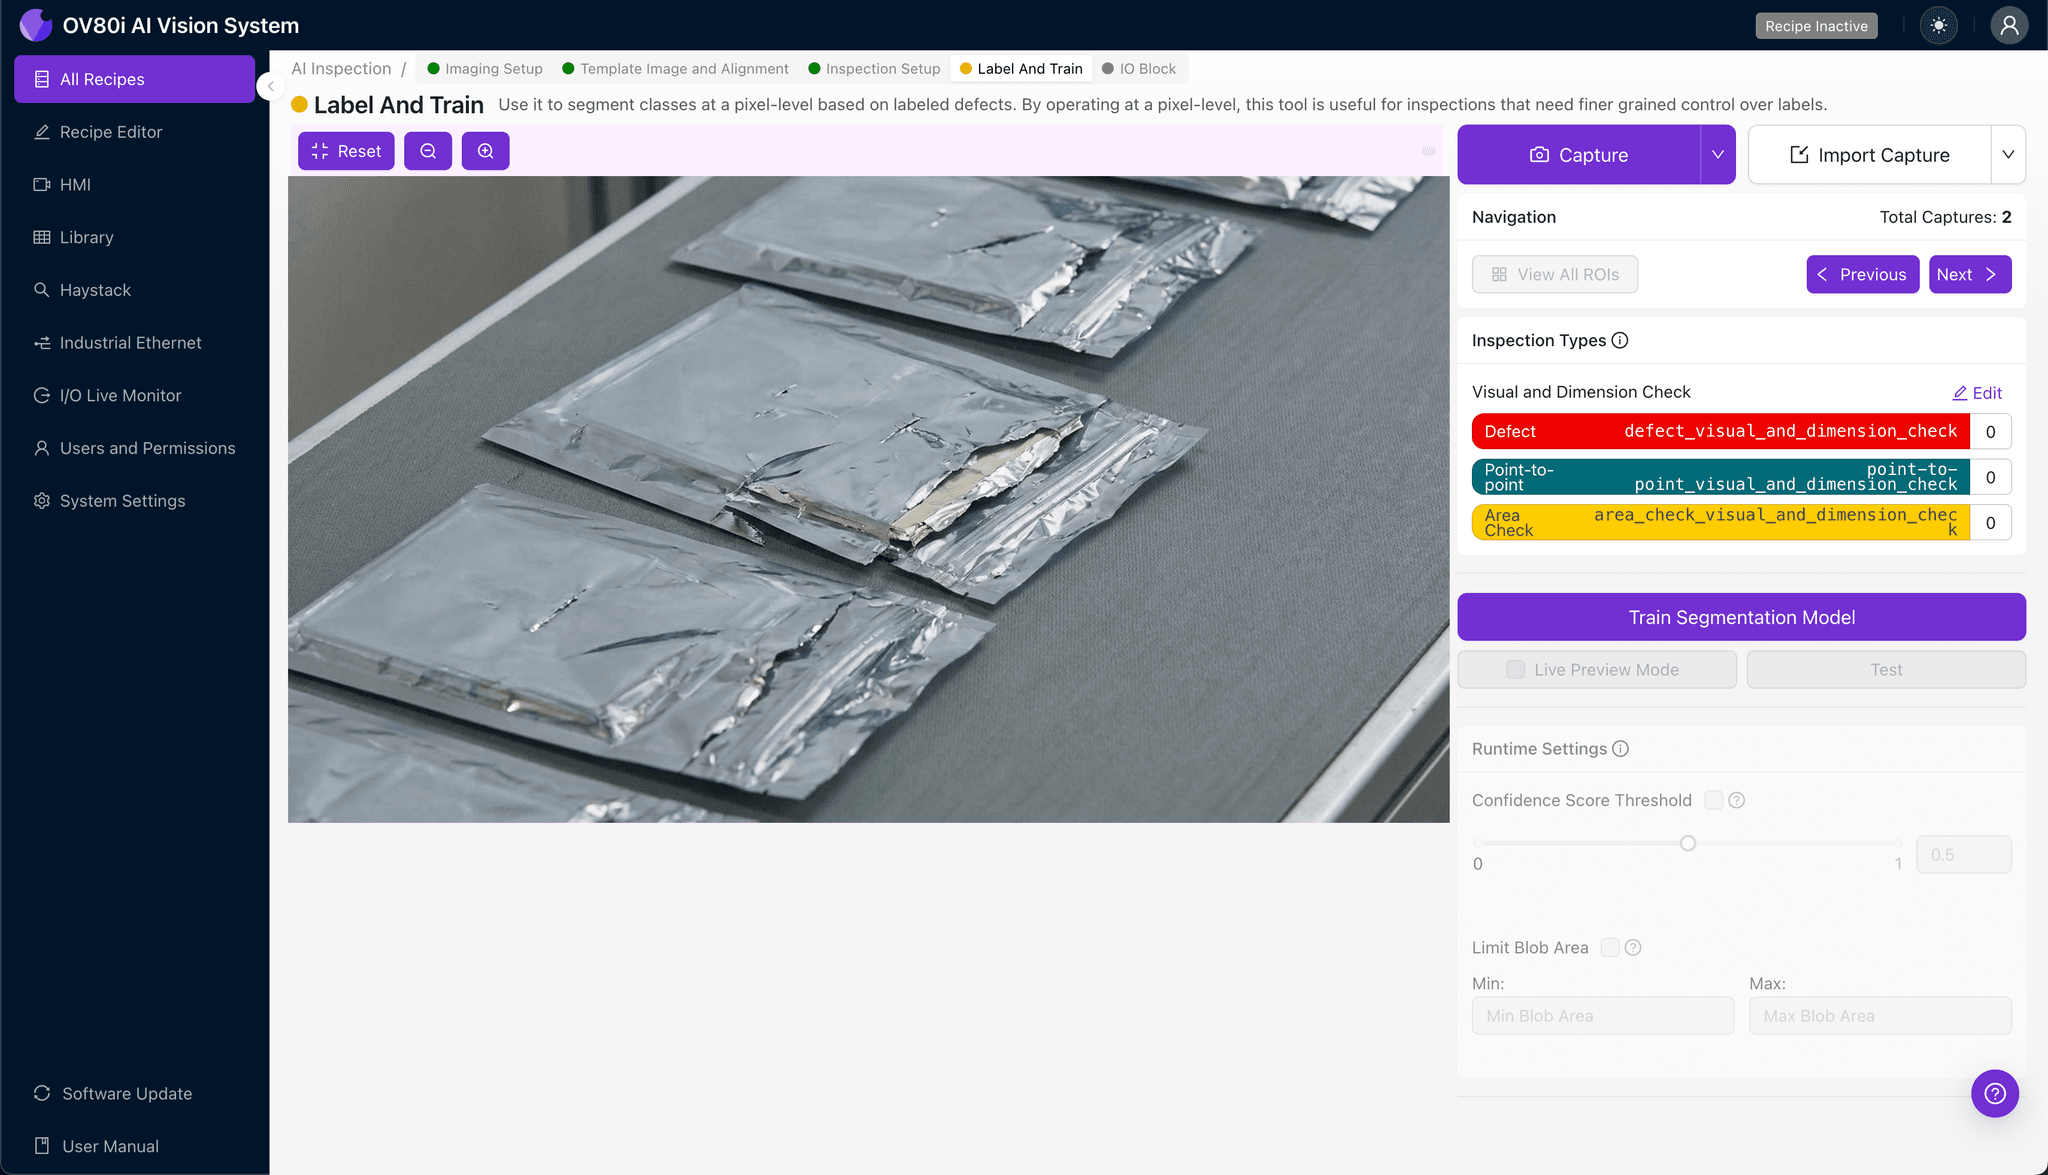
The human-in-the-loop labeling process is where your expertise trains the AI. Review captured images and label each as Good (intact shielding) or Bad (compromised shielding), building the dataset that teaches the model what to look for.
Include representative samples across your full range of products—different bag sizes, various lighting conditions, and acceptable cosmetic variations. Most importantly, incorporate known failure modes: confirmed delamination samples, bags that failed ESD testing, and customer returns with documented shielding failures.
Step 5: Creating Rules
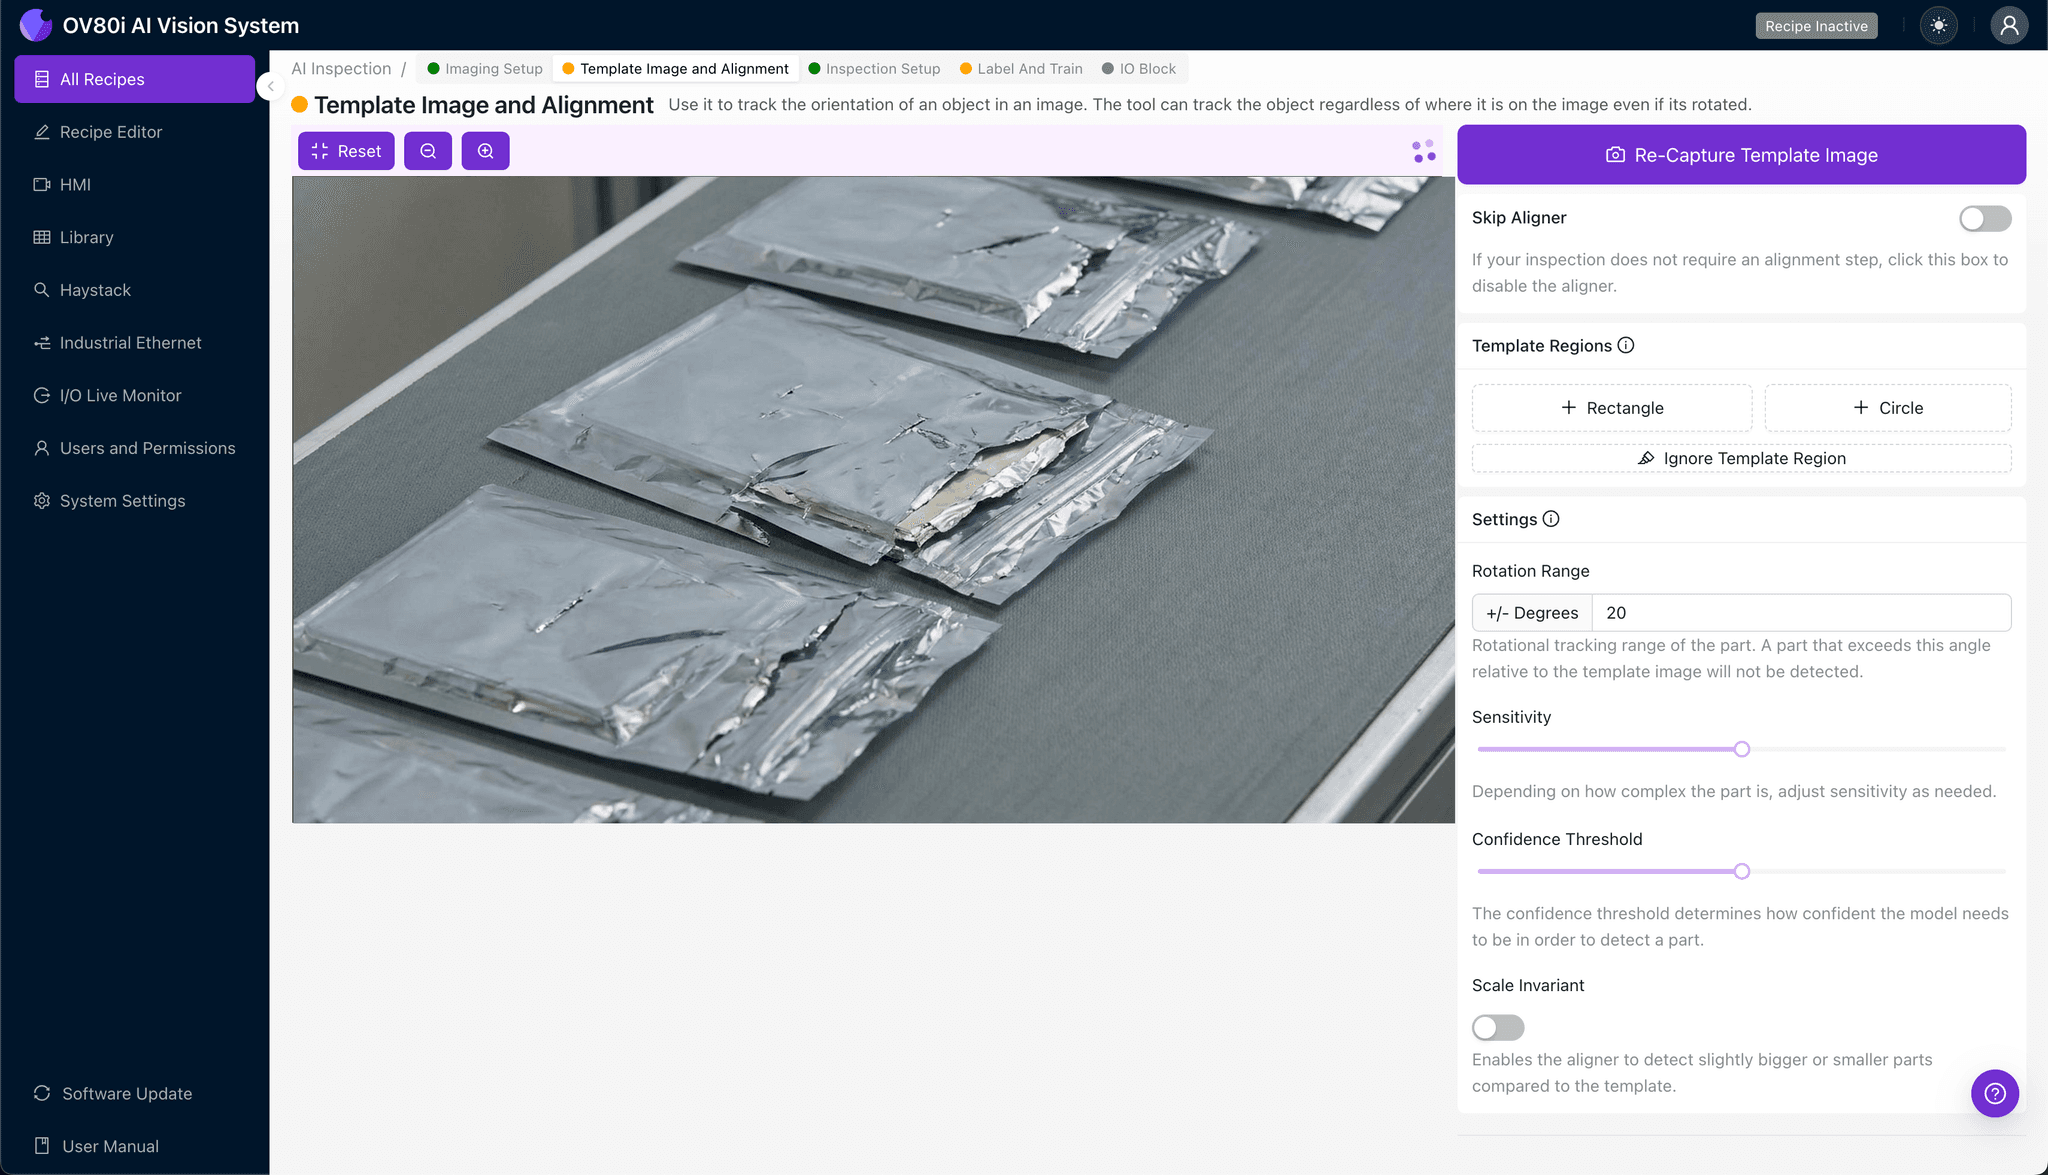
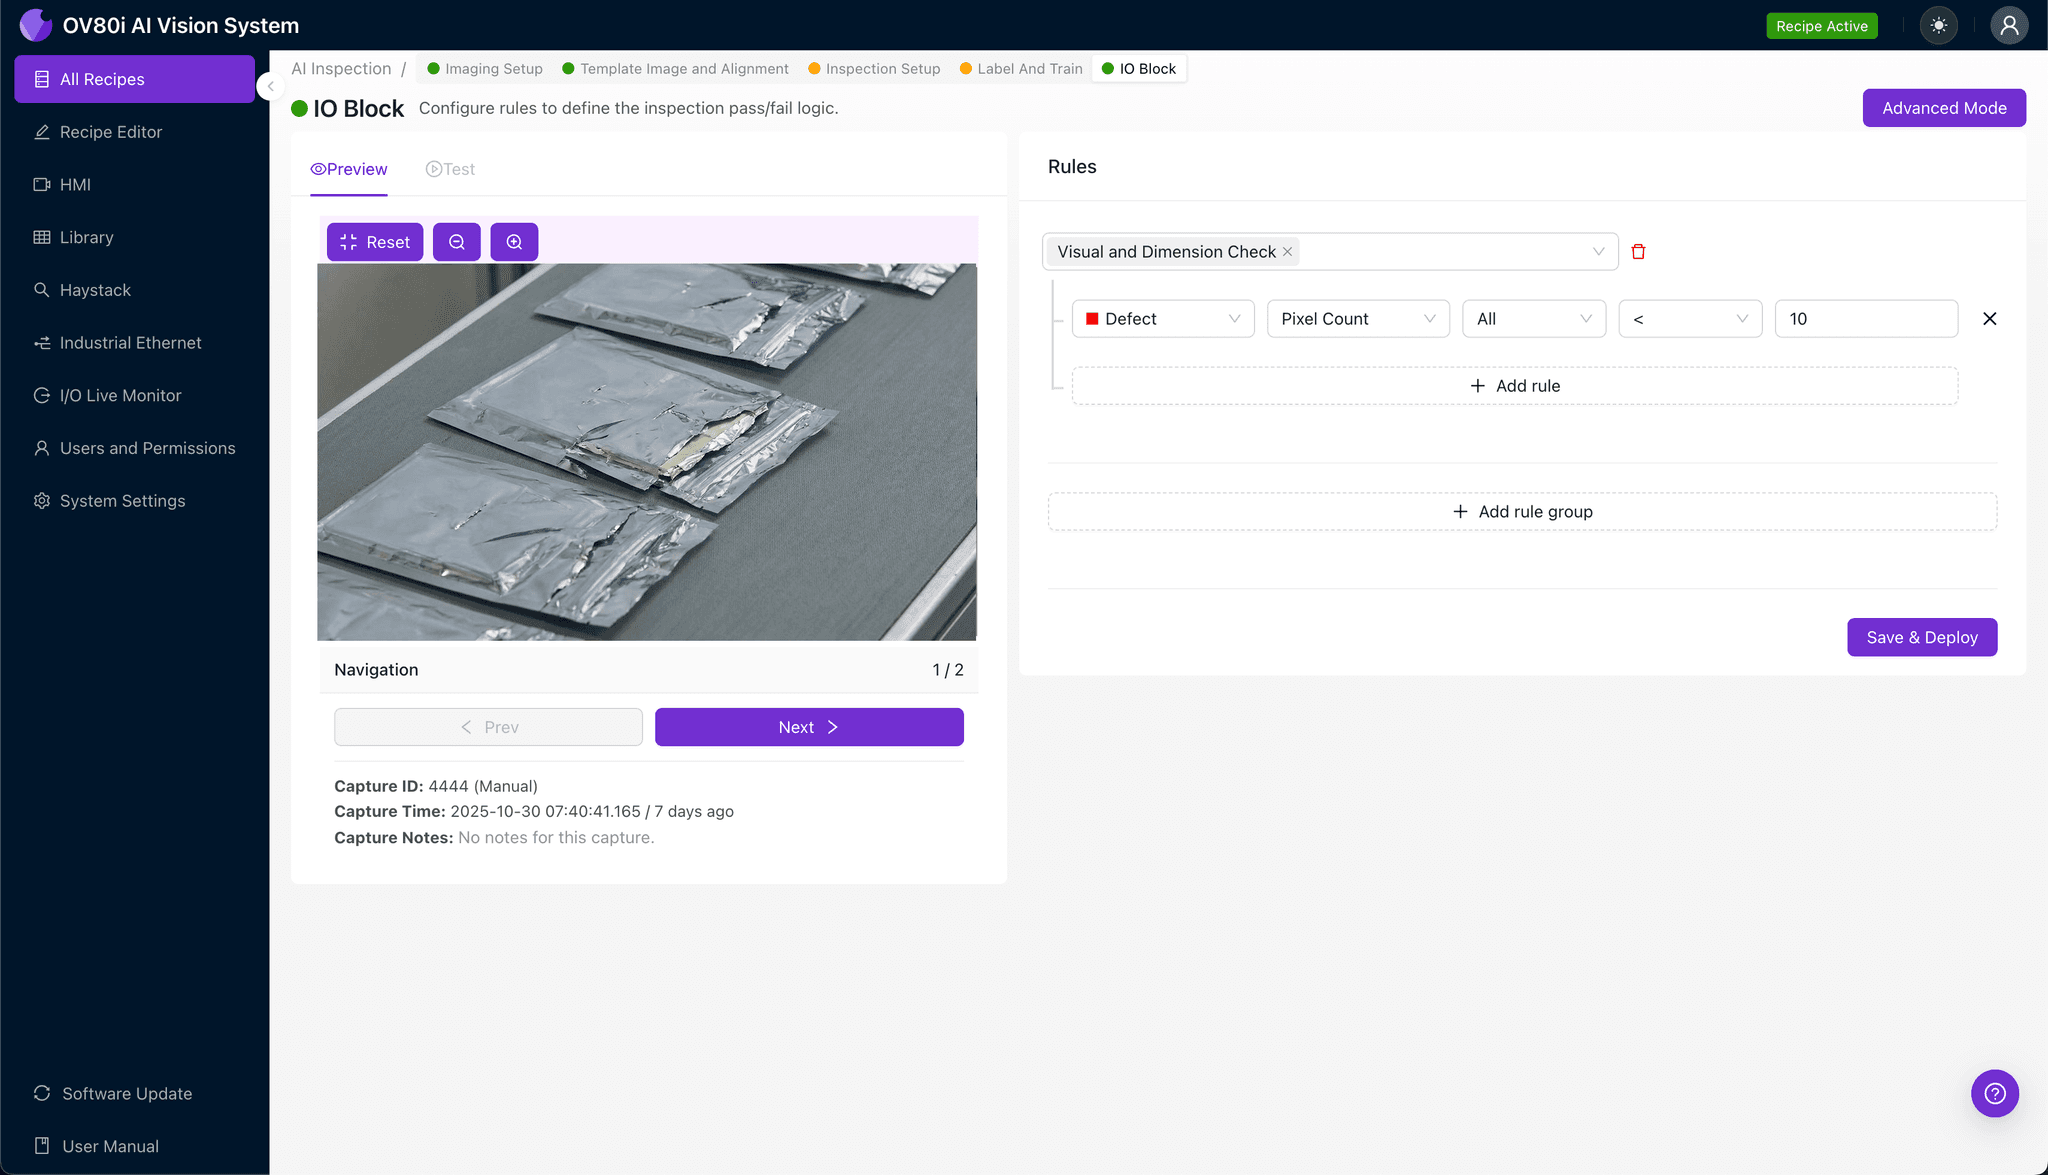
Configure your pass/fail logic based on the Inspection Types you've defined. Set threshold parameters that determine when detected anomalies warrant rejection versus when minor variations remain acceptable.
Gate automated acceptance on the line by connecting inspection results to your reject mechanism. Bags with compromised shielding layers are automatically diverted, while conforming products continue to packaging without interruption.
Key Outcomes & ROI
Implementing automated shielding layer inspection delivers measurable business impact:
- Reduced scrap and rework — catch compromised bags before they're filled with expensive electronic components
- Higher throughput — inspect 100% of production at line speed without adding inspection labor
- Compliance and traceability — generate automatic inspection records for ESD-sensitive component handling requirements (ANSI/ESD S541)
- Process improvement insights — identify upstream issues causing shielding damage through defect trend analysis and supplier quality tracking
Eliminate Shielding Defects Today
Stop relying on manual inspection for critical ESD protection. Deploy Overview.ai to catch compromised shielding layers instantly.