How to Inspect Calibration Kits with Scratched Reference Surfaces Using AI-Powered Vision Systems
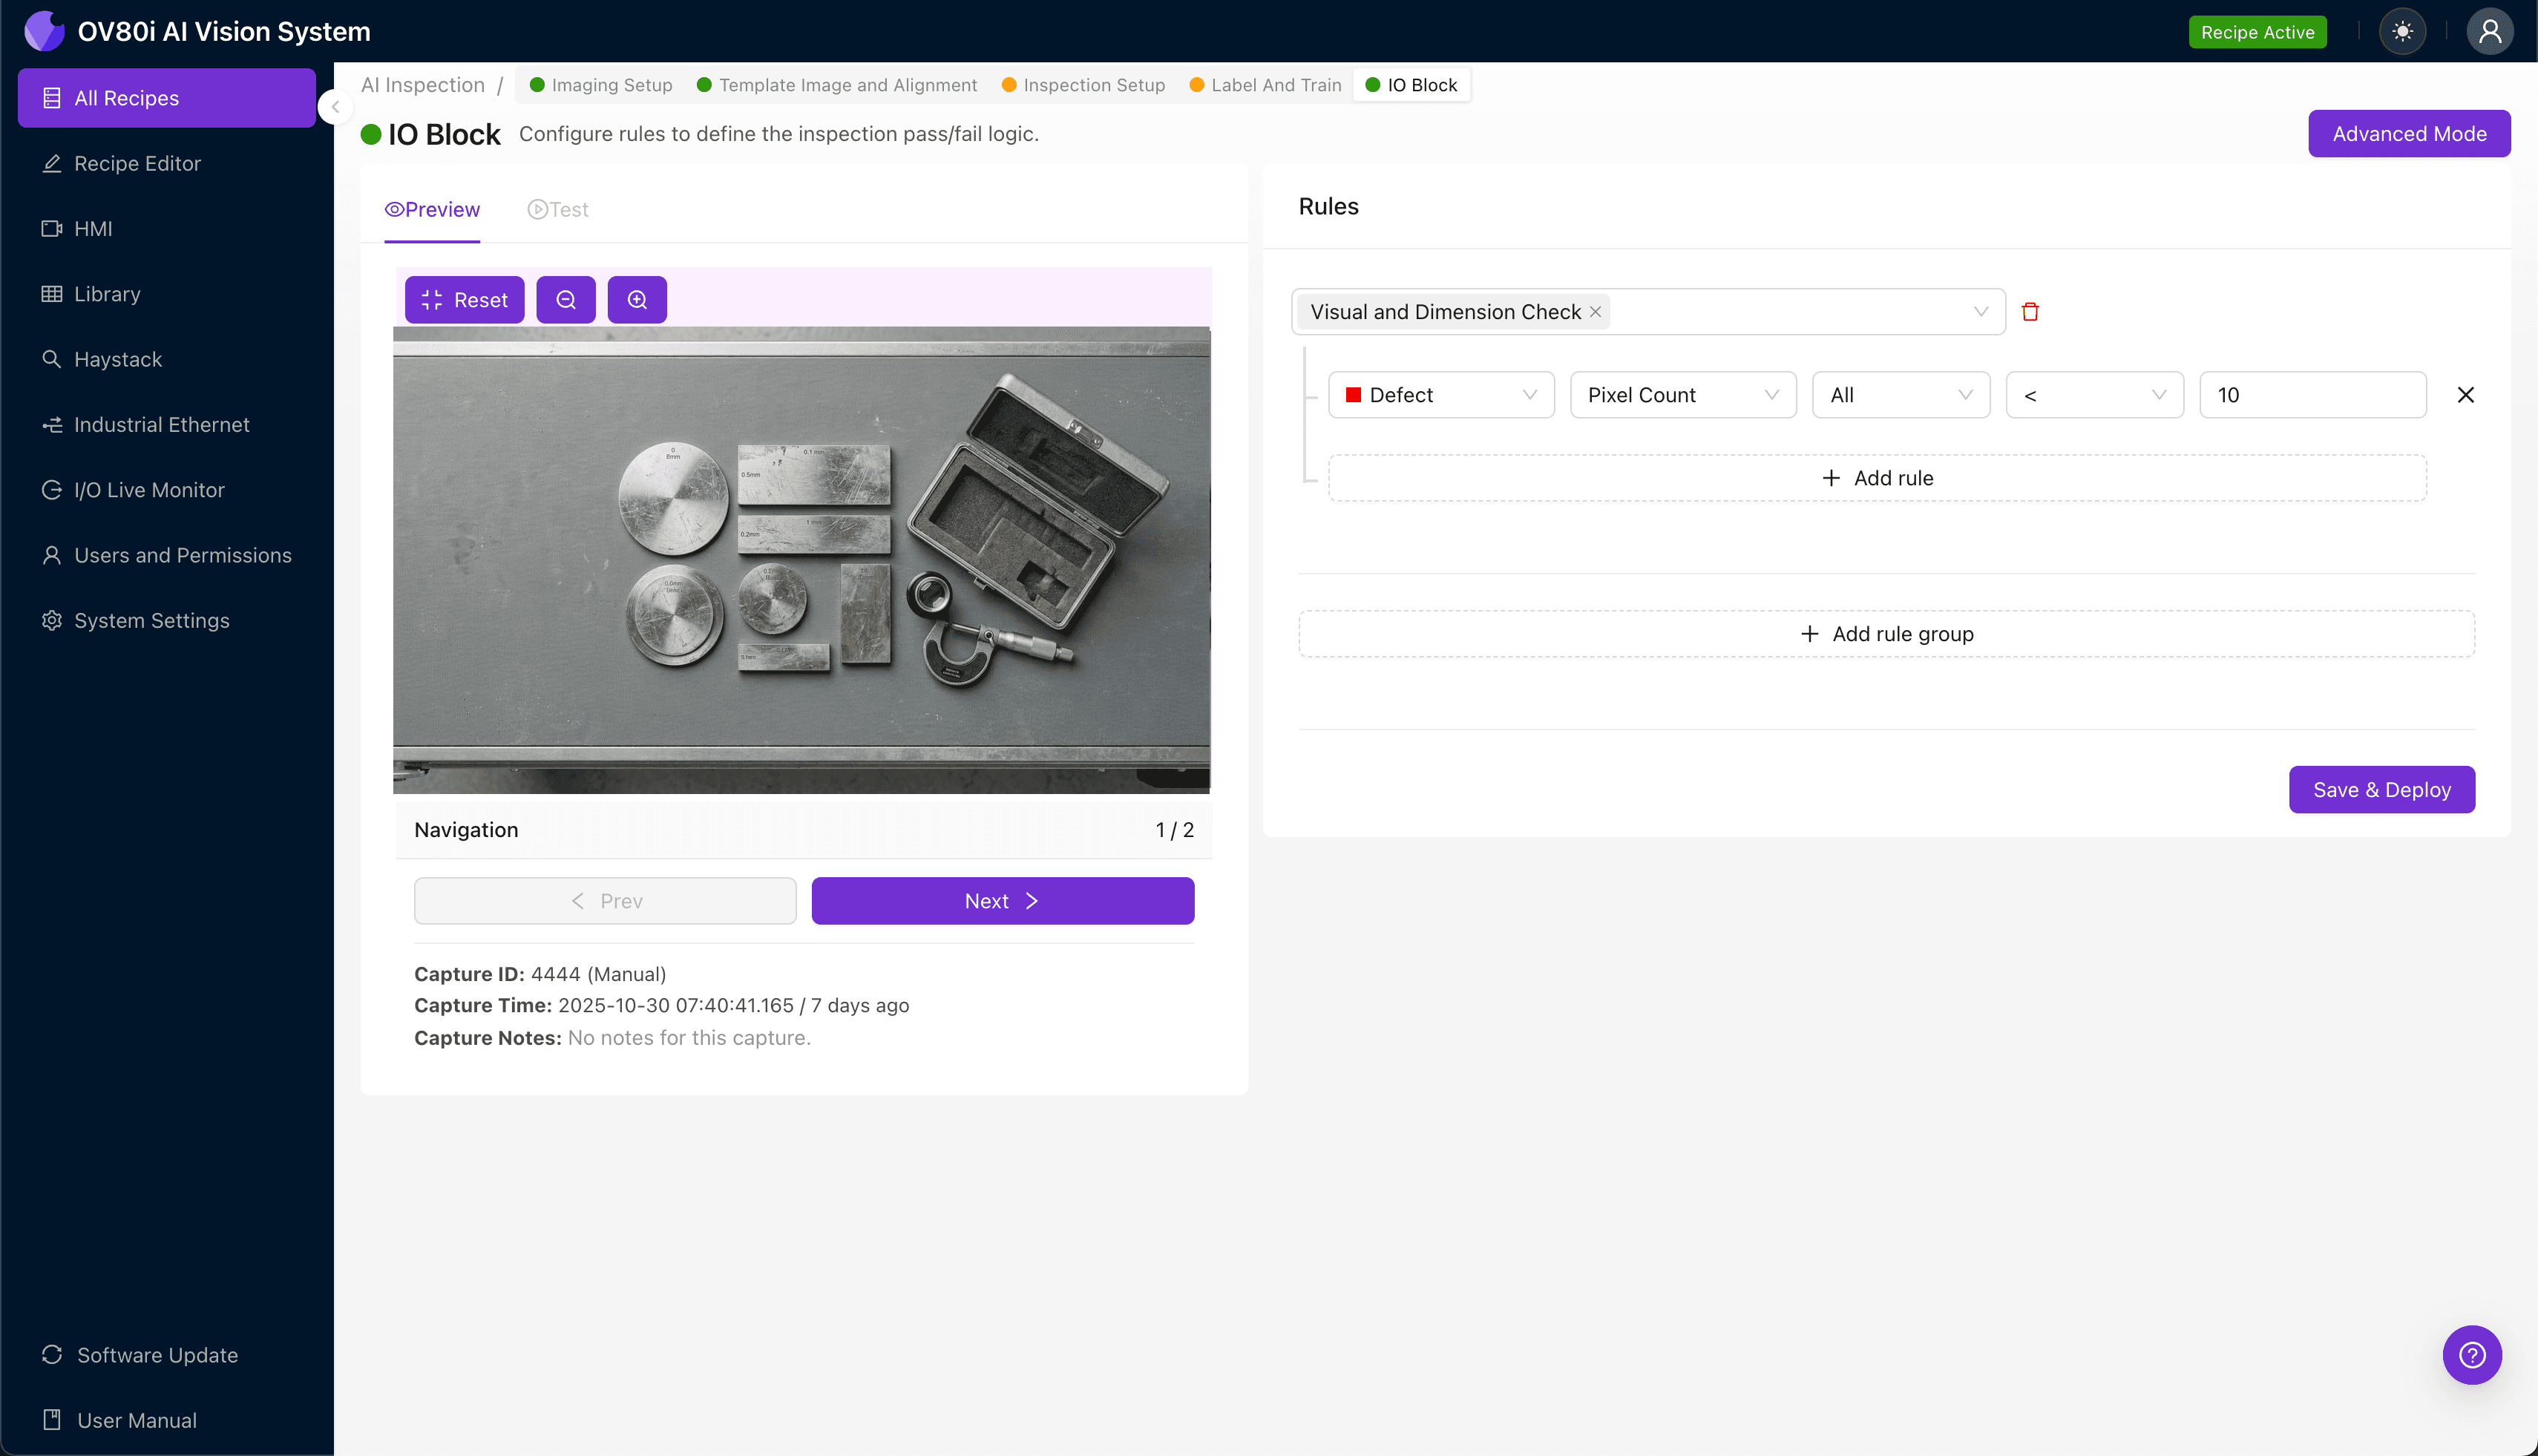
"Scratched reference surfaces on calibration kits silently introduce systematic errors into every downstream measurement. AI-powered vision systems detect surface defects invisible to human inspectors, ensuring only pristine calibration kits enter your quality workflow."
The Problem: Why Scratched Reference Surfaces Compromise Calibration Integrity
Calibration kits serve as the foundation for measurement accuracy across manufacturing operations. When reference surfaces become scratched or damaged, every subsequent calibration performed with that kit introduces systematic errors into your quality process.
Common Defects Found on Calibration Kit Reference Surfaces:
- Linear scratches – Fine parallel marks from improper handling or storage contact
- Circular abrasion patterns – Swirl marks caused by incorrect cleaning techniques
- Pitting and micro-craters – Small surface depressions from contamination or corrosion
- Edge chipping – Material loss along reference surface boundaries
- Surface haze – Diffuse optical degradation from repeated use or chemical exposure
- Cross-hatching – Intersecting scratch patterns from bidirectional contact damage
Manual inspection of calibration reference surfaces is notoriously unreliable. Human inspectors experience fatigue when examining highly reflective or optically flat surfaces, and subtle scratches that affect calibration accuracy often fall below the threshold of consistent visual detection—especially under production time pressures.
The Solution: Machine Vision and Deep Learning for Reference Surface Inspection
AI-powered visual inspection eliminates the subjectivity and inconsistency inherent in manual calibration kit assessment. Deep learning models learn to recognize the specific scratch patterns, surface anomalies, and degradation signatures that compromise reference surface integrity—detecting defects invisible to the human eye.
Overview.ai's approach delivers consistent, objective inspection at line speed. Every calibration kit receives the same rigorous examination, ensuring damaged reference surfaces never enter your calibration workflow and compromise downstream measurement accuracy.
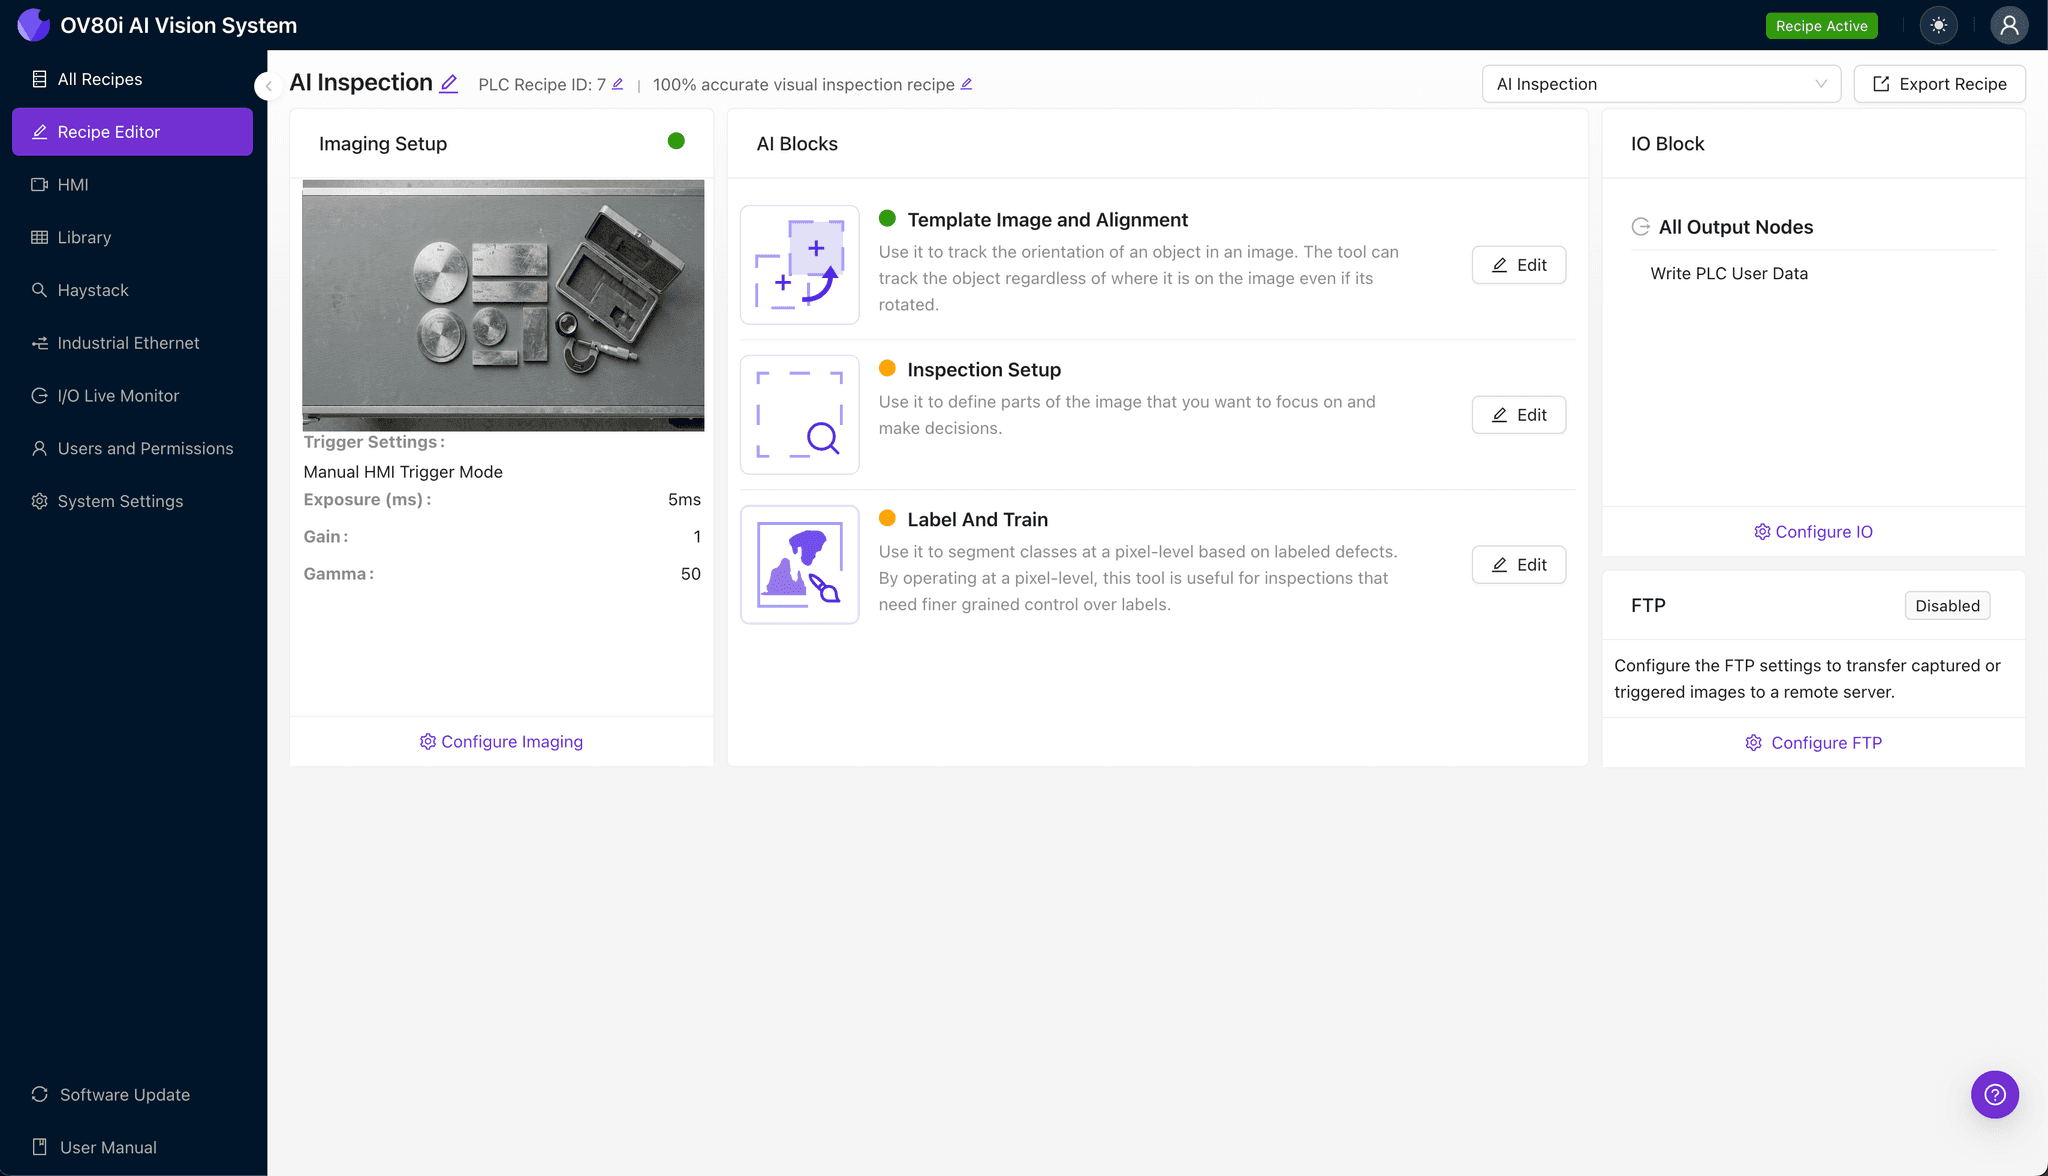
Step 1: Imaging Setup
Position the calibration kit with its reference surfaces facing the camera in the OV80i inspection station. Proper orientation ensures the optical system captures surface defects with maximum contrast and clarity.
Click "Configure Imaging" to access the camera settings panel. Adjust exposure and gain parameters until scratches and surface anomalies appear distinctly against the reference surface background—reflective surfaces may require multiple lighting angles or diffuse illumination.
Click "Save" to lock in your imaging configuration.
Step 2: Image Alignment
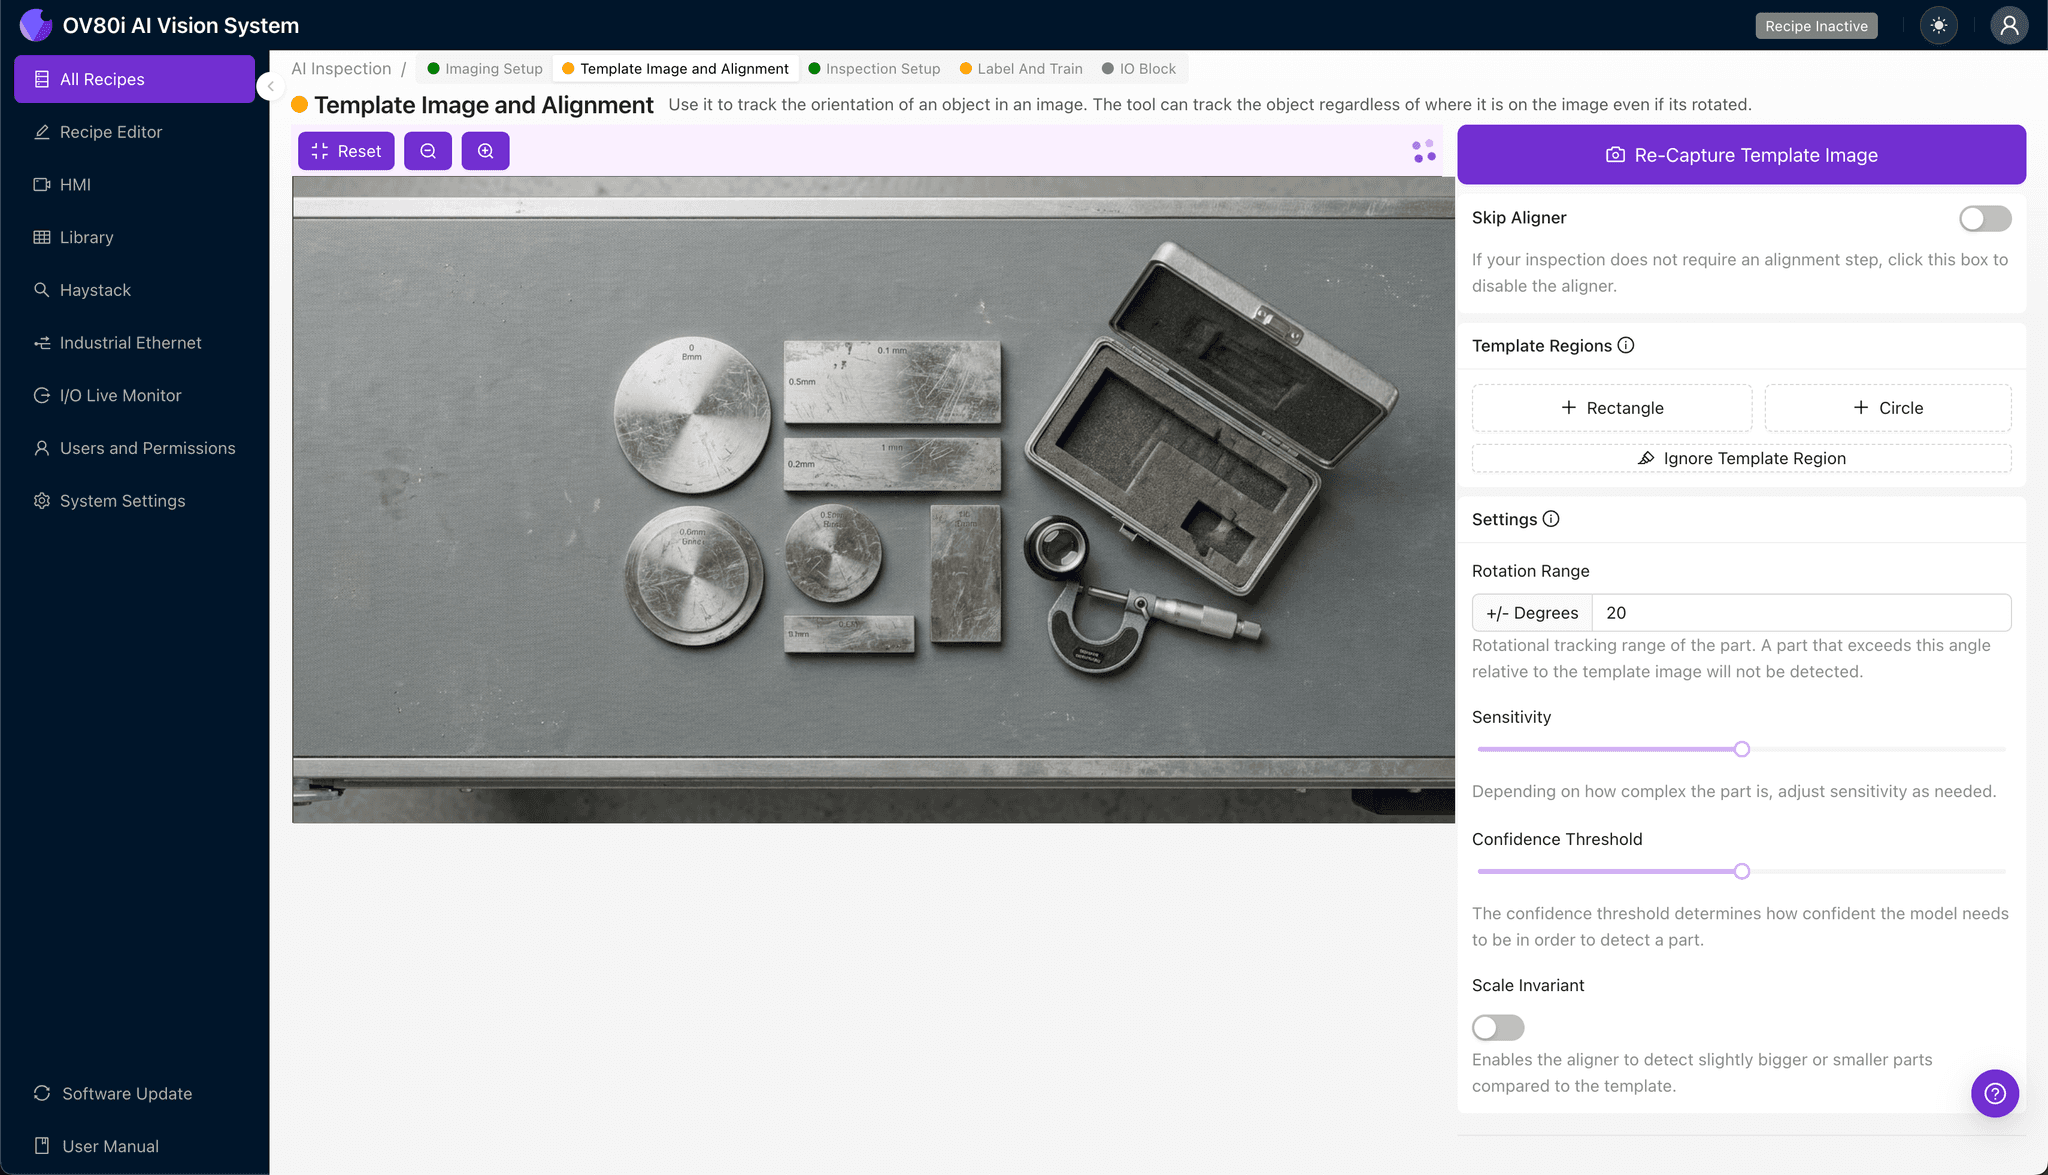
Navigate to the "Template Image" section in the interface. Capture a template image of a known-good calibration kit positioned in its standard inspection orientation.
Click "+ Rectangle" to add an alignment region around the main body of the calibration kit. This region anchors the inspection system to consistent positioning.
Set the "Rotation Range" to 20 degrees to accommodate minor placement variations during production inspection cycles.
Step 3: Inspection Region Selection
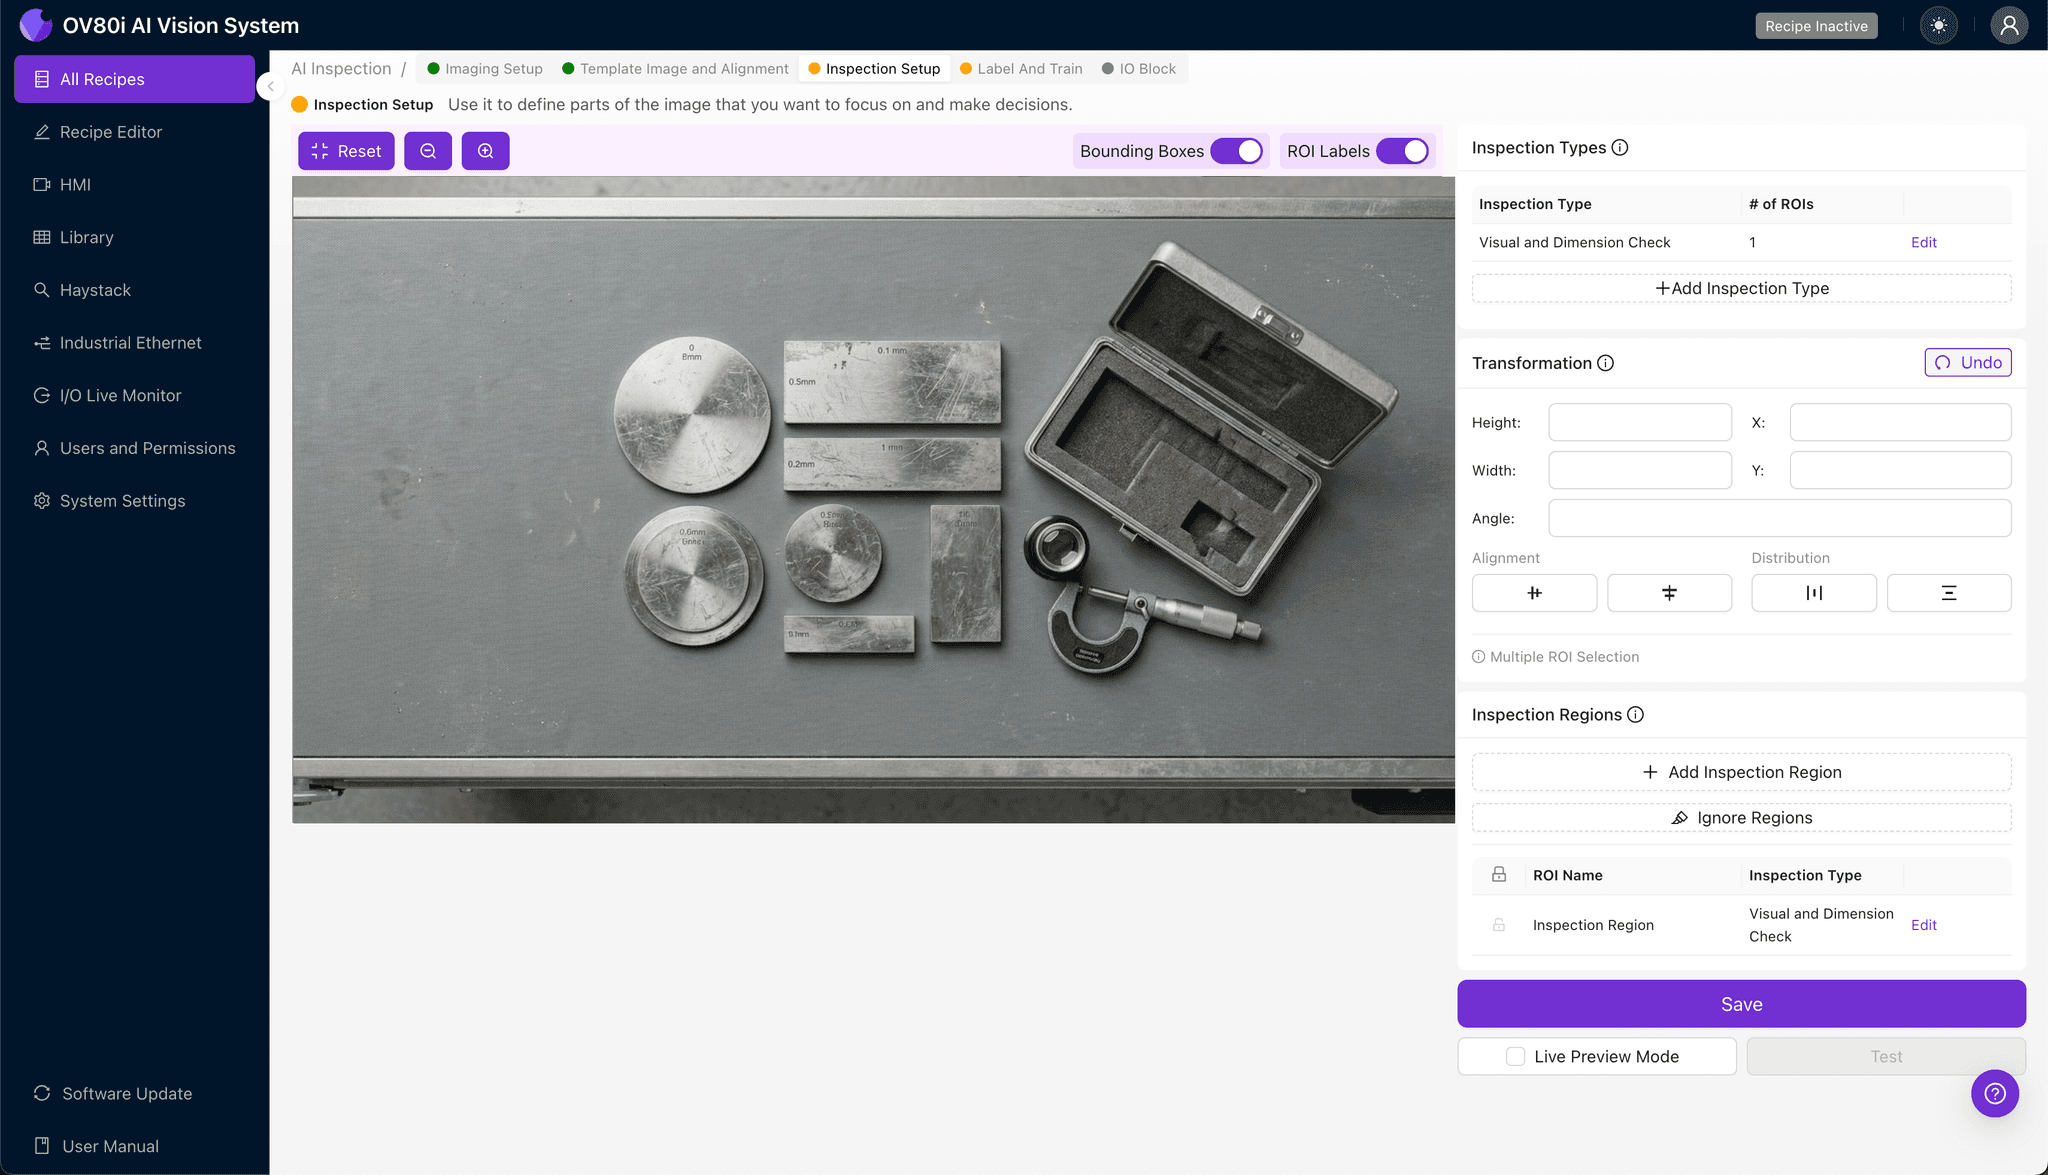
Navigate to "Inspection Setup" in the main menu. Rename your "Inspection Types" to reflect the specific defect categories—for example, "Reference_Surface_Scratches" or "Optical_Flat_Damage."
Click "+ Add Inspection Region" to create a new detection zone. Resize the yellow bounding box to cover the critical reference surface areas where scratches would impact calibration accuracy.
Click "Save" to confirm your inspection region configuration.
Step 4: Labeling Data
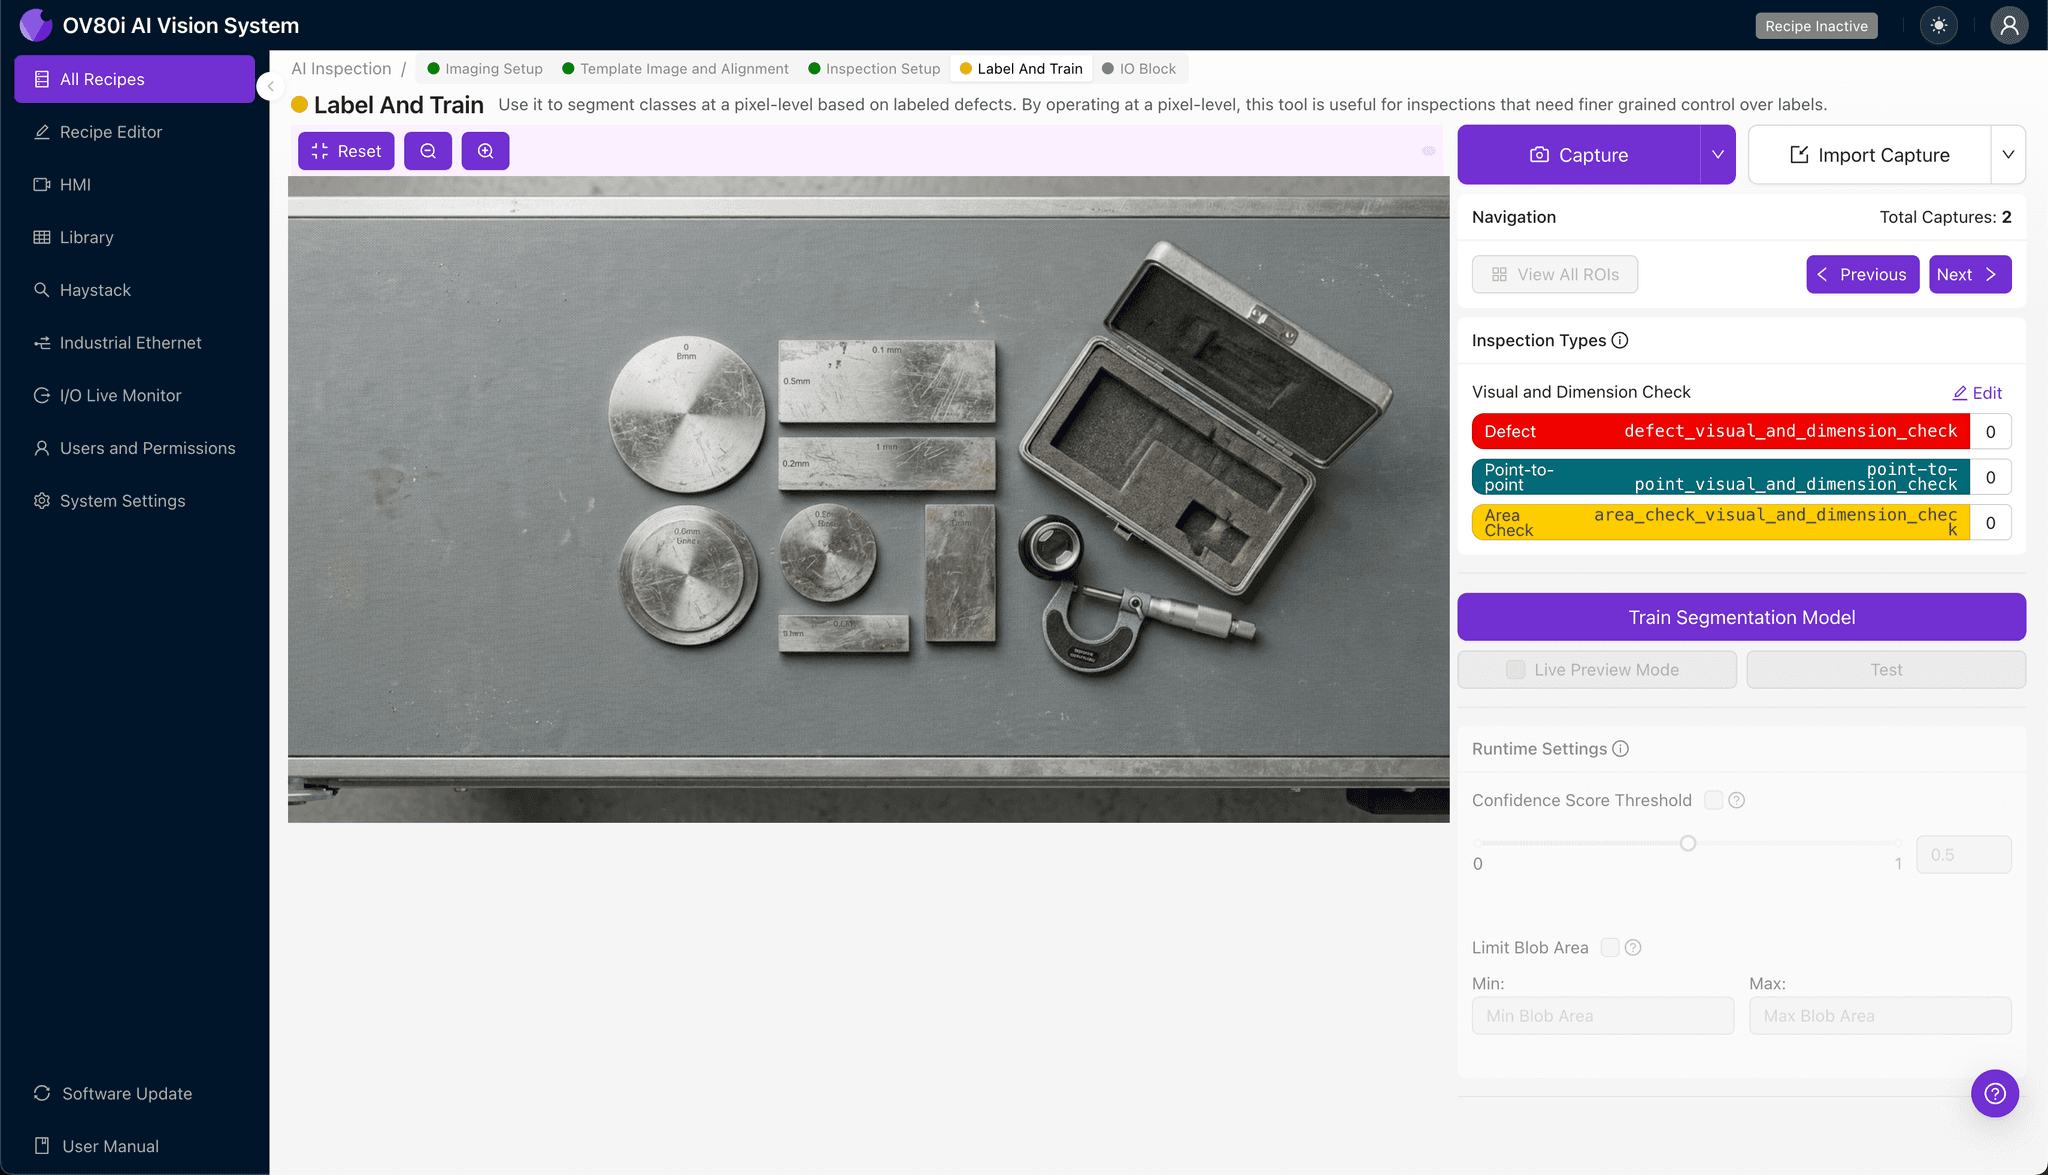
The human-in-the-loop labeling process teaches the AI model what constitutes acceptable versus rejectable surface conditions. Quality engineers review captured images and classify them as Good (surfaces meeting calibration standards) or Bad (surfaces with scratches or defects).
Include representative samples across the full spectrum of defect severity in your training dataset. Incorporate known failure modes—such as handling scratches, cleaning damage, and storage wear—to build a robust detection model.
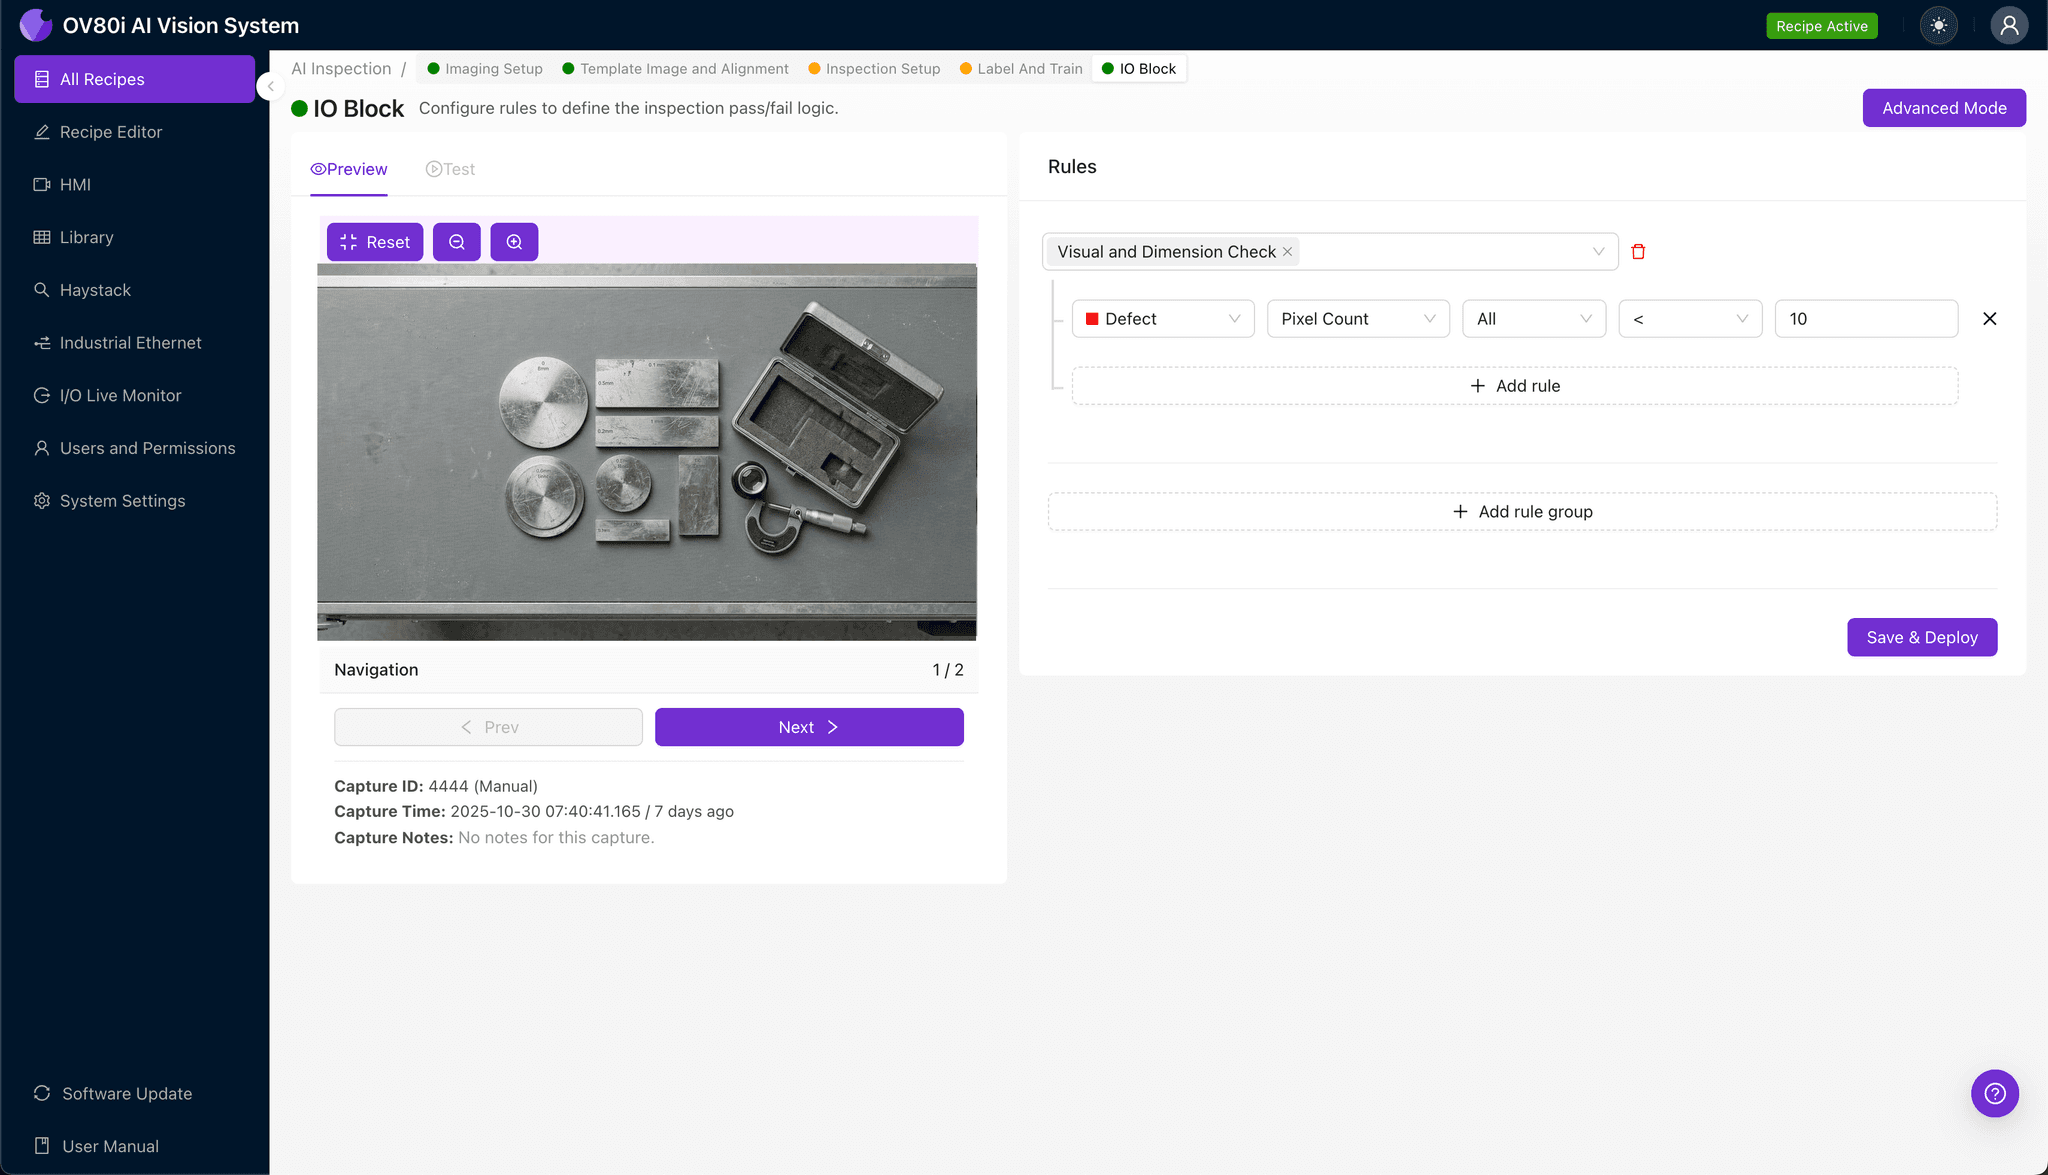
Step 5: Creating Rules
Configure your pass/fail logic based on the defined Inspection Types. Set threshold parameters that align with your calibration kit acceptance criteria and industry standards.
Gate automated acceptance on the production line so that only calibration kits with verified reference surface integrity proceed to use. Rejected kits route automatically for re-polishing, replacement, or quarantine review.
Key Outcomes & ROI
Implementing AI-powered inspection for calibration kit reference surfaces delivers measurable business impact:
- Reduced scrap and rework – Catch damaged reference surfaces before they cause downstream calibration failures and product rejections
- Higher throughput – Automate 100% inspection without creating production bottlenecks or adding headcount
- Compliance and traceability – Generate auditable inspection records documenting every calibration kit's surface condition for ISO and regulatory requirements
- Process improvement insights – Identify root causes of reference surface damage through defect trend analysis and handling procedure optimization
Protect Your Calibration Foundation with AI Vision
Scratched reference surfaces silently undermine measurement accuracy across your entire operation. Ensure every calibration kit meets your quality standards—consistently, objectively, and at production speed.