Continuity Tester with Oxidized Test-Nest Contacts: A Complete Visual Inspection Walkthrough
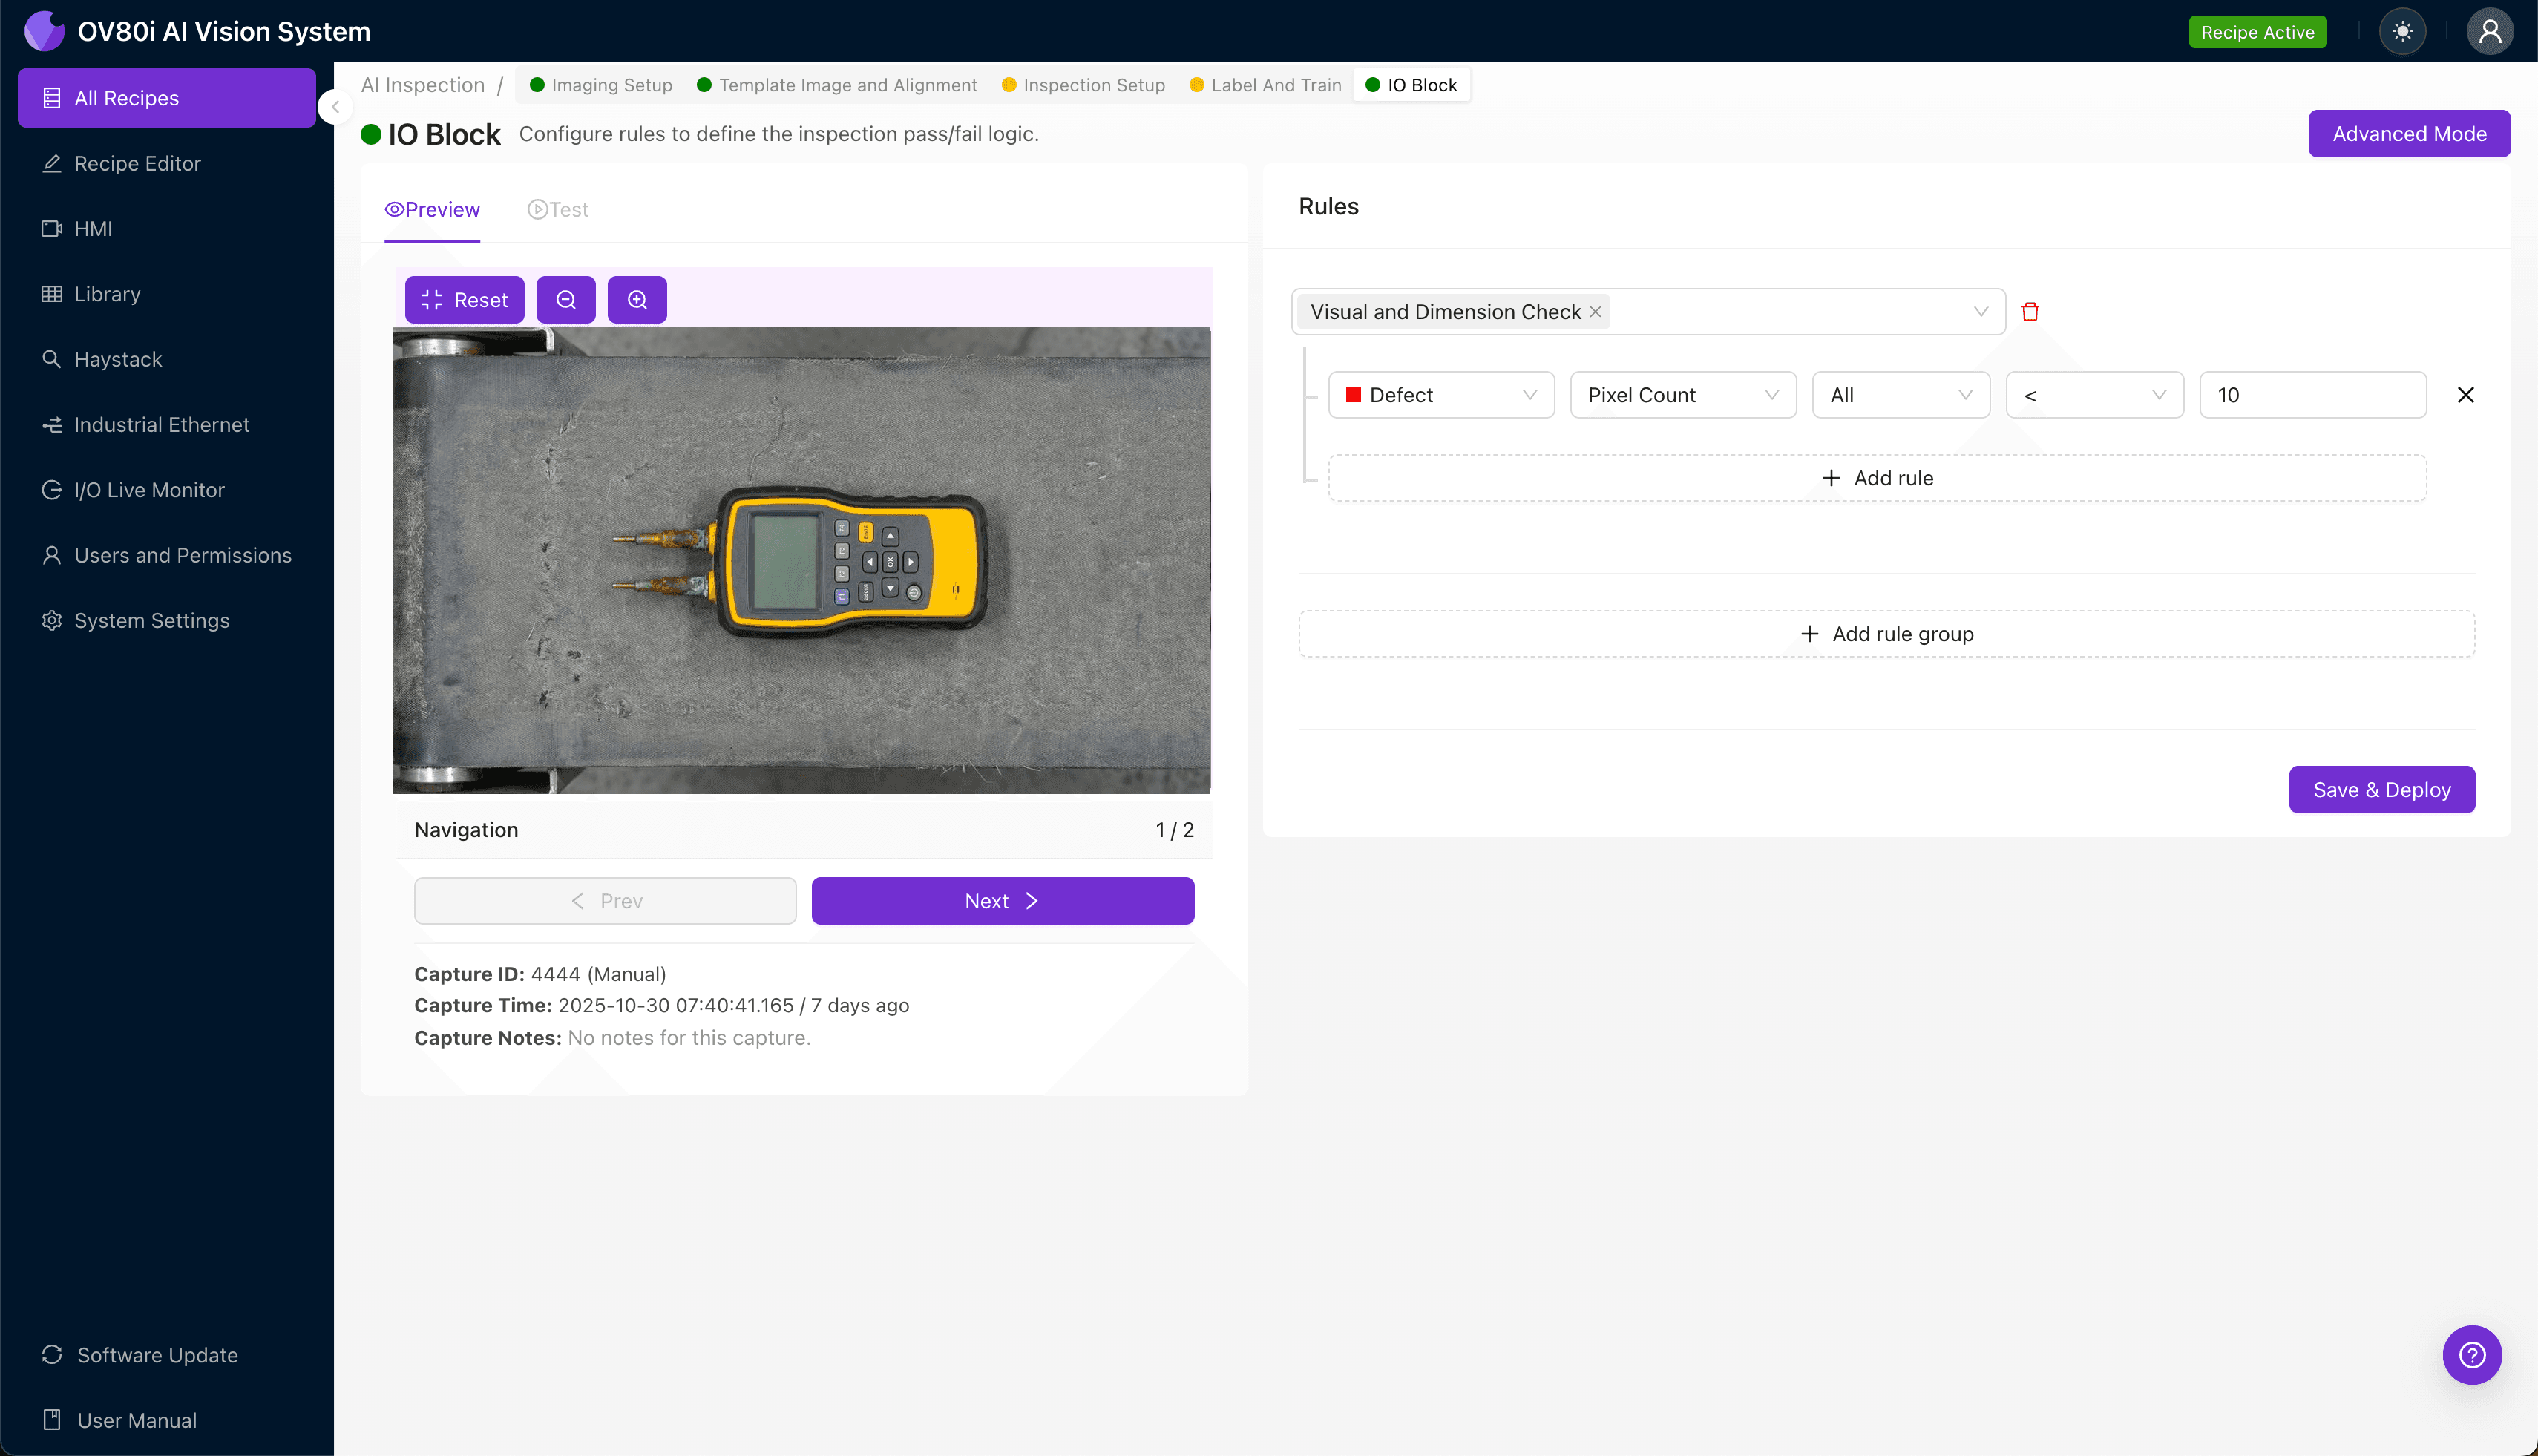
"Oxidized test-nest contacts compromise continuity testing accuracy, causing false passes and rejects. Overview.ai's machine vision system detects surface oxidation, pitting, and plating degradation at microscopic levels—catching contact degradation before it impacts your quality control process."
The Problem: Why Oxidized Test-Nest Contacts Compromise Your Continuity Testing
Continuity testers are the gatekeepers of electrical integrity in manufacturing, but their reliability depends entirely on the condition of their test-nest contacts. When these critical contact points oxidize, your entire quality control process becomes compromised—passing defective products and rejecting good ones.
Common Defects Found in Oxidized Test-Nest Contacts:
- Surface oxidation buildup — Green, brown, or black discoloration on contact surfaces that increases electrical resistance
- Pitting and corrosion craters — Microscopic surface damage that creates inconsistent contact points
- Contact wear patterns — Uneven material loss from repeated mechanical engagement cycles
- Contamination residue — Foreign particles, flux residue, or debris trapped on contact surfaces
- Plating degradation — Gold or tin plating worn through to base metal, accelerating oxidation
- Spring tension fatigue — Weakened contact pressure leading to intermittent connections
Human inspectors struggle to catch these defects consistently. Oxidation often begins at the microscopic level, invisible to the naked eye until significant damage has occurred. Factor in inspector fatigue during repetitive visual checks, and subtle variations in contact condition slip through undetected.
The Solution: Machine Vision and Deep Learning for Contact Inspection
Machine vision systems eliminate the subjectivity and fatigue that plague manual inspection of test-nest contacts. High-resolution cameras capture surface details invisible to human inspectors, while deep learning algorithms learn to recognize the subtle patterns that distinguish healthy contacts from oxidized ones.
Overview.ai's approach delivers consistent, objective inspection at line speed—every single contact, every single time. The system doesn't get tired at the end of a shift, doesn't have "good days" and "bad days," and maintains the same detection accuracy whether it's inspecting contact number one or contact number ten thousand.
Step 1: Imaging Setup
Begin by positioning your continuity tester assembly under the Overview.ai camera system. Ensure the test-nest contacts are fully visible and properly illuminated to reveal surface conditions.
Click "Configure Imaging" in the software interface to access your Camera Settings. Adjust exposure to capture oxidation discoloration without overexposing reflective contact surfaces, and fine-tune gain to maximize detail in shadowed areas between contact pins.
Click "Save" to lock in your optimized imaging parameters.
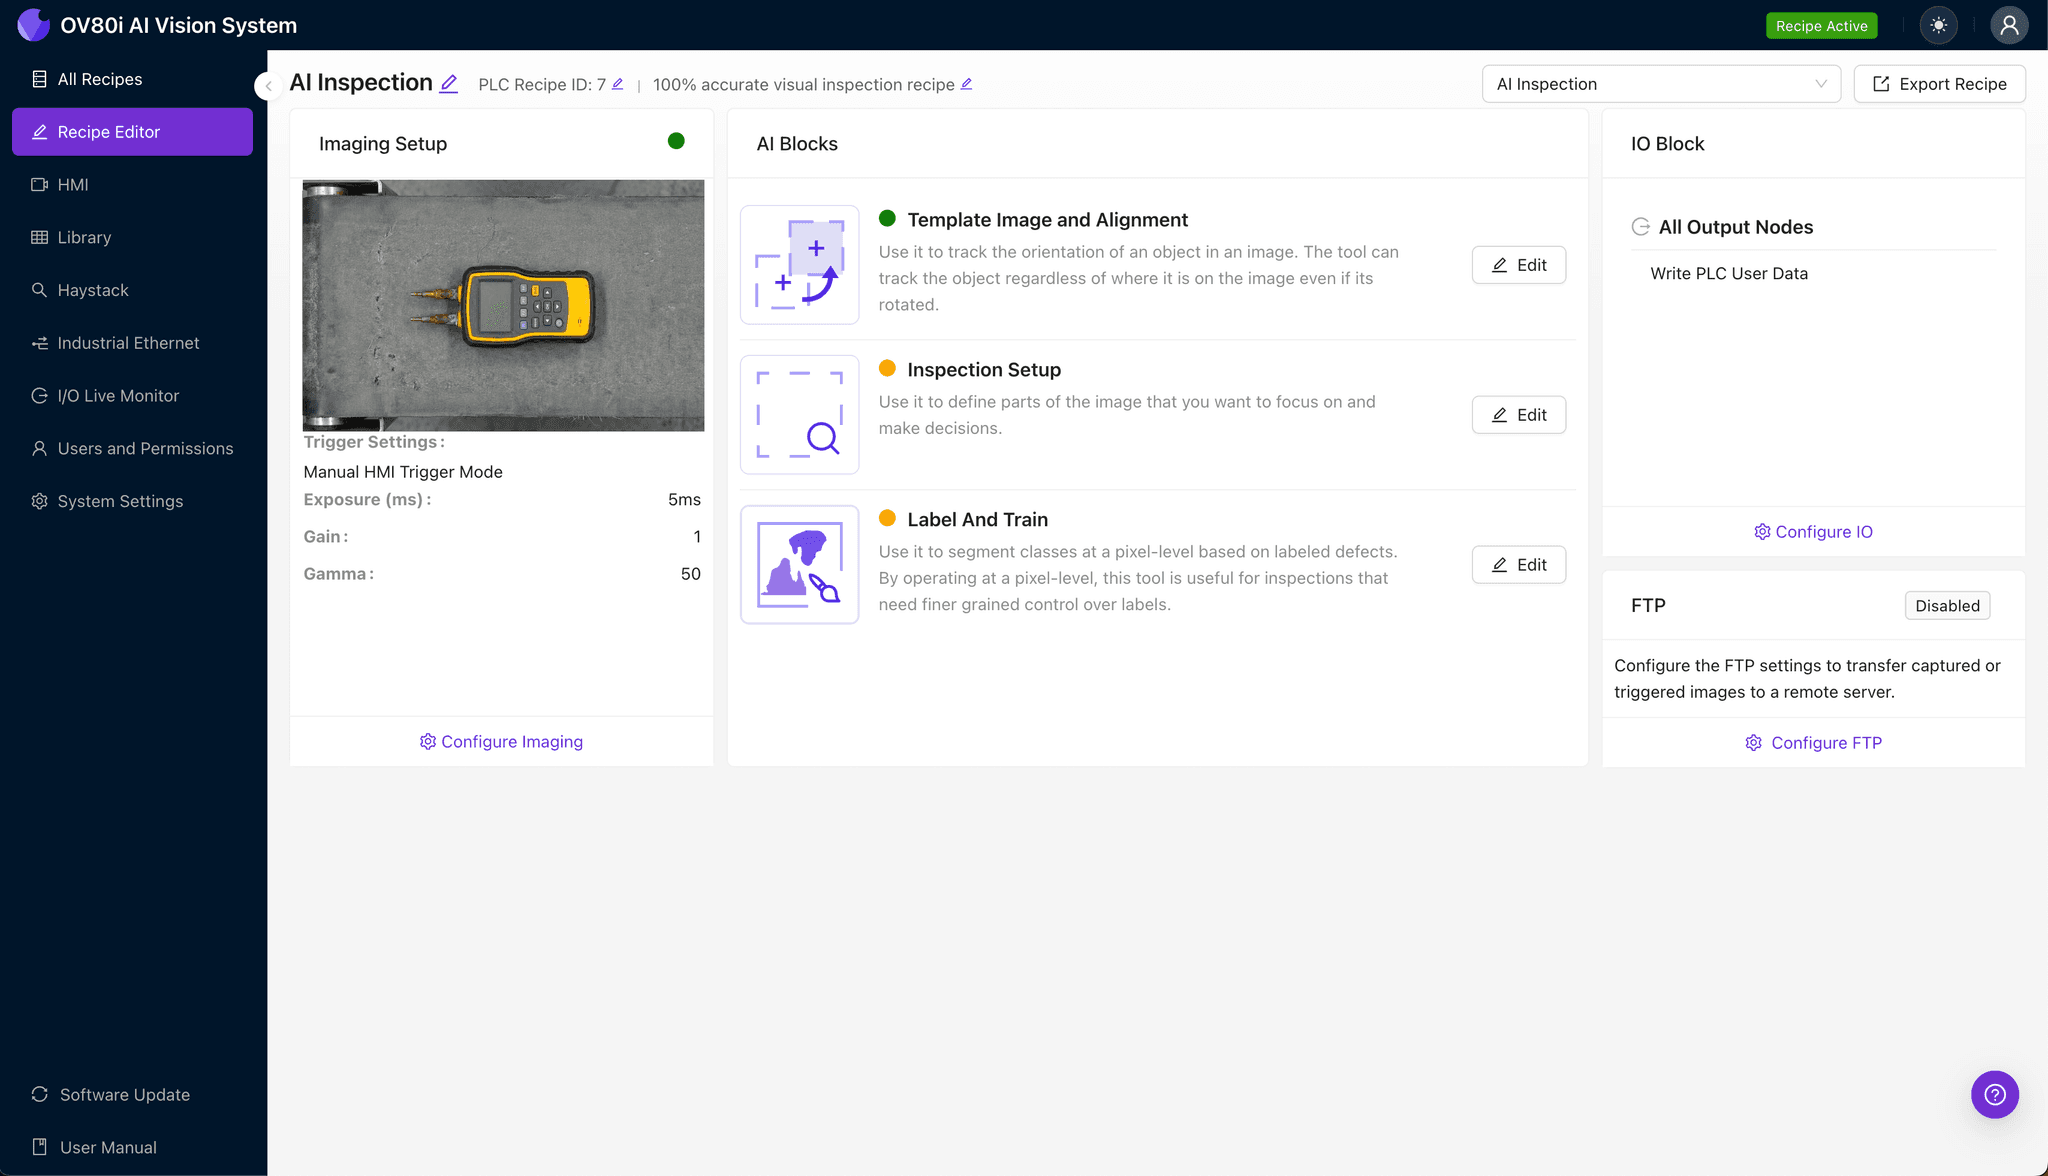
Step 2: Image Alignment
Navigate to the "Template Image" section in your configuration panel. Capture a Template image of a known-good continuity tester with clean, properly functioning test-nest contacts.
Click "+ Rectangle" to add an alignment region around the main body of the test fixture. This anchors the inspection system to consistent reference points.
Set your "Rotation Range" to 20 degrees to accommodate minor variations in how testers are presented to the camera. This ensures reliable detection regardless of slight positional differences on your line.
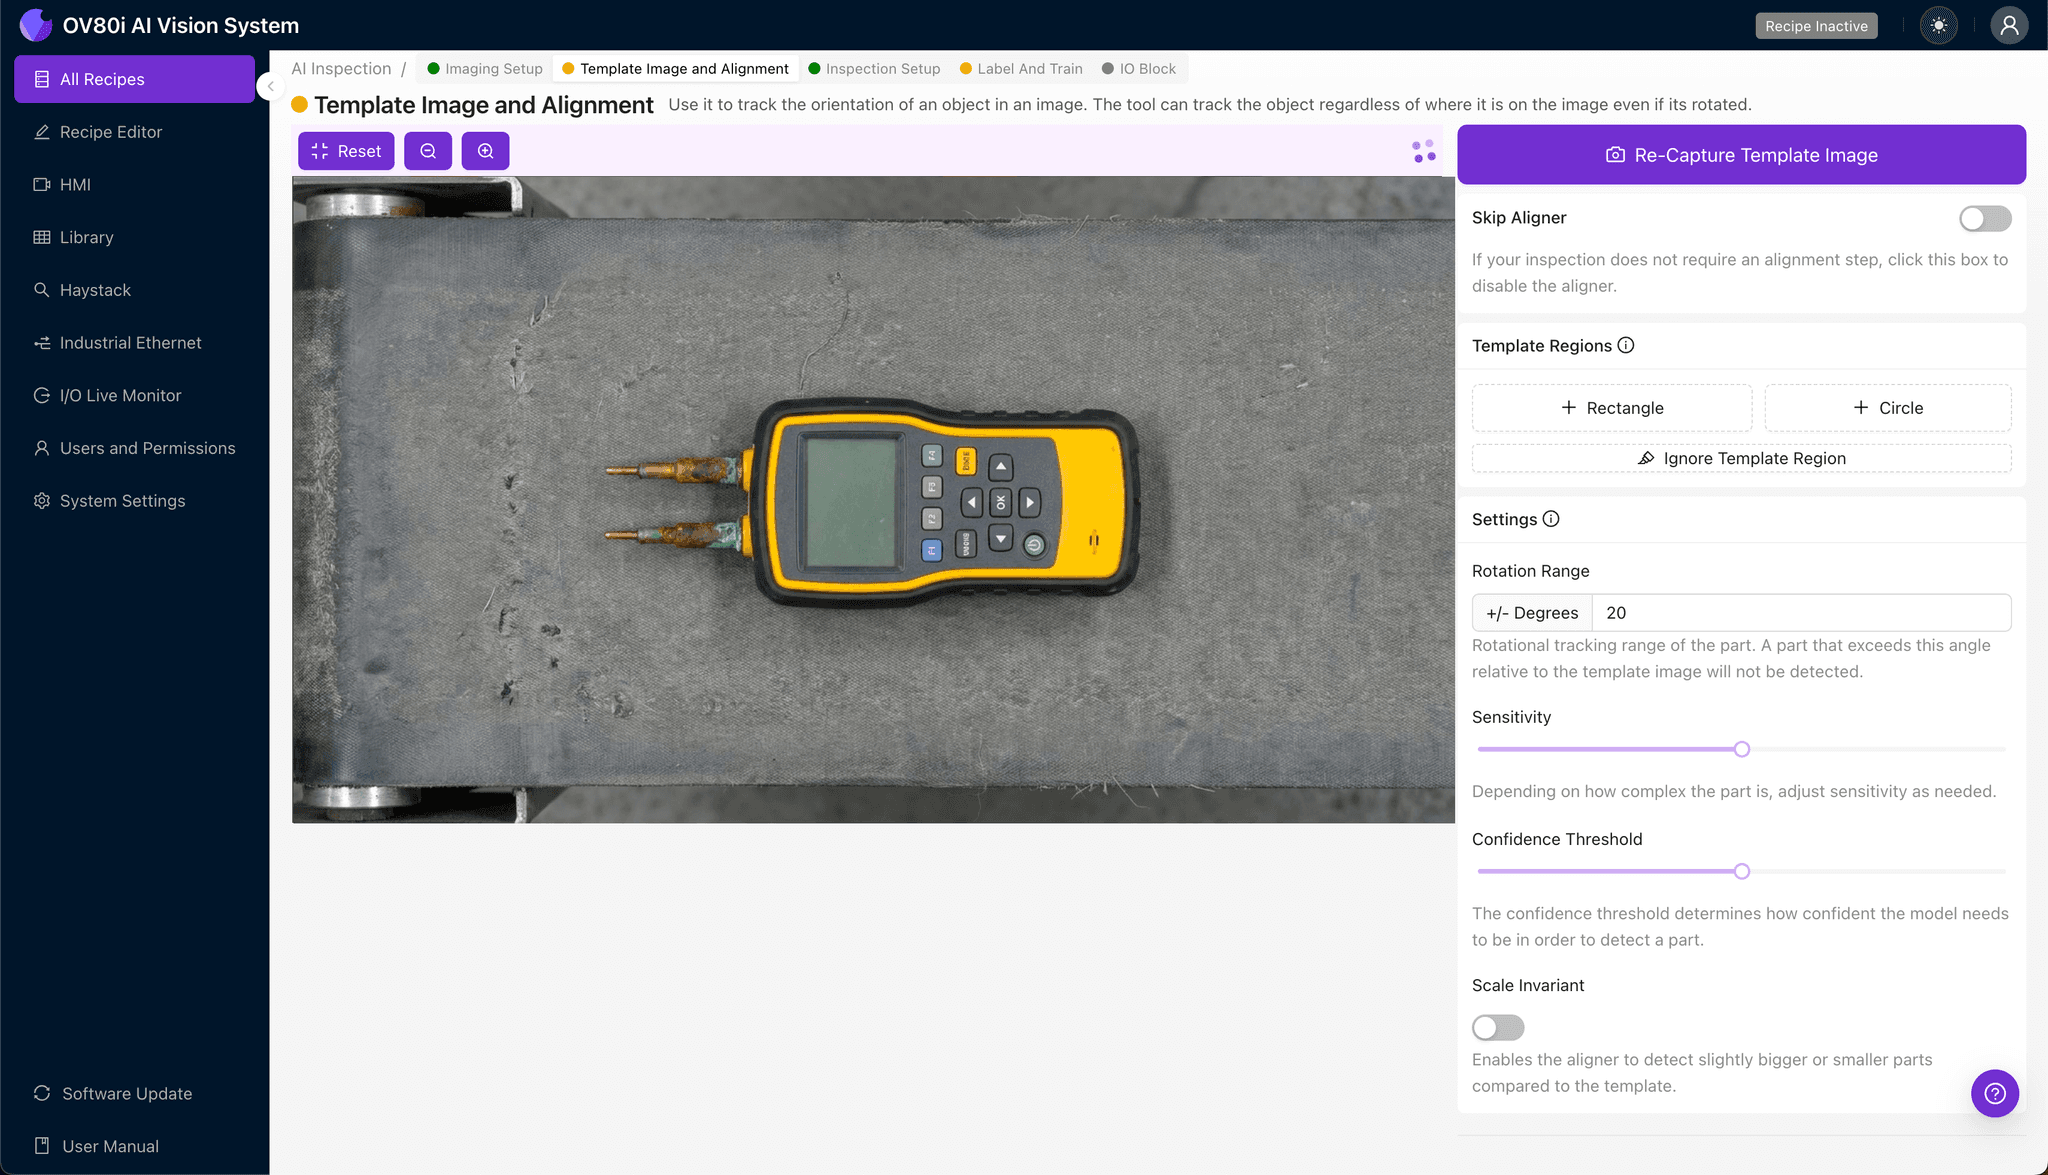
Step 3: Inspection Region Selection
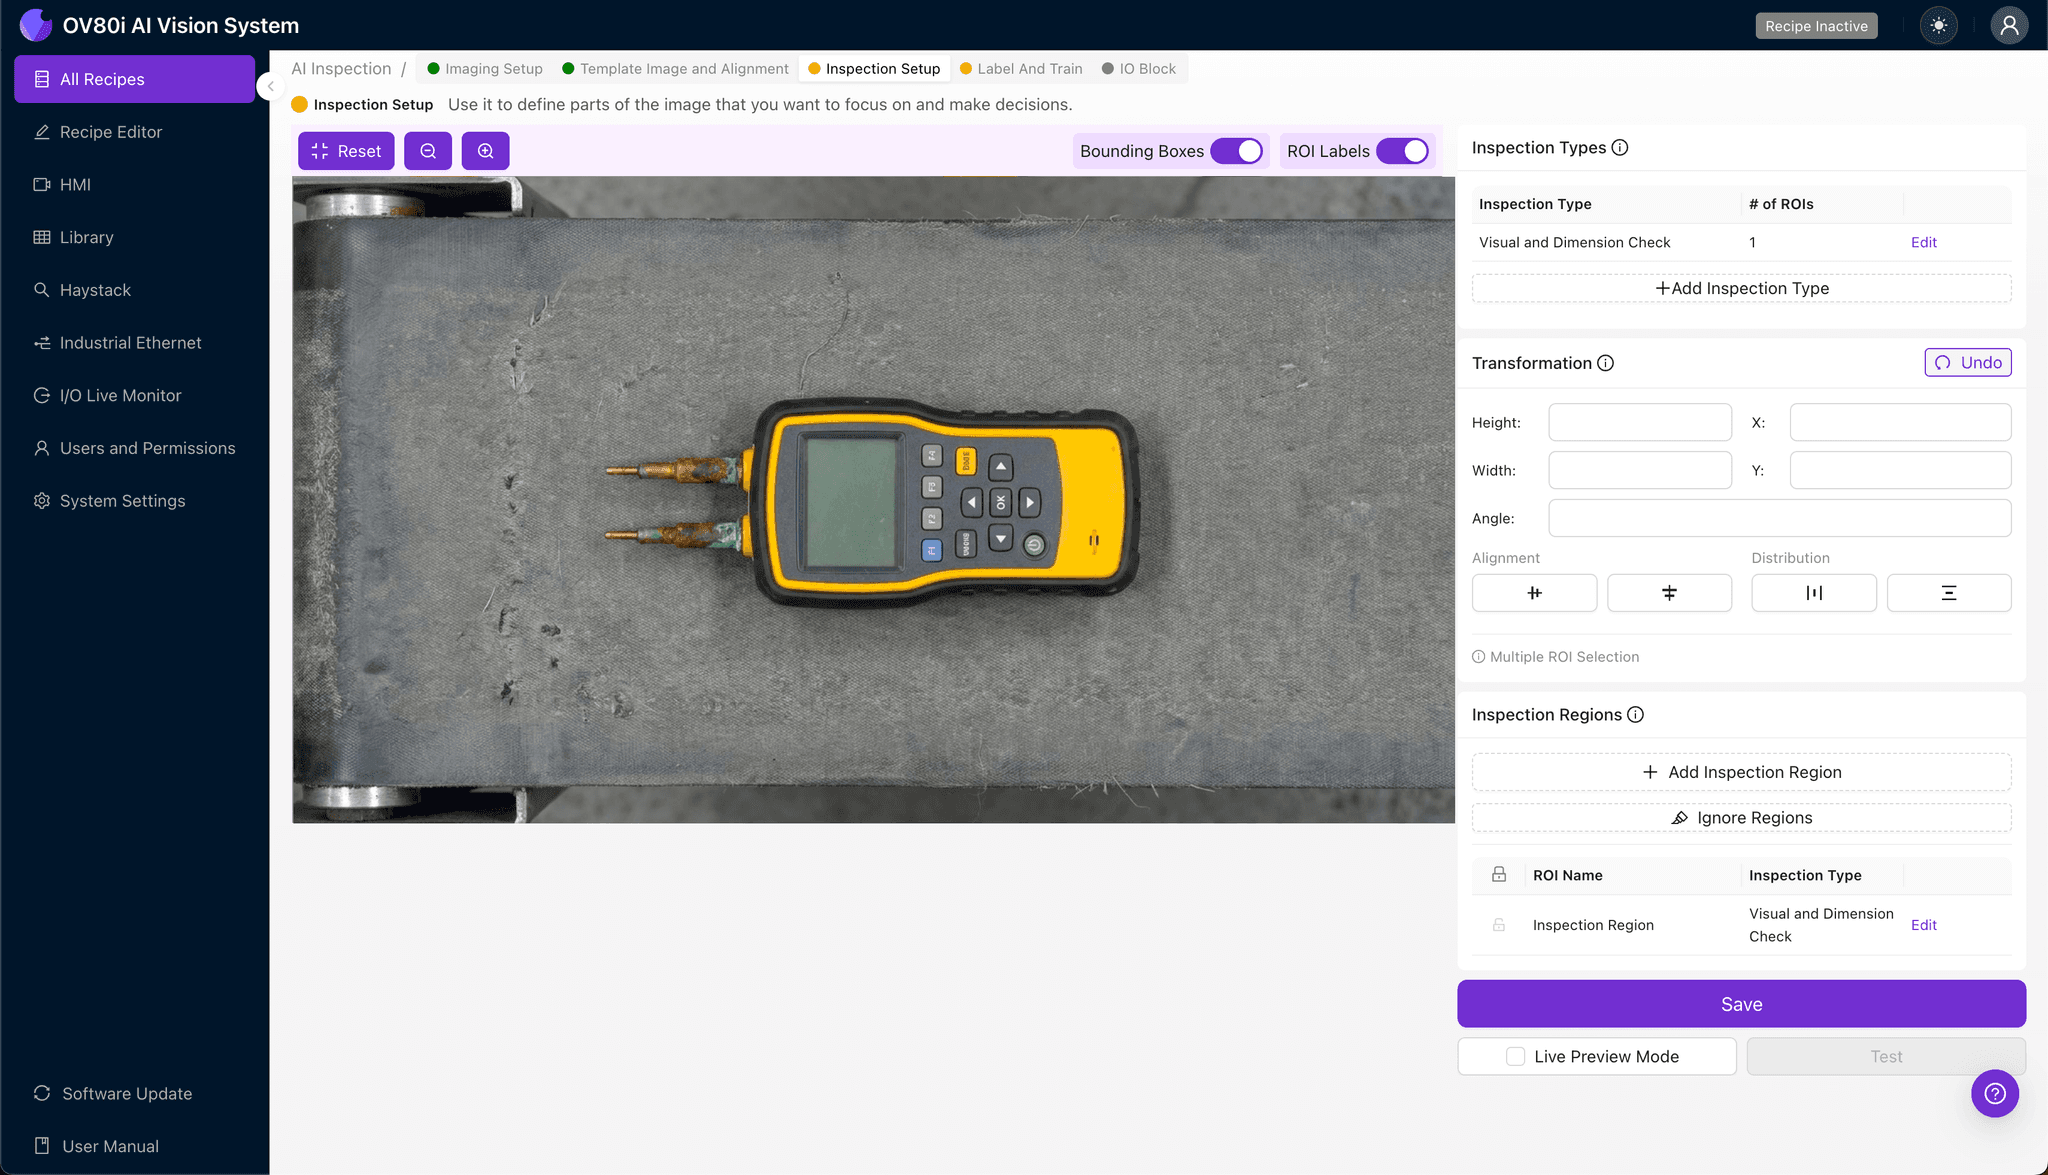
Navigate to "Inspection Setup" to define where the system should focus its analysis. This step is critical for isolating the contact surfaces from the surrounding fixture components.
Rename your "Inspection Types" to reflect the specific defect categories you're targeting—for example, "Contact_Oxidation," "Surface_Pitting," or "Plating_Wear." Clear naming conventions simplify downstream analysis and reporting.
Click "+ Add Inspection Region" and resize the yellow bounding box to cover each critical contact point. Focus on the contact tips and engagement surfaces where oxidation most directly impacts electrical performance.
Click "Save" to confirm your inspection regions.
Step 4: Labeling Data
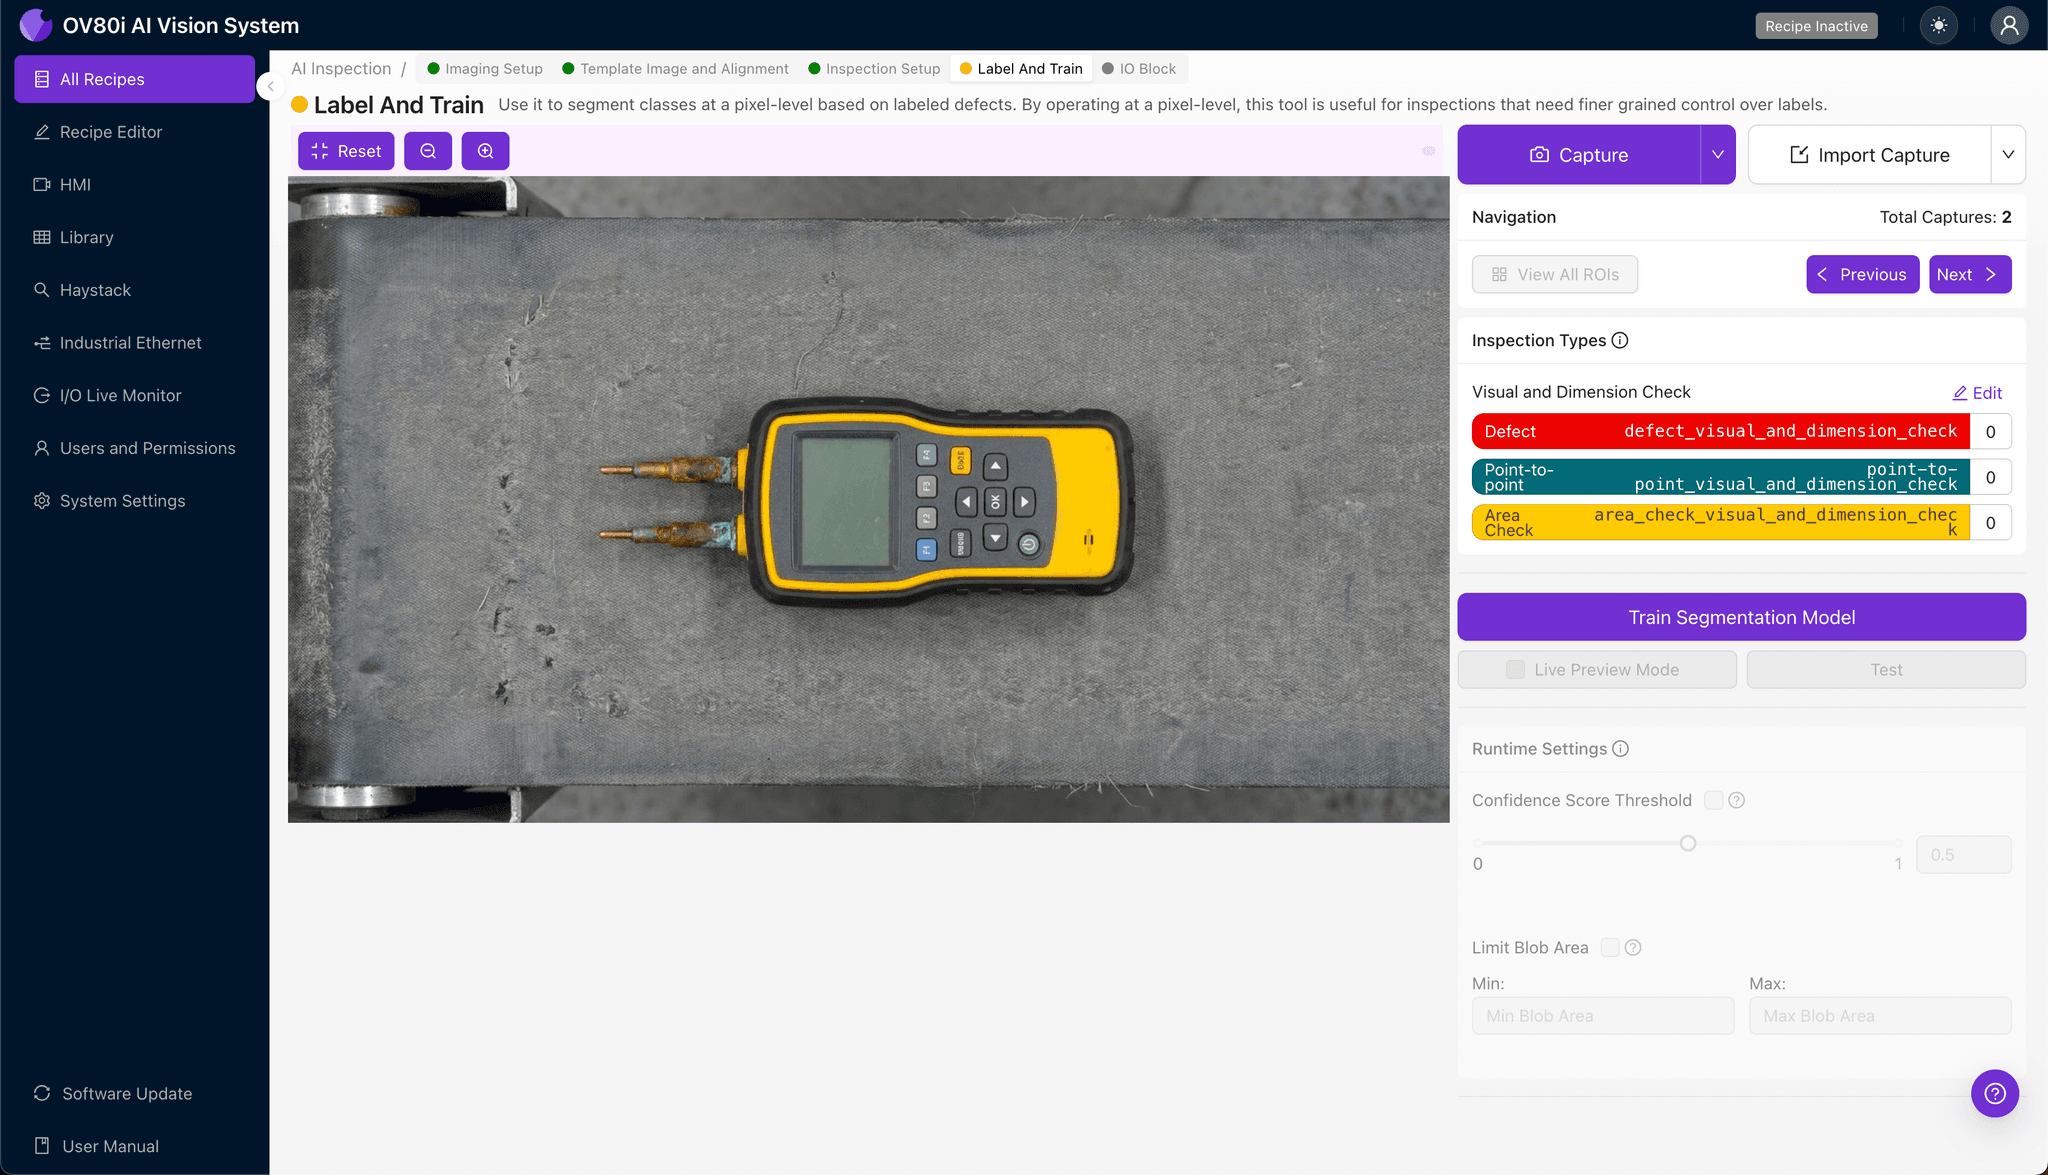
The human-in-the-loop labeling process trains your deep learning model to recognize oxidation patterns specific to your contacts. This is where your domain expertise becomes embedded in the AI.
Label captured images as Good (clean, functional contacts) or Bad (oxidized, damaged, or contaminated). Include representative samples across the full spectrum of conditions—slight oxidation, moderate buildup, severe corrosion.
Be sure to incorporate known failure modes from your production history. The more edge cases and real-world defect examples you provide, the more robust your model becomes at catching subtle quality issues.
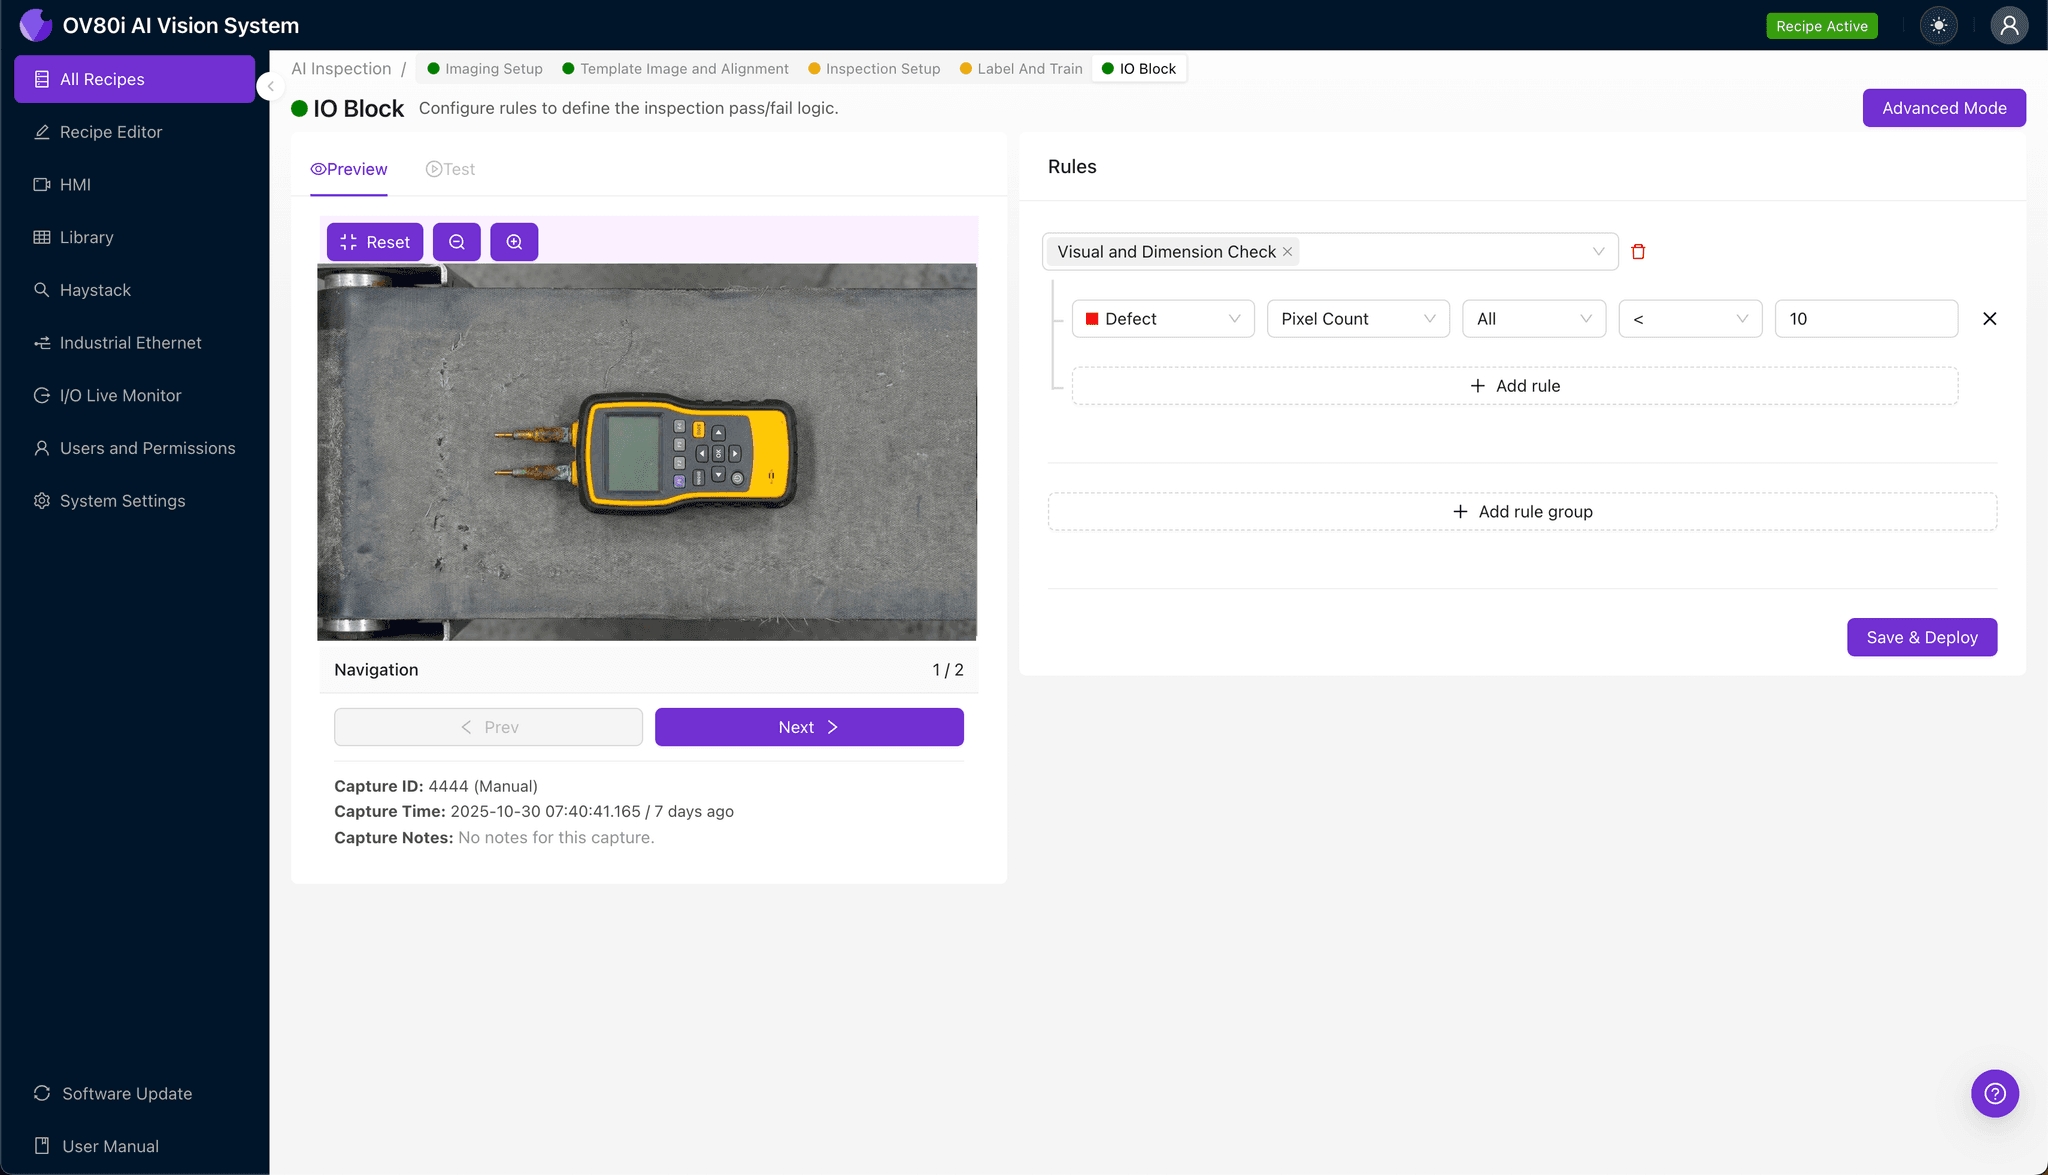
Step 5: Creating Rules
With your model trained, establish pass/fail logic based on your defined Inspection Types. Set confidence thresholds that balance detection sensitivity with false positive rates appropriate for your quality requirements.
Gate automated acceptance decisions directly on the line. Products with contacts meeting your criteria proceed automatically, while flagged units route to secondary inspection or rejection—all without manual intervention slowing your throughput.
Key Outcomes & ROI
Implementing automated visual inspection for your continuity tester contacts delivers measurable business impact:
- Reduced scrap rates — Catch oxidation before it causes false test failures, preventing good product from being discarded
- Higher throughput — Inspect every contact at line speed without bottlenecking production for manual checks
- Compliance and traceability — Maintain complete inspection records with timestamped images for audit trails and customer requirements
- Process improvement insights — Identify oxidation trends over time, enabling predictive maintenance of test fixtures before quality suffers
Conclusion
Oxidized test-nest contacts represent a hidden quality risk that compounds over time. By implementing Overview.ai's visual inspection system, manufacturers gain the ability to detect contact degradation early, maintain testing accuracy, and protect both product quality and production efficiency.
The five-step configuration process puts powerful deep learning capabilities in the hands of your quality team—no machine vision PhD required.
Eliminate Defects Today
Stop relying on manual inspection. Deploy Overview.ai to catch defects instantly.