Inspection Camera with Shutter Lag: A Complete Visual Inspection Walkthrough
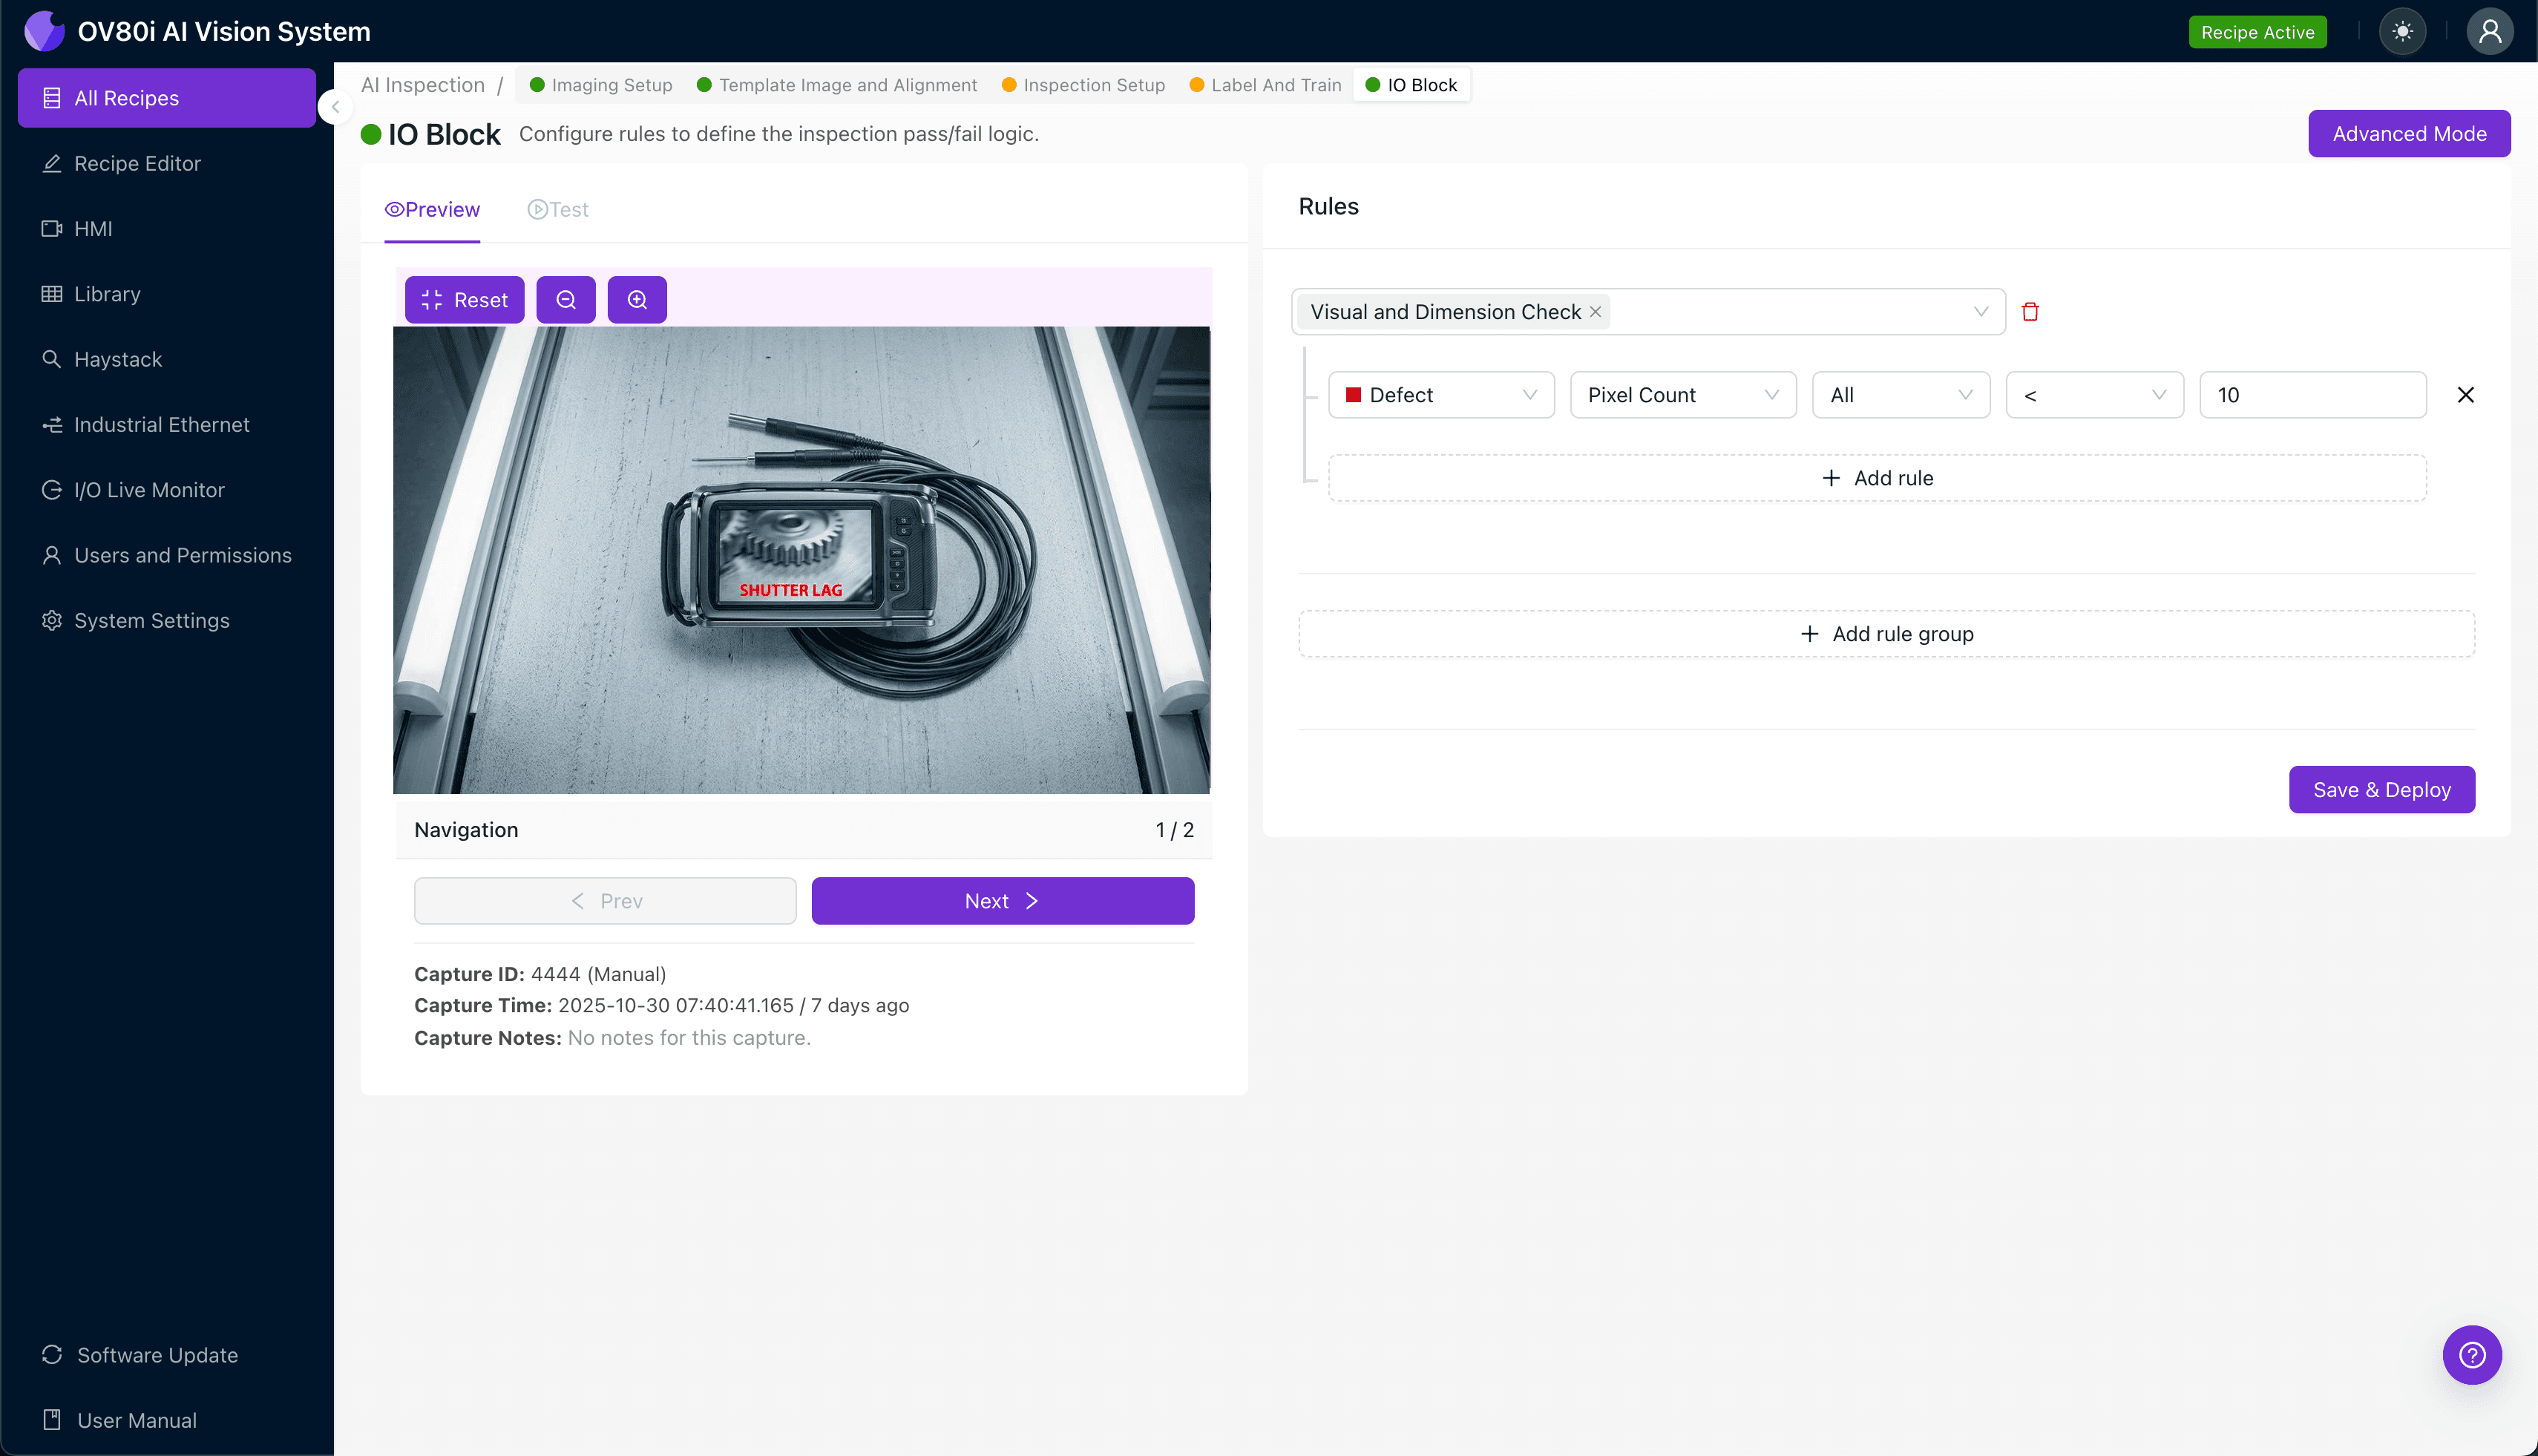
"Inspection cameras with shutter lag create timing inconsistencies that compromise defect detection accuracy. Overview.ai's deep learning platform compensates for these hardware limitations, maintaining 100% inline inspection at full line speed."
The Problem: Why Shutter Lag Undermines Quality Control
Inspection cameras with shutter lag present a critical challenge in high-speed manufacturing environments. The delay between trigger signal and actual image capture creates timing inconsistencies that compromise defect detection accuracy.
Common Defects Caused by Shutter Lag in Manufacturing Inspection:
- Motion blur artifacts – Moving parts travel beyond the intended capture point, producing unusable images
- Positional misalignment – Components appear shifted from their actual location, causing false rejects
- Inconsistent frame timing – Variable lag duration creates unpredictable image quality across production runs
- Missed defect windows – Critical inspection zones pass before the sensor activates
- Synchronization failures – Encoder and trigger signals fall out of phase with actual captures
- Ghost imaging – Overlapping exposures from delayed shutter response create duplicate or shadowed features
Manual inspection cannot compensate for these camera-induced errors. Human inspectors experience fatigue-related accuracy drops of up to 30% over extended shifts, and they simply cannot maintain the millisecond-level consistency required to catch timing-related defects at production speeds.
The Solution: Machine Vision and Deep Learning
Modern machine vision systems paired with deep learning algorithms transform how manufacturers handle inspection camera limitations. These AI-powered platforms learn to recognize defects even when image quality varies, compensating for hardware inconsistencies that would defeat traditional rule-based inspection.
Deep learning models trained on thousands of production images develop robust pattern recognition that adapts to real-world conditions. Unlike static threshold-based systems, neural networks identify defects based on learned features rather than rigid parameters.
Overview.ai's Approach
Overview.ai delivers consistent, objective inspection at full line speed—regardless of upstream camera challenges. The OV80i platform processes images in real-time, applying trained models that maintain accuracy even when input quality fluctuates due to shutter lag or other hardware variables.
Step 1: Imaging Setup
Position your inspection camera with shutter lag directly above the conveyor or inspection station, ensuring the field of view captures the entire component. Proper mounting reduces vibration that can compound timing issues.
Navigate to "Configure Imaging" in the Overview.ai interface. Adjust Camera Settings including exposure time and gain to optimize image brightness and contrast for your specific part geometry.
Click "Save" to lock in your baseline configuration.
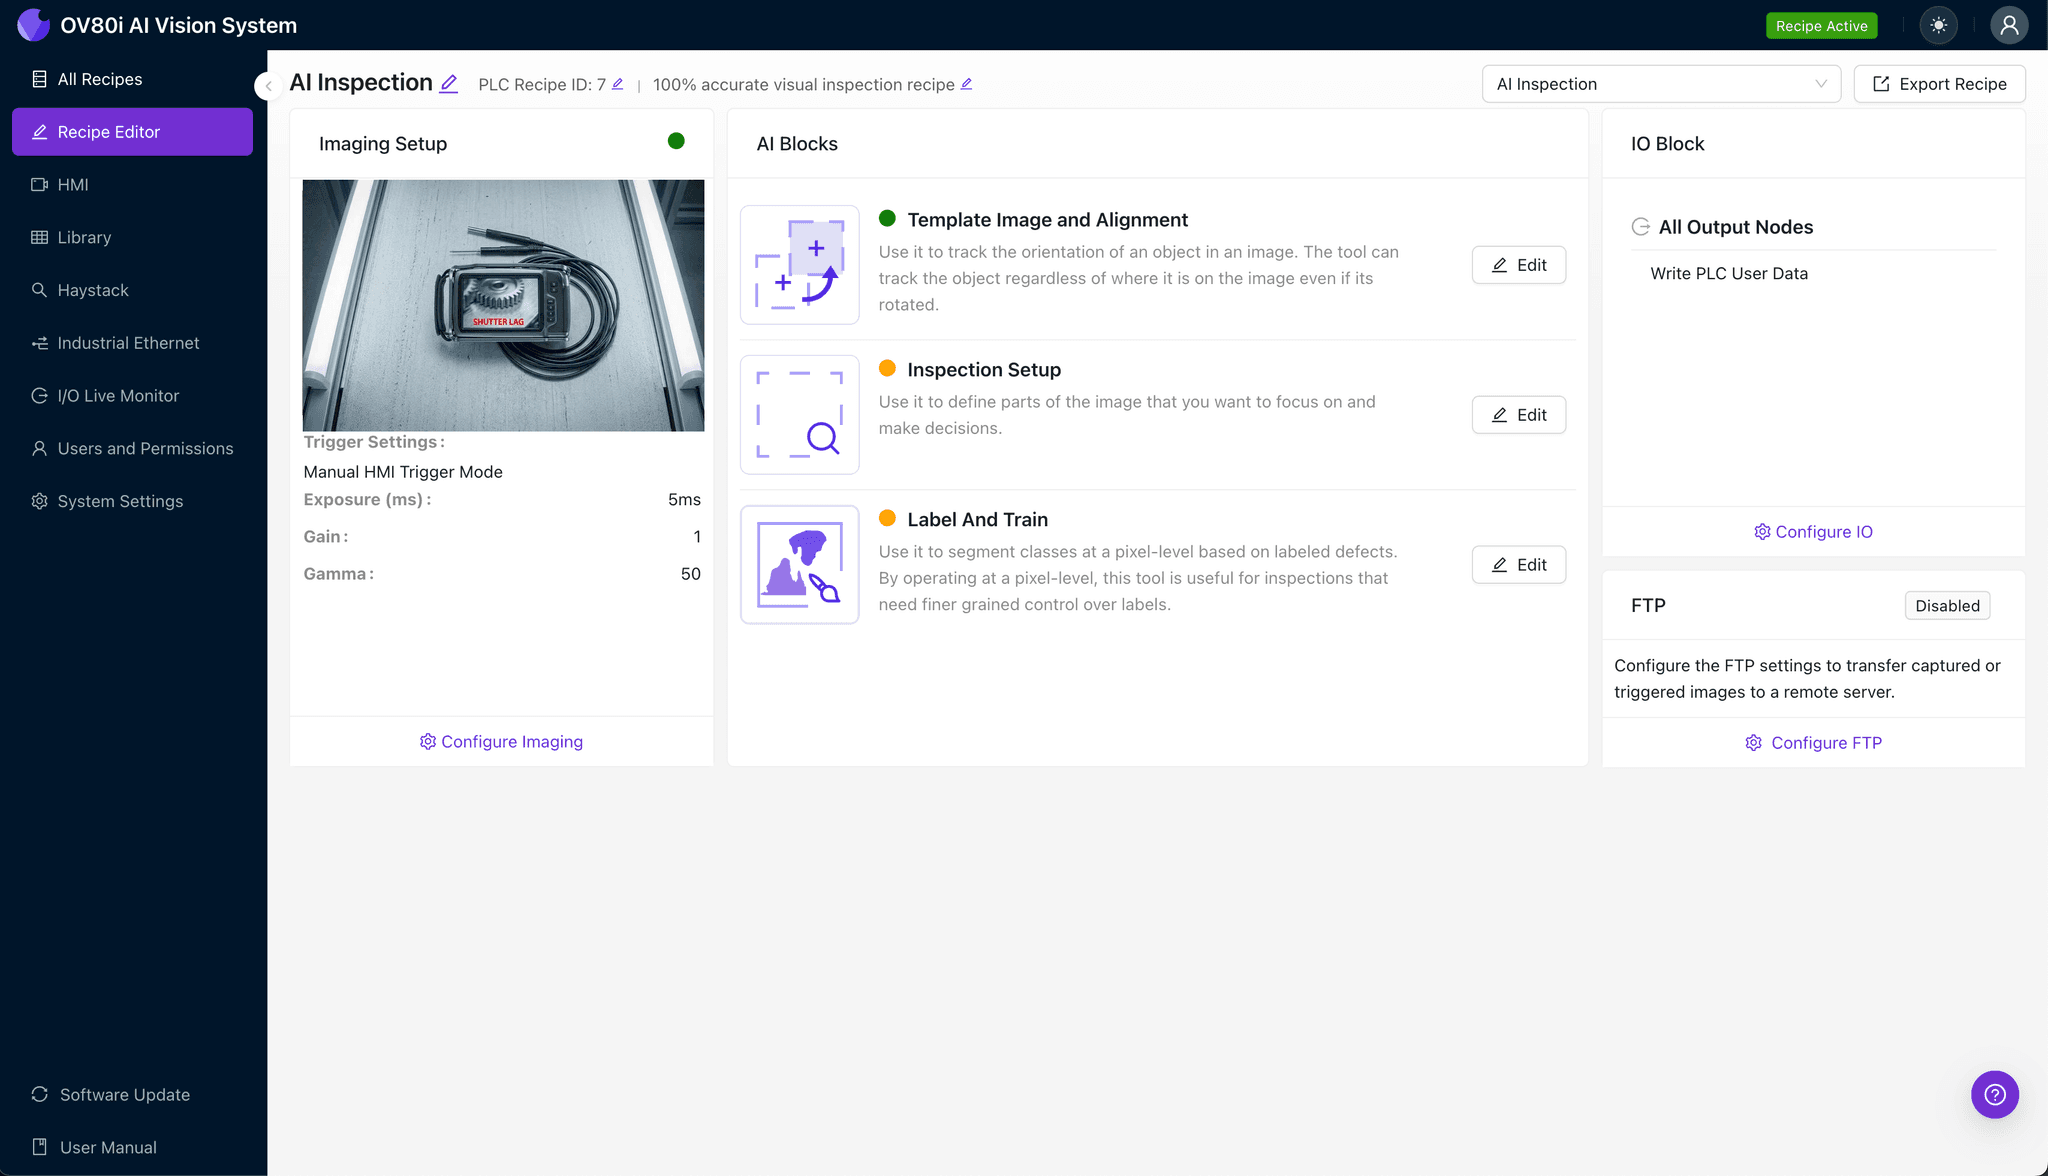
Step 2: Image Alignment
Navigate to the "Template Image" section within the platform. Capture a high-quality reference image that represents your ideal part orientation.
Click "+ Rectangle" to add an alignment region around the main body of your component. This establishes the geometric reference for all subsequent inspections.
Set the "Rotation Range" to 20 degrees to accommodate normal part-to-part variation in presentation angle.
Step 3: Inspection Region Selection
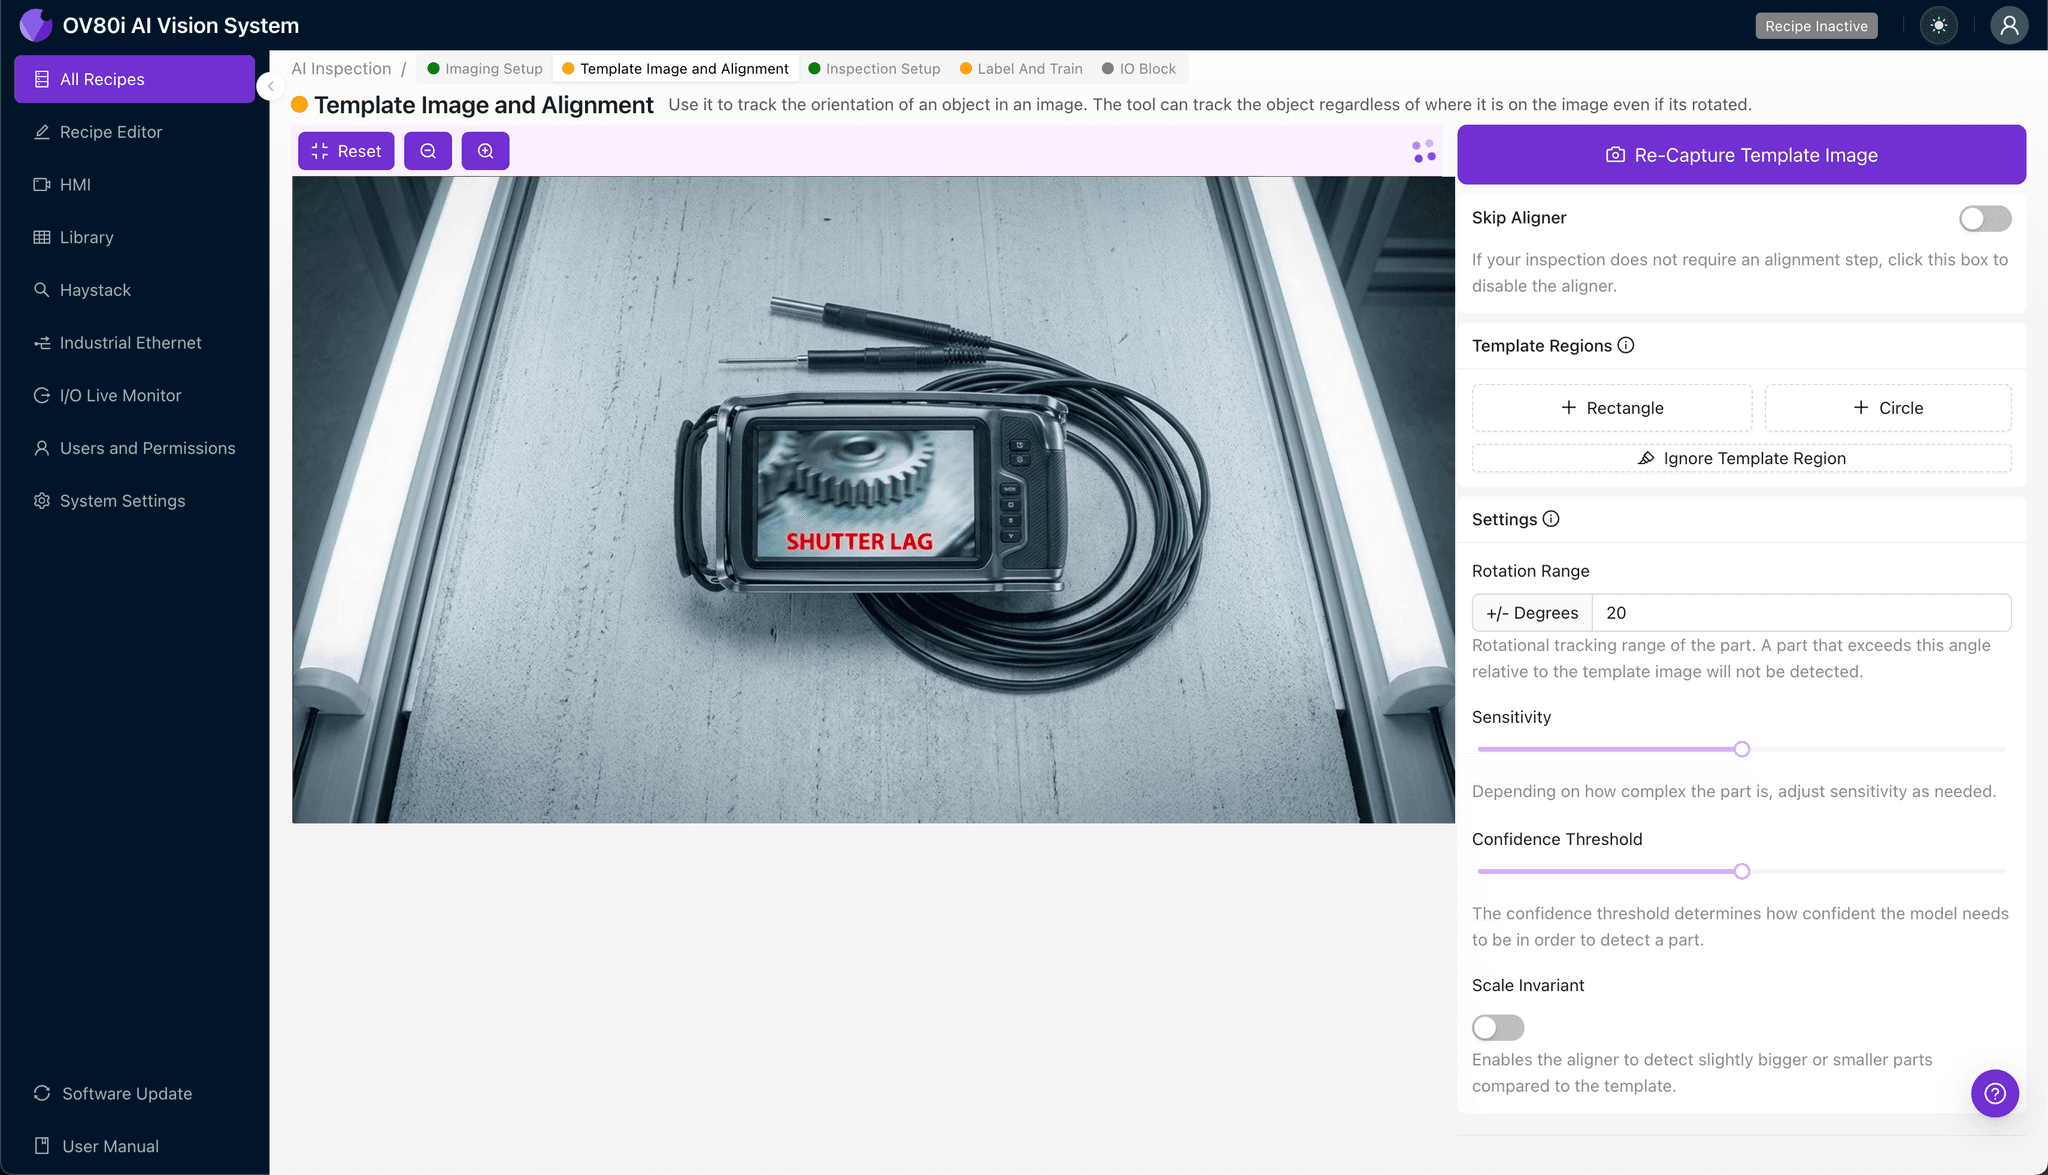
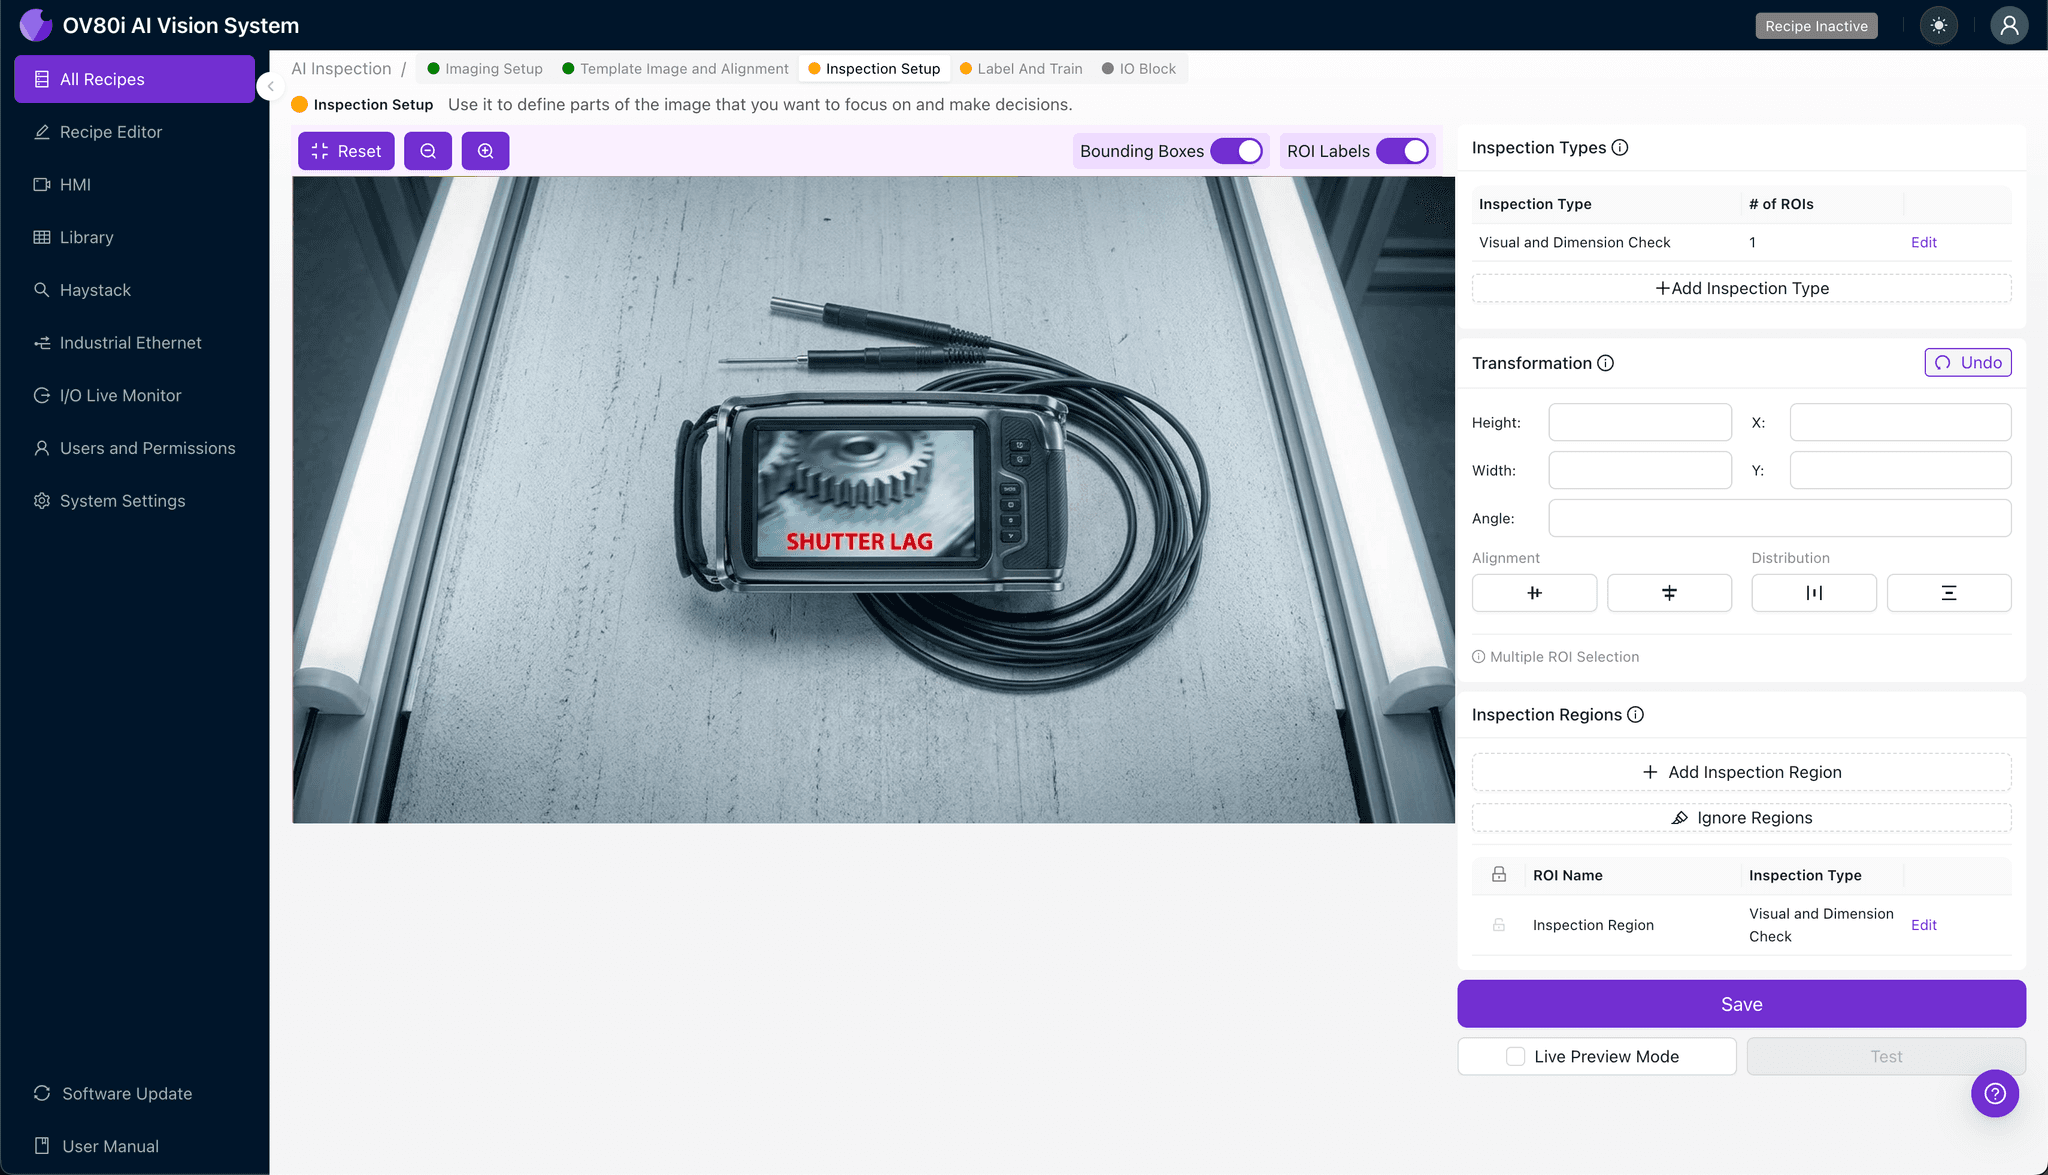
Navigate to "Inspection Setup" from the main menu. Rename your "Inspection Types" to reflect the specific defects you're targeting—for example, "Surface Scratch" or "Edge Chip."
Click "+ Add Inspection Region" to define your critical areas. Resize the yellow bounding box to cover zones where defects most commonly appear, such as weld seams, mounting surfaces, or printed features.
Click "Save" to confirm your region definitions.
Step 4: Labeling Data
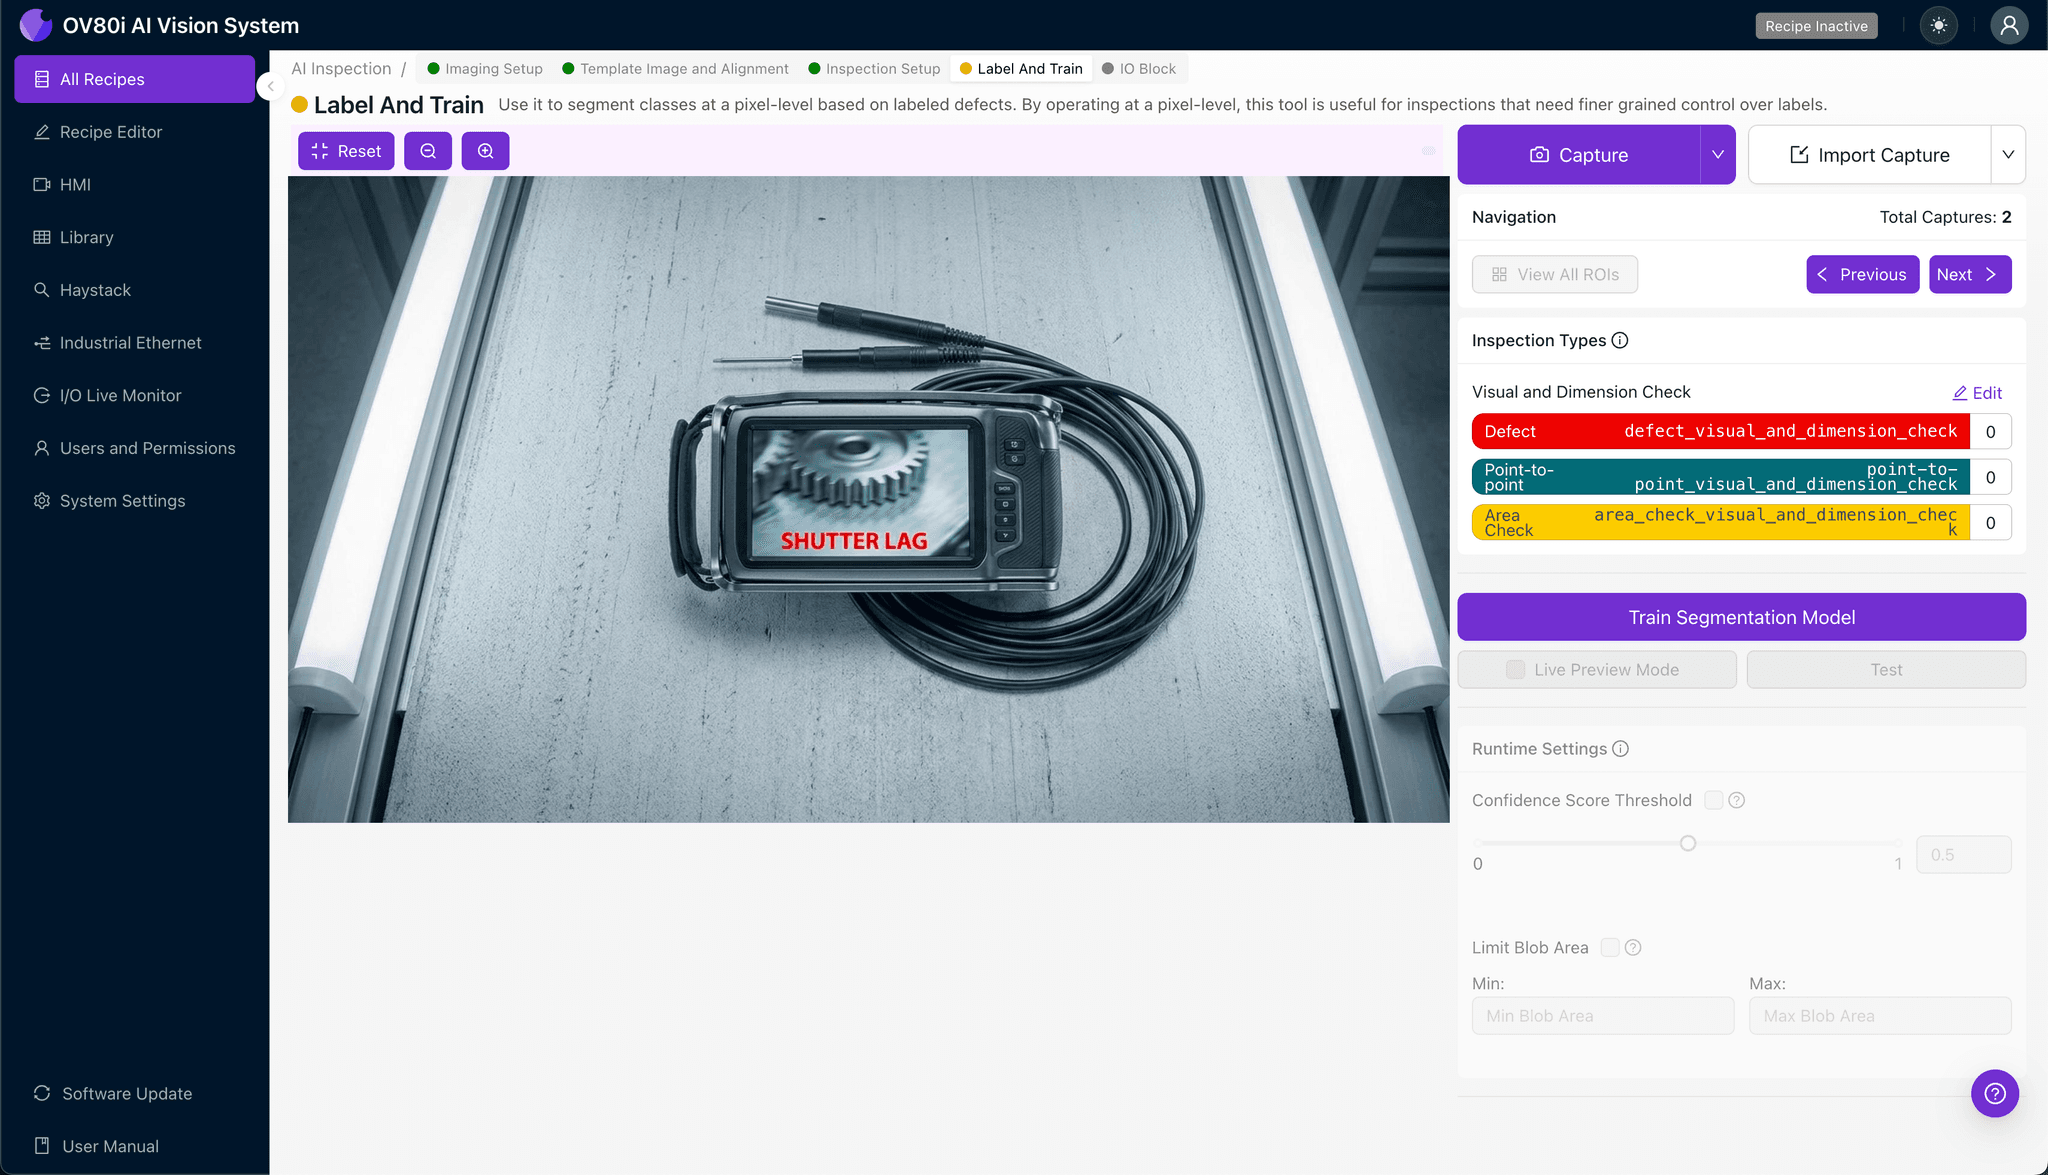
The human-in-the-loop labeling process trains the AI model on your specific quality standards. Review captured production images and categorize each as Good or Bad based on your acceptance criteria.
Include representative samples across the full range of acceptable variation. Incorporate known failure modes and edge cases to build a robust training dataset that generalizes well to production conditions.
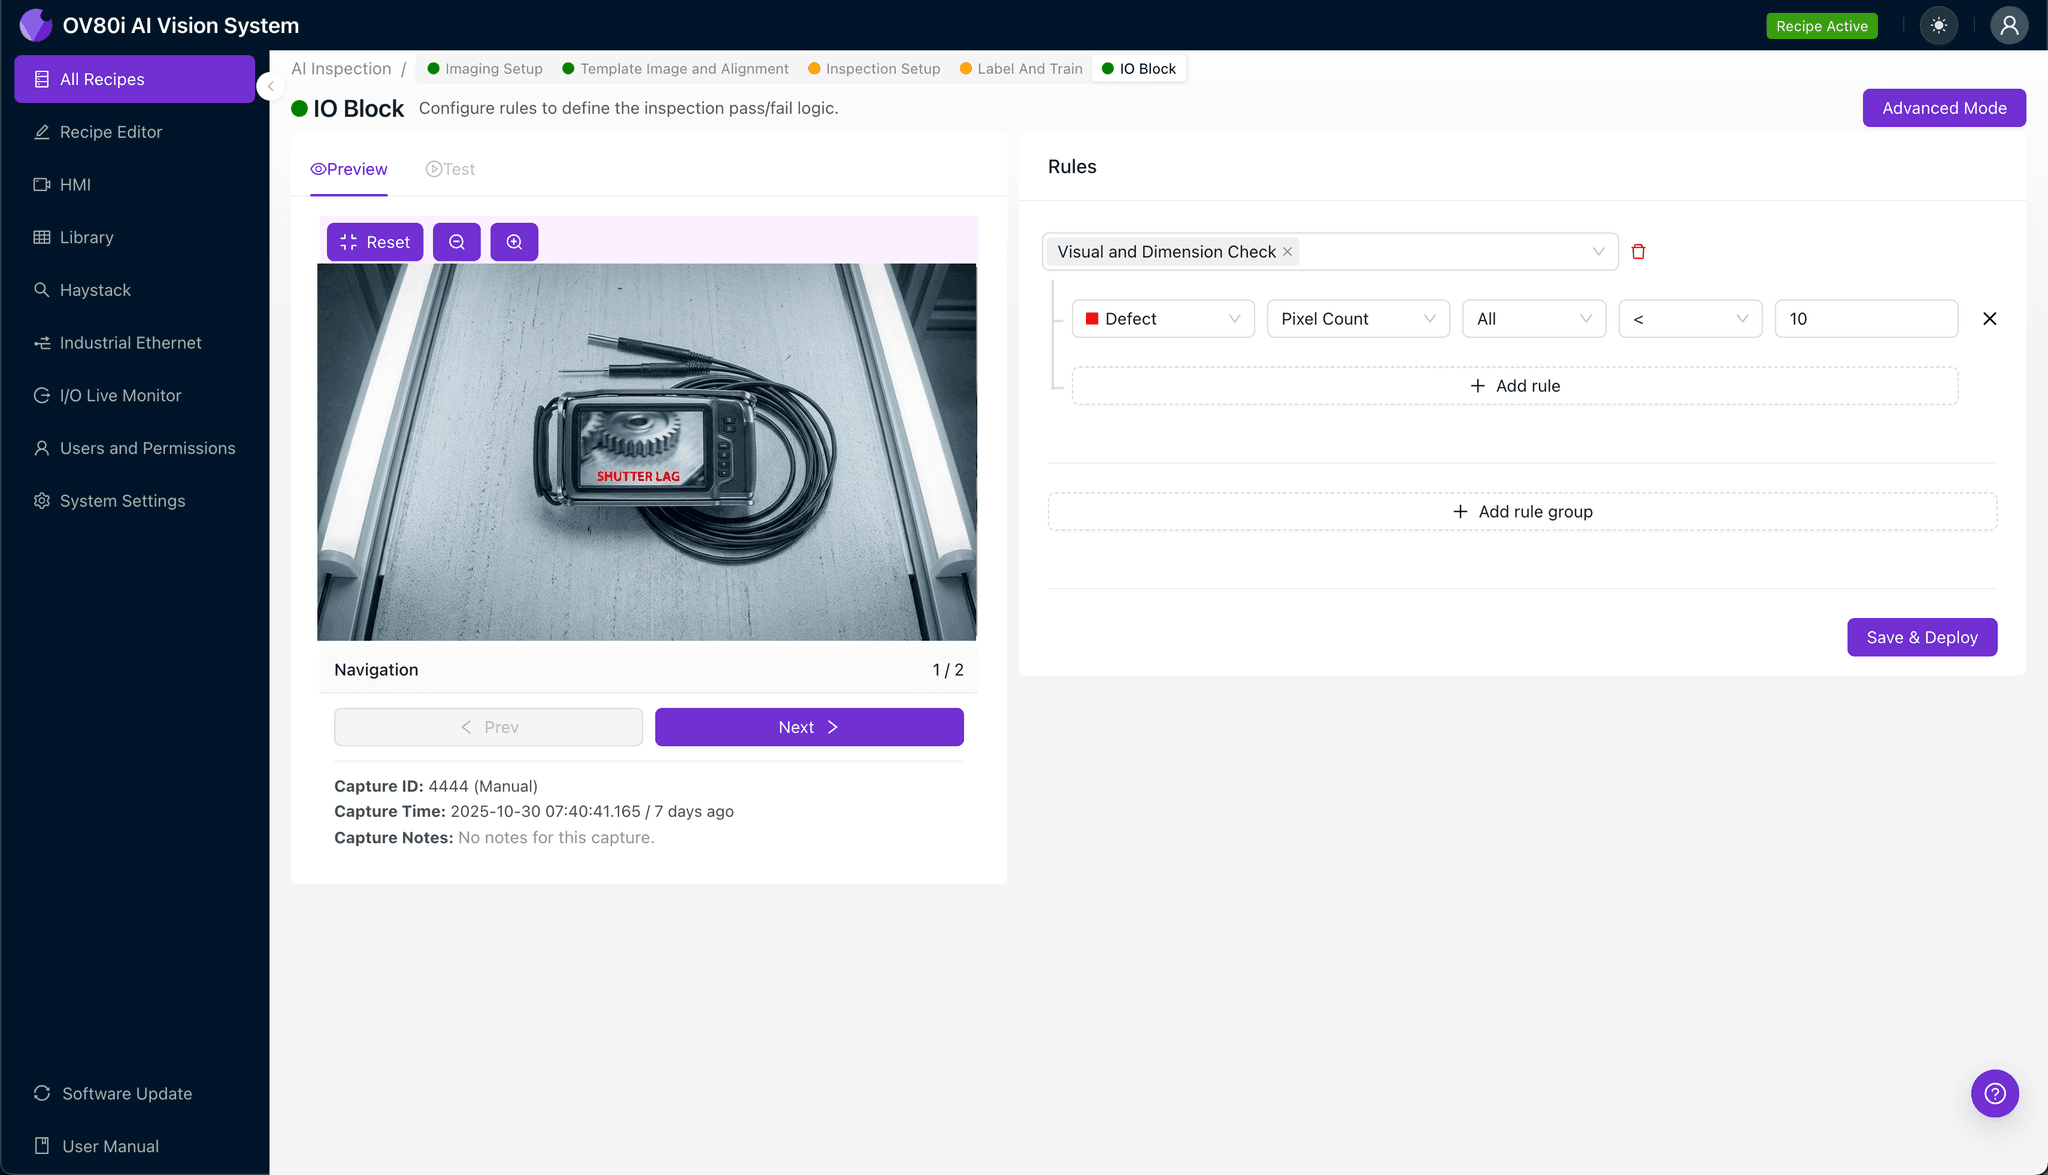
Step 5: Creating Rules
Configure pass/fail logic based on your defined Inspection Types. Set threshold values that align with customer specifications and internal quality standards.
Gate automated acceptance directly on the production line. Parts that fail inspection trigger rejection mechanisms or diversion to rework stations without operator intervention.
Key Outcomes & ROI
Implementing AI-powered visual inspection delivers measurable business impact:
- Reduced scrap rates – Catch defects earlier in the process before value-added operations increase part cost
- Higher throughput – Eliminate inspection bottlenecks with real-time, inline quality verification
- Enhanced compliance and traceability – Automatically log every inspection result with timestamped images for audit trails
- Process improvement insights – Identify defect trends and root causes through aggregated inspection data analytics
Conclusion
Inspection cameras with shutter lag don't have to compromise your quality program. With Overview.ai's deep learning platform, manufacturers gain the consistency and speed needed to maintain 100% inline inspection—turning hardware limitations into manageable variables rather than production-stopping problems.
Eliminate Defects Today
Stop relying on manual inspection. Deploy Overview.ai to catch defects instantly.