Machine vision guide
Tools, recipes, operator screens and Library questions with Sparky
Start with a natural-language inspection goal. Sparky helps select tools and build the recipe, presents imaging options, and answers questions about the camera. It also supports operator HMI building and Library questions. Your team reviews the setup and validates the inspection before production.
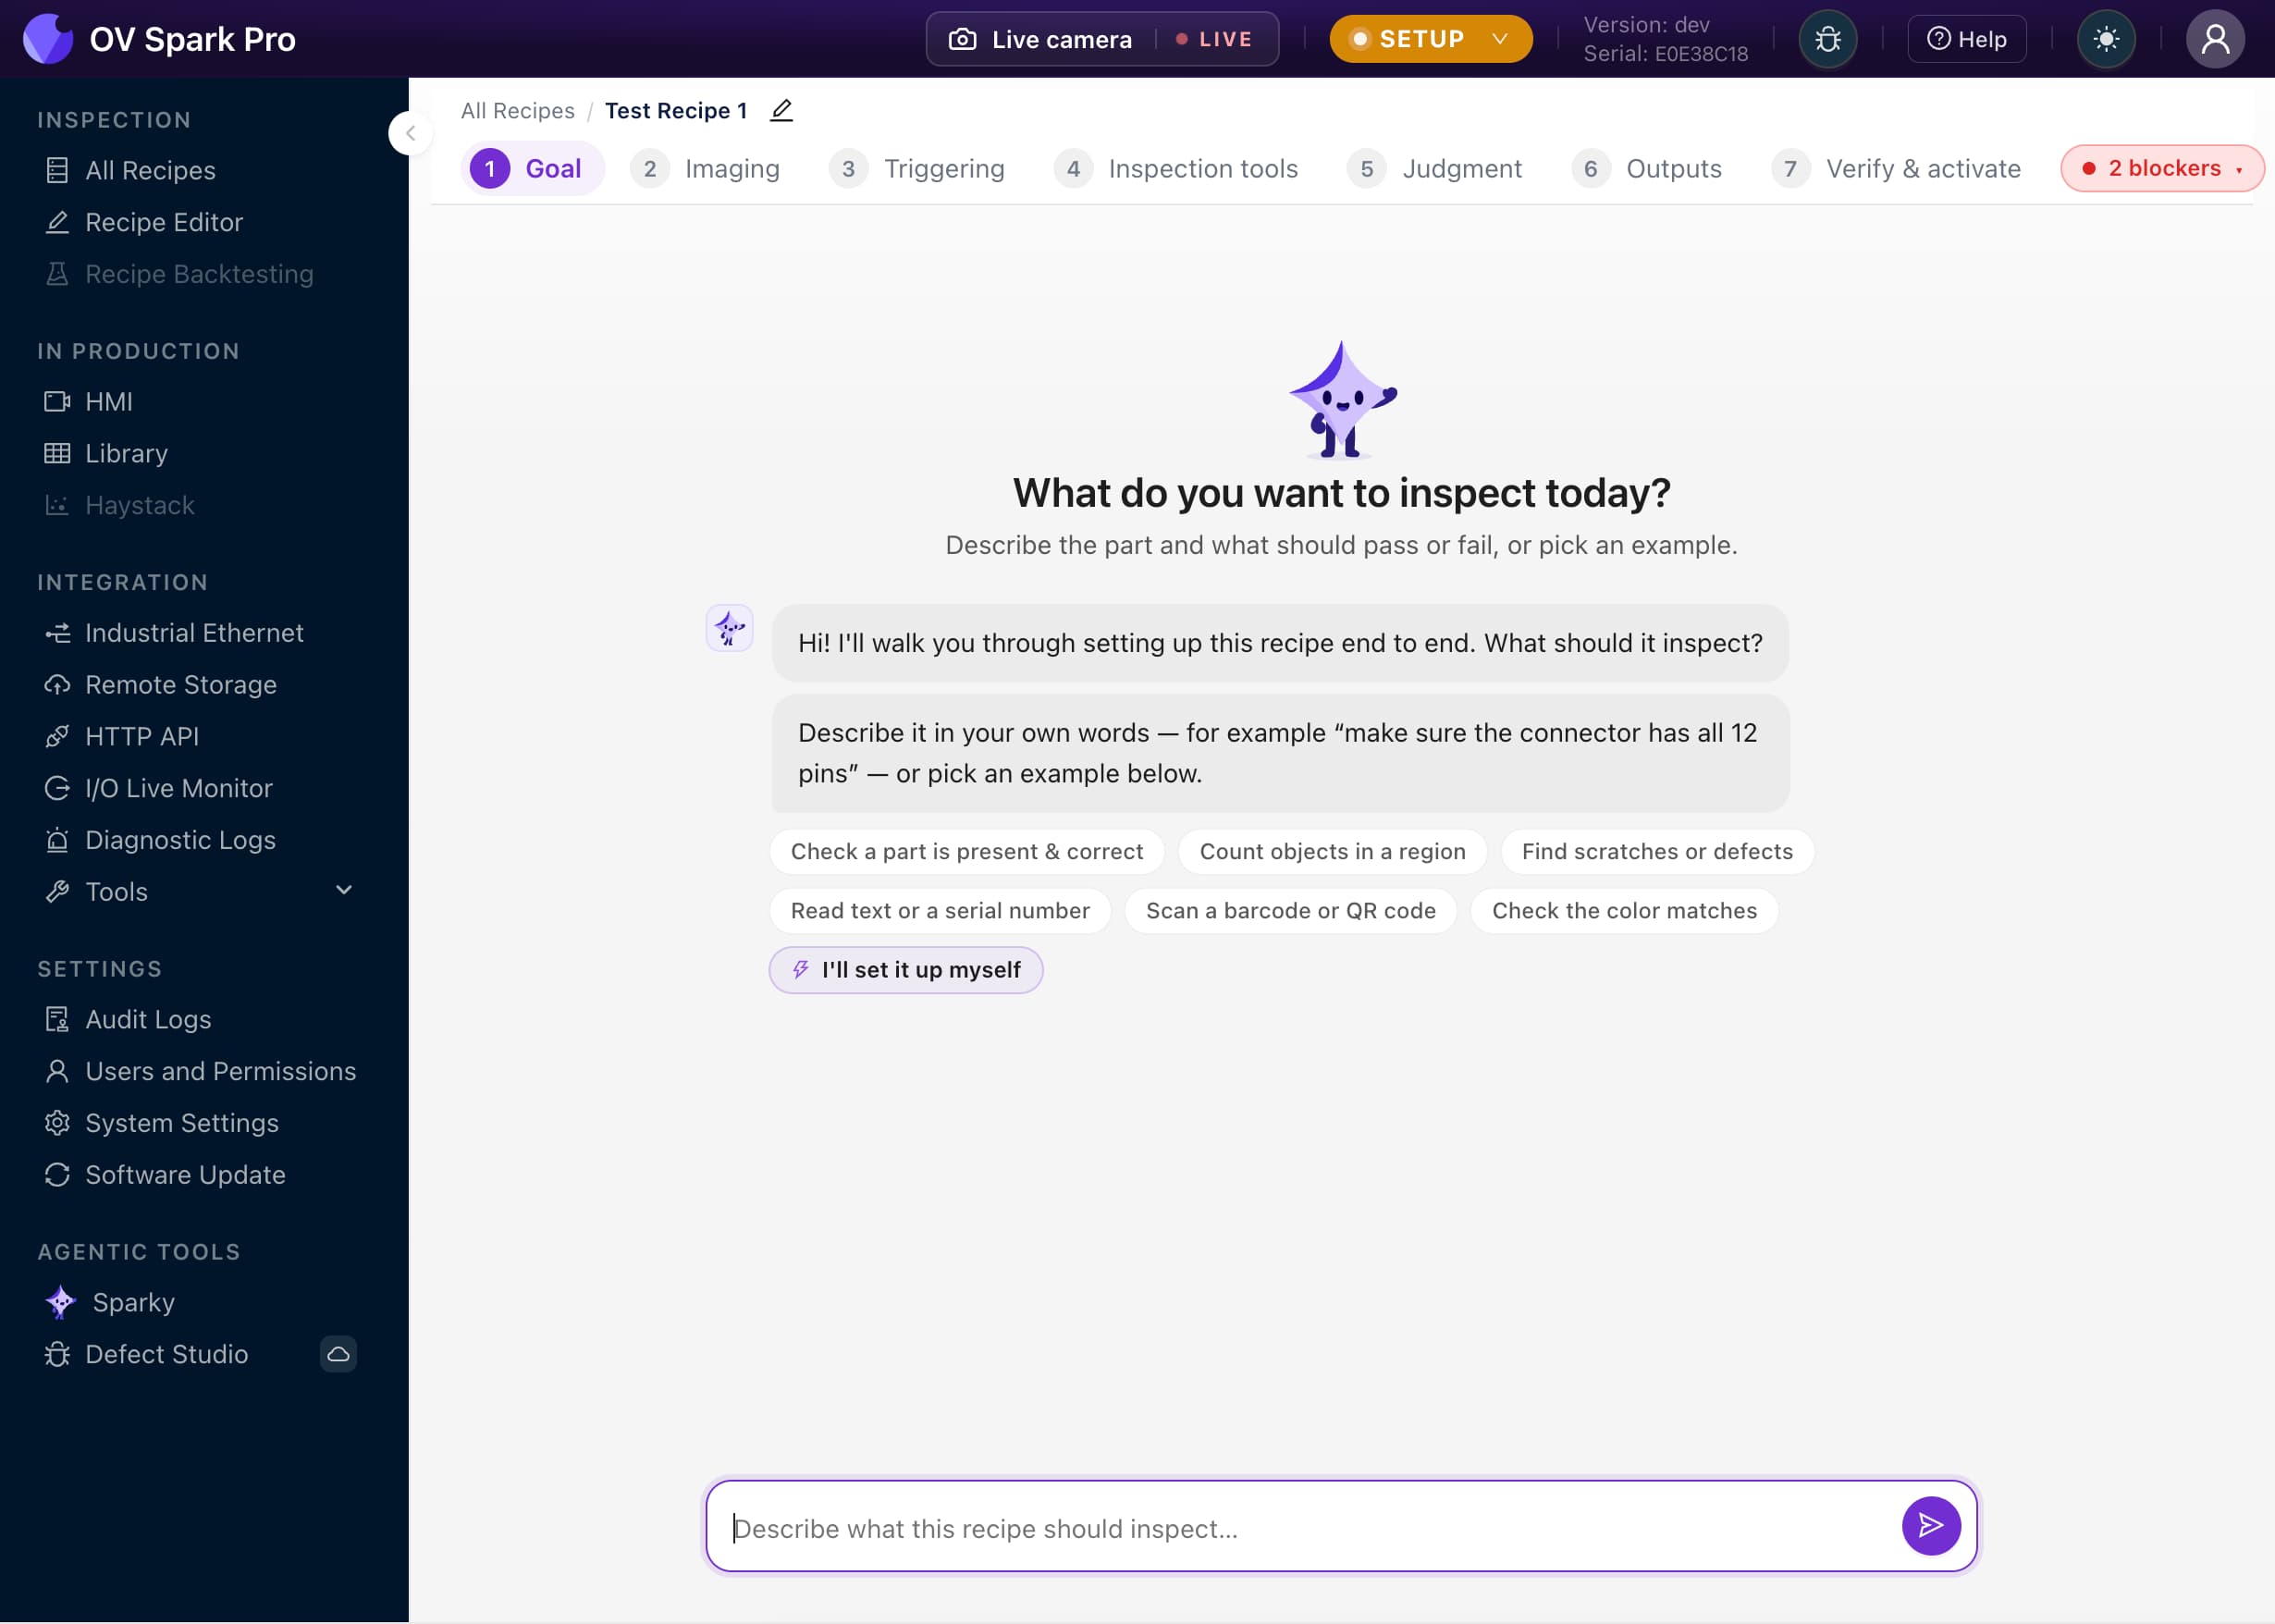
Choose tools with Sparky
Start with a clear description of what the part needs checked. A tray might need a count of six components and a check on its printed lot code. Sparky’s tool selector helps identify tools suited to those tasks.
Use the recipe builder to help put the inspection together, then review the setup with your team. Configure the regions and acceptance rules, supply training examples where needed, and test the tools on good parts and known failures. Selecting tools does not configure or commission the station.
Build the inspection recipe
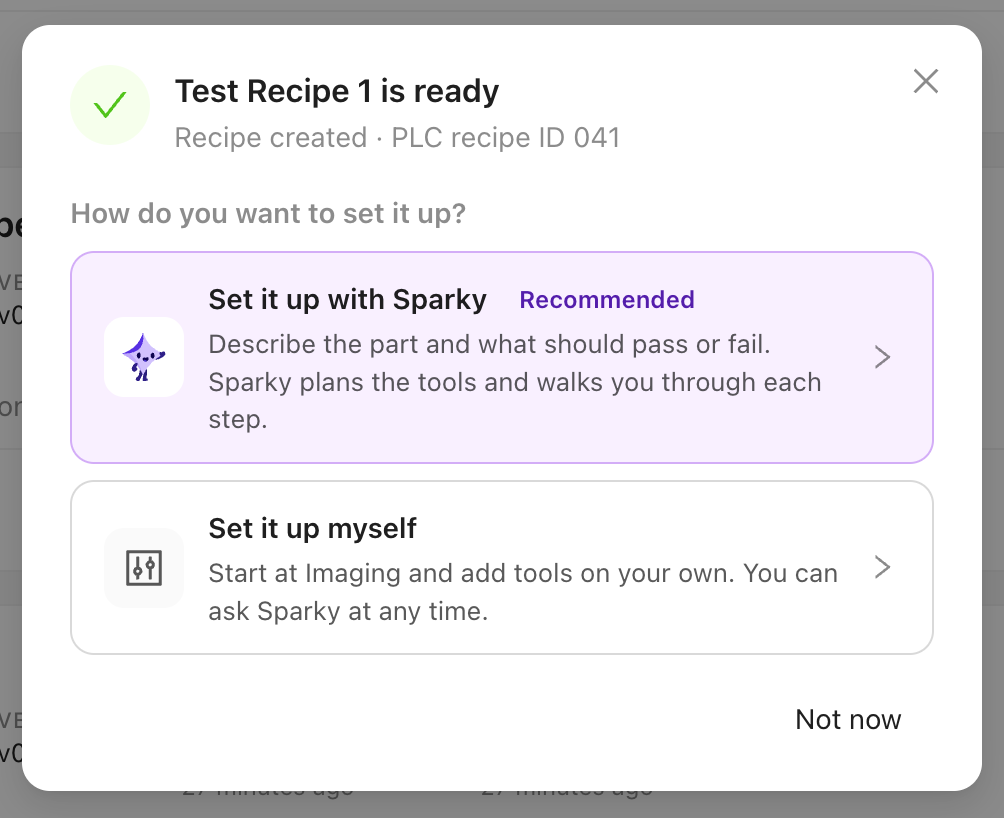
After creating a recipe, choose guided setup with Sparky or manual setup. The Goal page lets you describe the part and what should pass or fail; Sparky plans the tools and walks you through the setup stages.
Check the regions, settings and rules, supply training examples where needed, and test good parts and known failures. Recipe building is one step toward a validated production station.
Compare imaging settings on your part
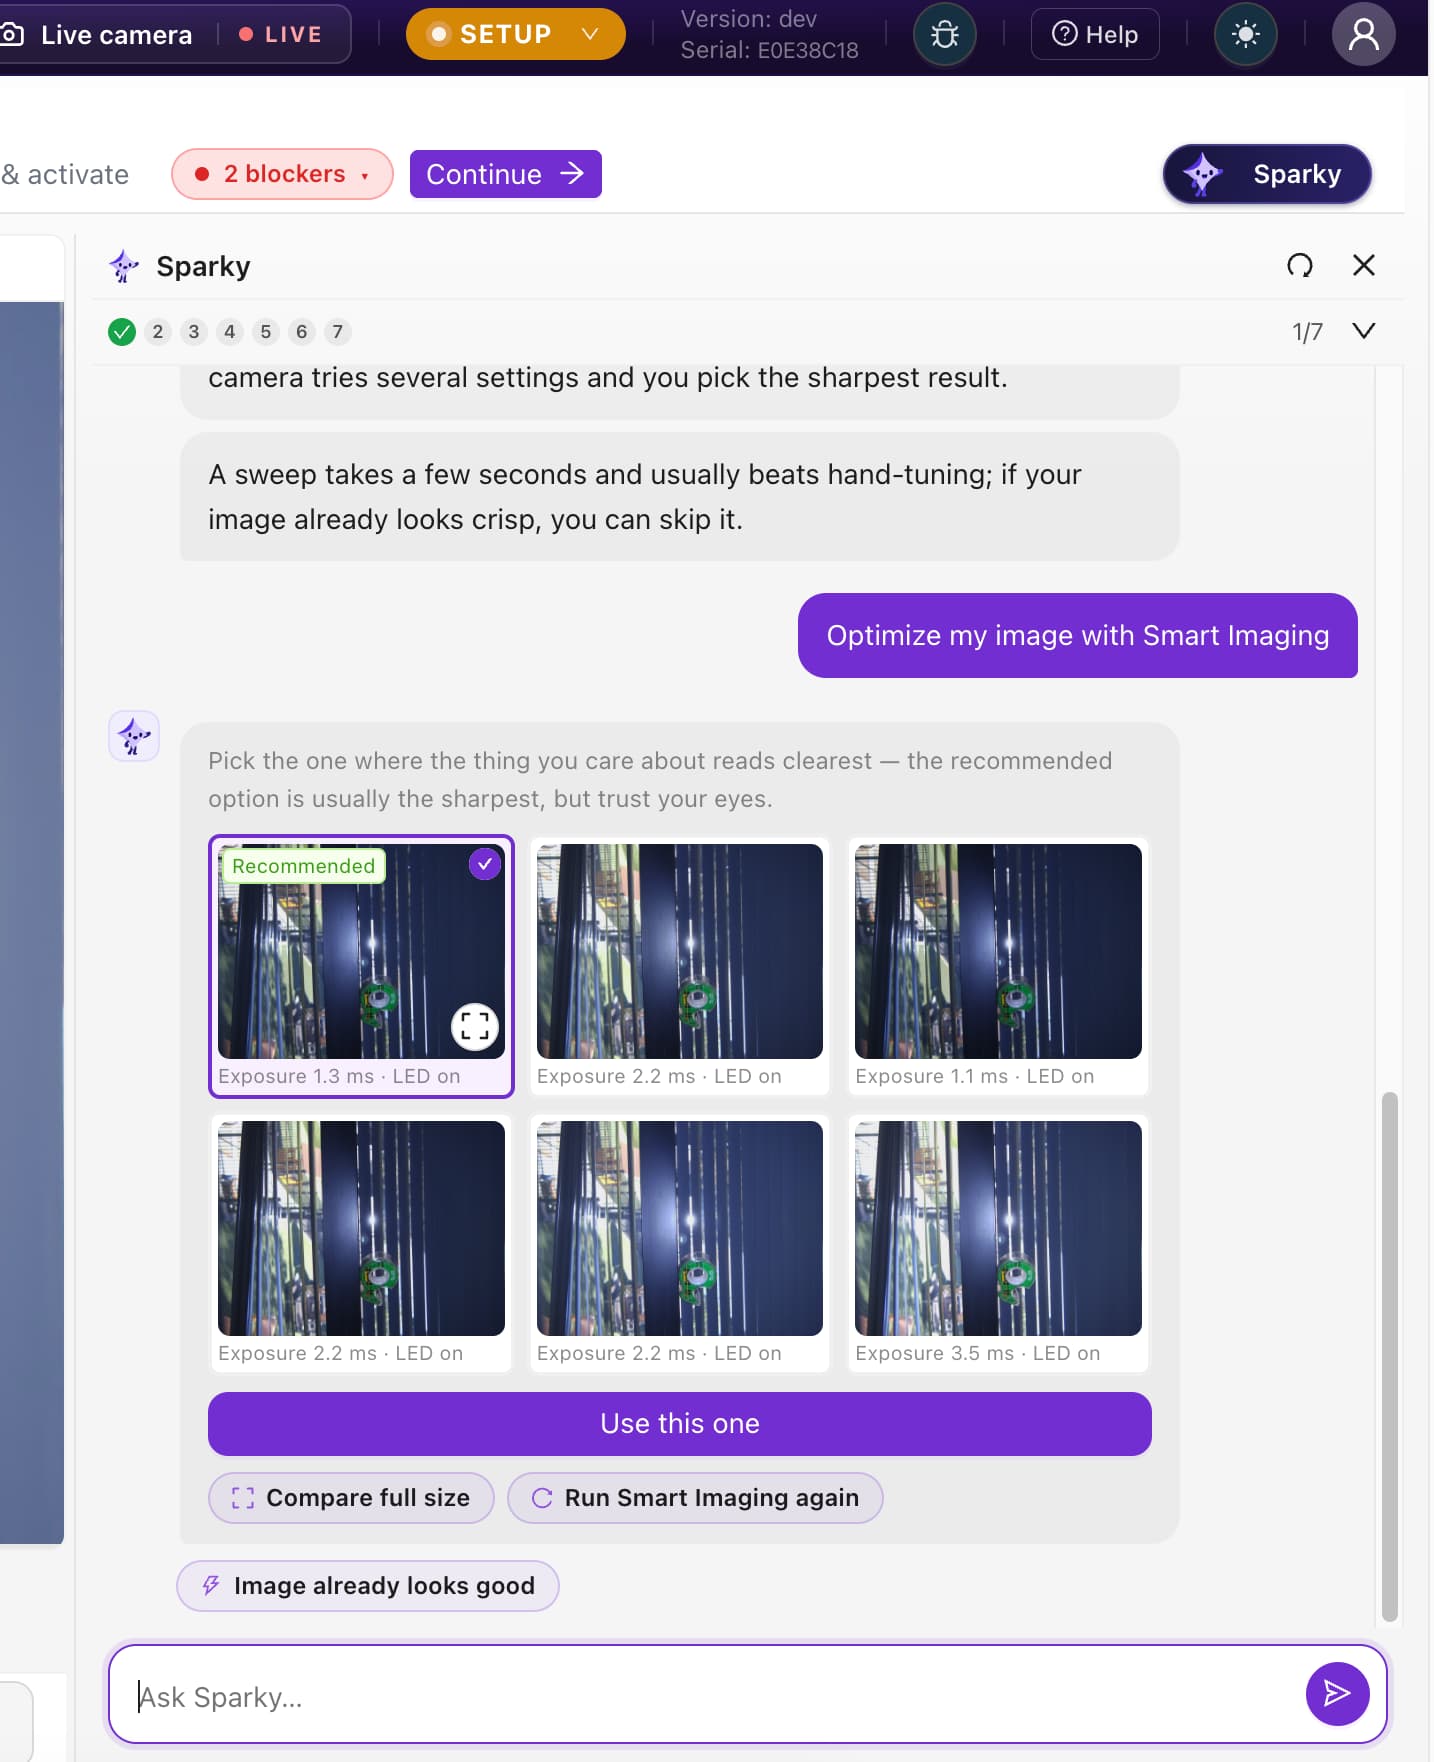
Smart Imaging captures alternatives at different settings and presents them for comparison. Inspect the feature you care about, compare the full-size images, and choose the clearest result.
A suggested image is a starting point. Confirm that the chosen settings resolve the features needed by your tools across the variation your line will see.
Create the operator view
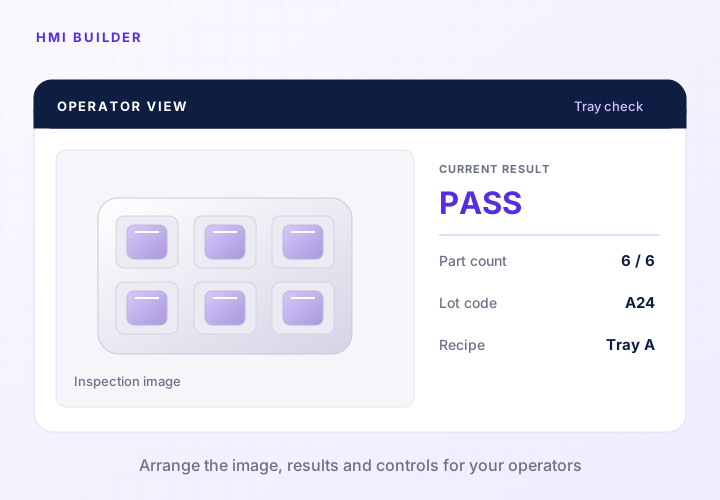
Use Sparky’s HMI builder to help create a screen for the people running the station. Bring the image, named check results and relevant controls together so an operator can see which requirement failed.
Review the screen against the actual inspection. Test a good part, a missing component and an incorrect code. Check that labels and controls match the station and that an operator can interpret each result.
Ask questions about saved images and results
Use Sparky to ask questions about the Library when you want to explore saved inspection images and results. Review the captures behind the answer to understand which examples deserve a closer look.
An answer helps with the investigation. Your team still checks the physical part and process, decides what needs changing, and chooses any examples used for retraining.
Get answers about the camera
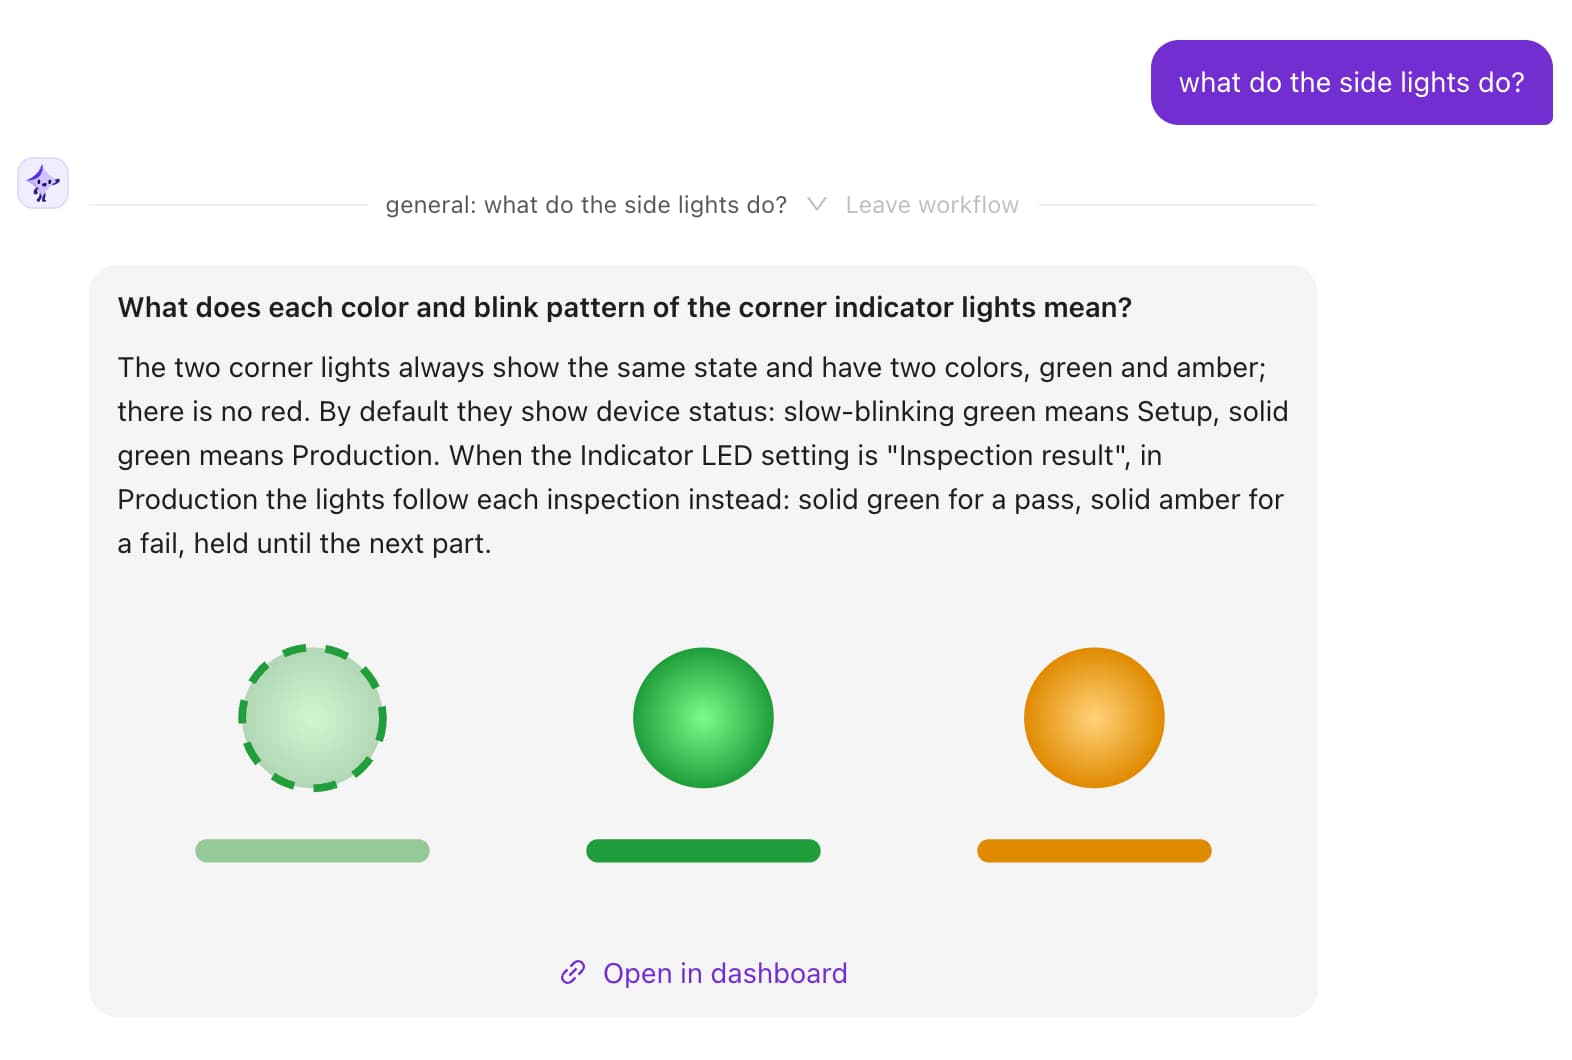
Ask documentation-style questions without leaving the inspection workflow. In this example, Sparky explains how the corner indicator lights show device status or inspection results, with a visual explanation and a dashboard link.
Complete the setup on your line
Mount and light the part so the required features are visible. Configure the inspection regions and settings, prepare training data for supported tools, and check the recipe against separate evaluation samples.
Connect and test the trigger, PLC outputs and any reject mechanism. Verify the complete cycle at production speed, including empty views, unreadable codes and failed alignment. Your team approves the station only after it meets the agreed acceptance criteria.
Common questions
- What can Sparky help me do?
- Sparky supports tool selection, recipe building, HMI building and questions about the Library. Those functions help your team work with the inspection; they do not complete every part of station setup.
- Does Sparky train and deploy the inspection for me?
- Your team supplies and reviews training data, configures the relevant tools, tests the inspection and approves it for production. Machine integration and validation remain part of that work.
- Does Sparky decide whether each part passes?
- The configured inspection tools and acceptance rules produce the production result. Sparky helps with tool selection, recipe building, operator screens and Library questions.
- What should I bring to a demonstration?
- Bring representative parts, known failures and the checks you need. Ask to see tool selection, recipe building, HMI building and Library questions separately, then review the remaining setup and integration work.
See Spark inspect your parts
Bring representative parts, acceptable variation, and examples of the failures you need to catch. We will walk through a Spark inspection with your team.
Request a Spark demo